Loading ...
Loading ...
Loading ...
Adjusting the Screen Size (Aspect)
The screen size of the projected image can be adjusted
optimally according to the original screen size (aspect)
that has been input.
1
Press the [MENU] button to display
the menu
2
Select “Input Signal” " “Aspect” in
the
menu, then select the setting and
press [OK]
.
MENU
BACK
Auto
16:9
Auto
Picture Position
3D Setting
Progressive
Mask
Aspect
Color Space
Input Level
Input Signal
Auto
A
HDMI2 EDID
Back
Operate
Select
Exit
Setting Description
4:3 Sets the screen size to 4:3. For
HD signals, the two sides are
reduced.
Displayed
only during
video signal
input.
16:9 Sets the screen size to 16:9.
For SD signals, the two sides
are expanded.
Zoom Enlarges the entire image.
* Not selectable
in the case of
HD signals.
Auto Positions the image at the
center with the entire image
enlarged.
Displayed
only during
PC signal
input.
Just Displays the input image in the
actual size.
Full Fills the entire screen with the
image with
the size (aspect) of
the input image ignored.
0
This item is grayed out and cannot be adjusted when
there is no signal, signal is out of range, or during 3D
or 4K input.
3
Press the [MENU] button to exit
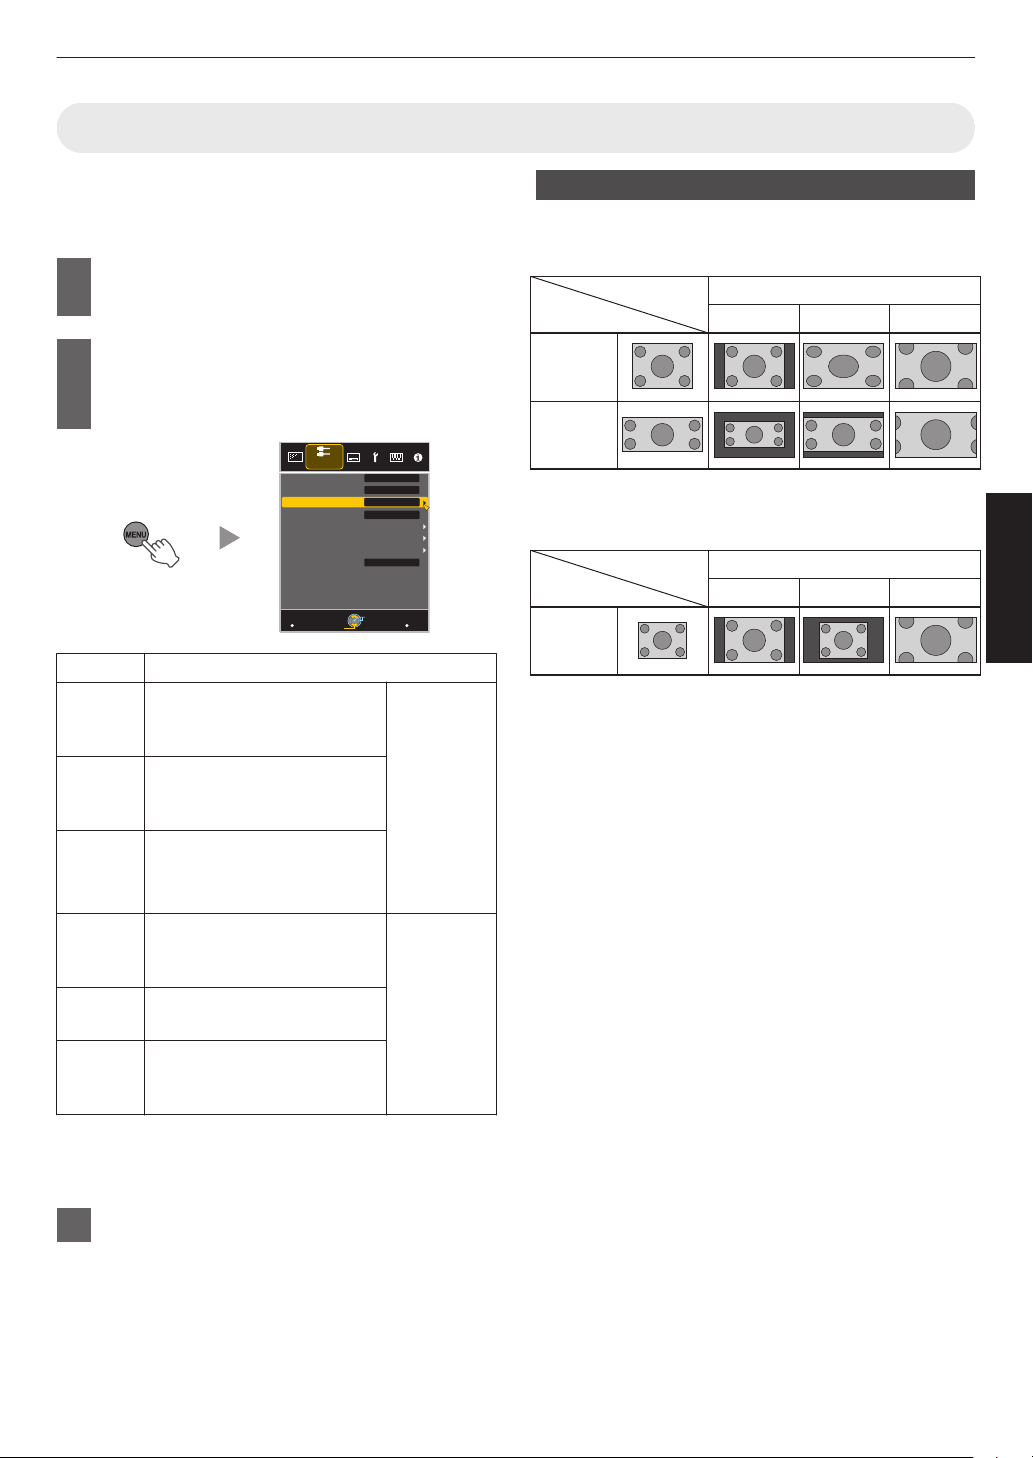
Example of input image and screen size
HDMI Signal Input
.
Zoom
16:9
4:3
4:3
2.35:1
(Cinema
Scope)
Setting
Input Image
Output Image
PC Signal Input
.
1280×1024
Full
Just
Auto
Setting
Output Image
Input Image
27
Operate
Loading ...
Loading ...
Loading ...