Loading ...
Loading ...
Loading ...
Viewing Videos
MEMO
0
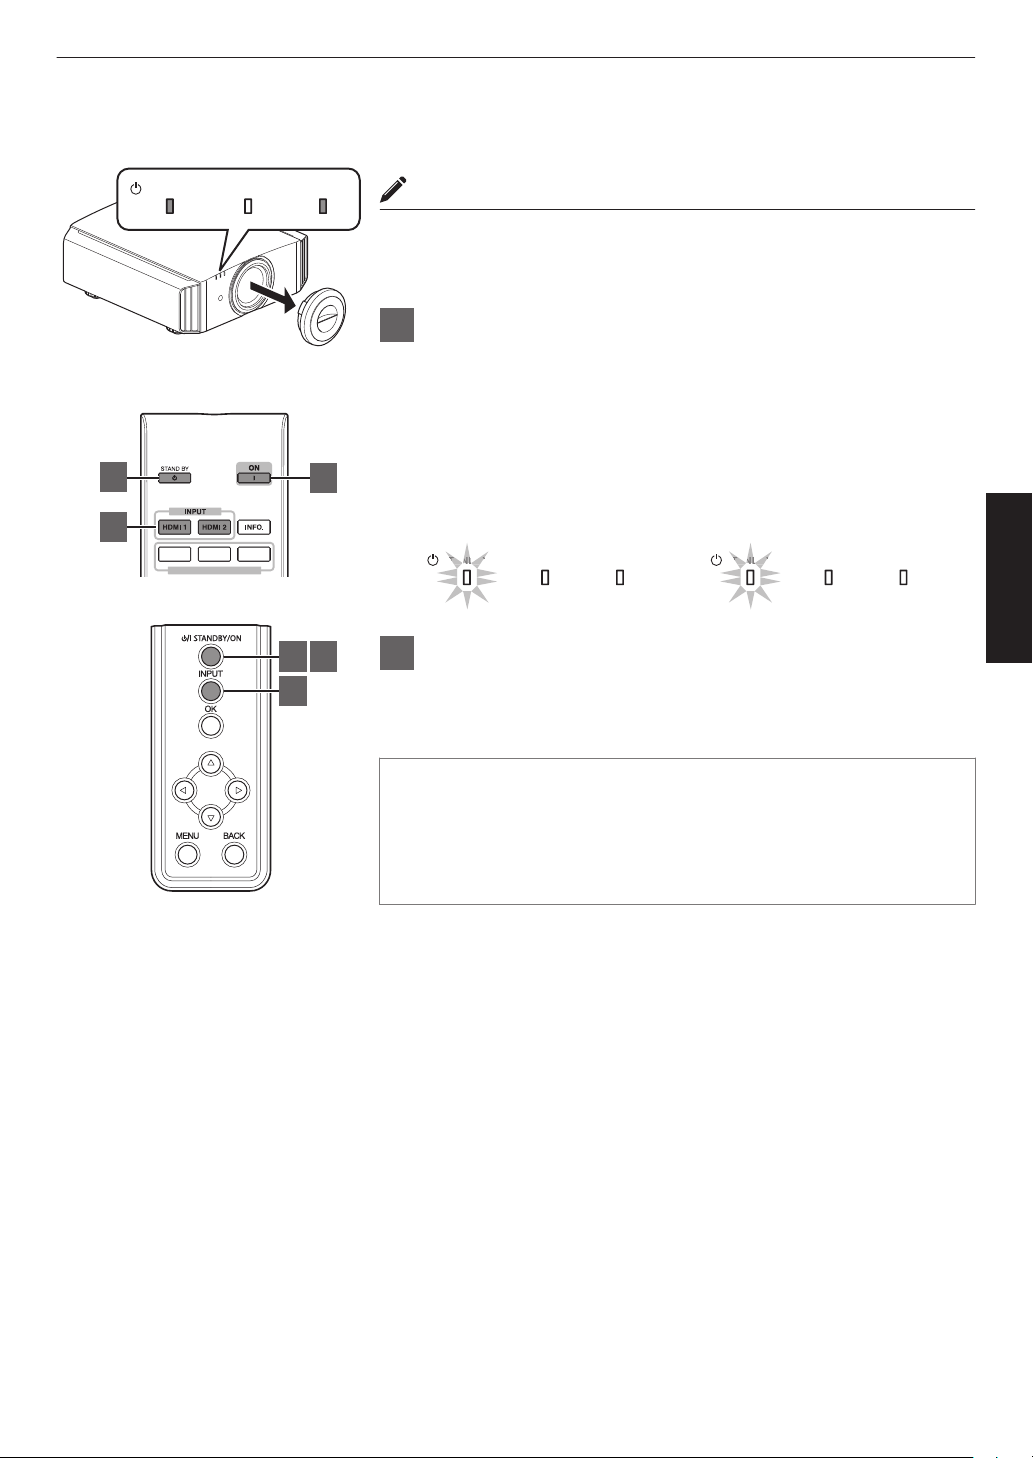
When you are using L, be sure to remove the lens cover.
0
Connect the power cord, and ensure that the “STANDBY/ON” indicator
lights up in red.
1
Turn on the power
Remote control: press the C [ON] button
Projector unit: press the A [STANDBY/ON] button
0
The “STANDBY/ON”
indicator light switches from red to green (light
goes off after the unit starts up).
0
(K A) The lens cover opens.
.
LAMP WARNING
STANDBY/ON
ND
TAN
DBY
LAMP WARNING
STANDBY/ON
ND
TAN
DBY
During lamp startup
“STANDBY/ON” lights up (green)
In standby state
“STANDBY/ON” lights up (red)
2
Choose the image to project
Remote control: press the [HDMI 1] or [HDMI 2] button
Projector unit: press the [INPUT] button to switch the input
0
Play back the selected device to project the image.
To hide the image temporarily
Press the [HIDE] button on the projector unit or remote control
0
The “STANDBY/ON” indicator light starts to blink in green.
0
Press the [HIDE] button again to resume display of the image.
0
The power cannot be turned off when the image is temporarily hidden.
LAMP WARNING
STANDBY/ON
SETTING MEMORY
MODE 1 MODE 2 MODE 3
1 3
2
L
1
2
3
This unit
Remote Control
21
Operate
Loading ...
Loading ...
Loading ...