Loading ...
Loading ...
Loading ...
5 M
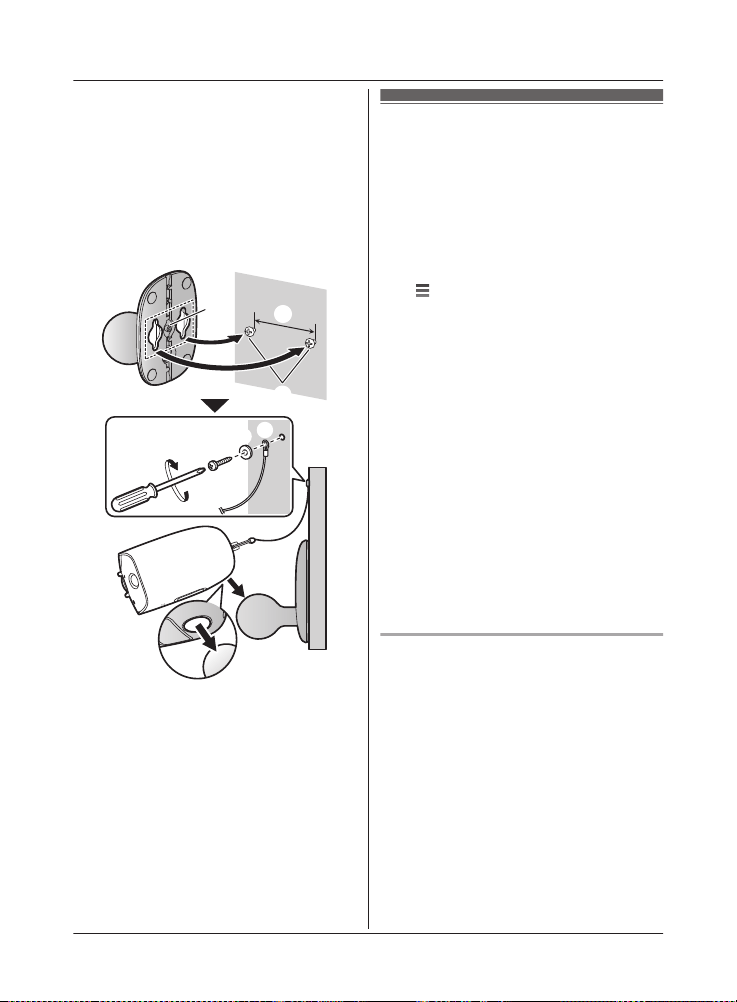
ount the wall mounting adaptor to the
wall. Next, attach the safety wire to the
wall, and then attach the camera to the
wall mounting adaptor.
1
Wall mounting screws
2
25.4 mm (1 inch)
3
Hole
Y
ou can prevent the camera from falling
by passing a string through the hole in the
wall mounting adaptor.
3
1
2
3
2
1
6 A
djust the camera angle.
Note:
R Attach the safety wire while it is bent.
R Attach the safety wire high on the wall so
that the camera does not strike anyone in
the event the camera detaches from the
wall.
R Do not hang from the camera or wall
mounting adaptor.
Testing the motion
d
etection range
After you have installed the [HomeHawk] app
on your mobile device, you can use your
mobile device to test the performance of the
camera’s motion detection features.
For details about these operations, refer to the
User’s Guide (page 32).
1 Start the [HomeHawk] app and then tap
.
2 T
ap [Settings].
3 Tap [Camera settings] and select the
camera to be tested.
4 Tap [Detection] ® [Detection Test].
5 Move to an area within the camera’s
viewable area.
6 While moving near the camera, use your
mobile device to observe where you are
in the viewable area when the camera’s
motion detection features are triggered.
7 Note the areas of the viewable area
where movement is detected, and make
adjustments as necessary.
Note:
R You can adjust the area detectable by the
visual sensor. For more information, refer to
the User’s Guide (page 32).
Testing the microphone
To test the microphone, speak loudly and
clearly into the microphone while a mobile
device user is viewing live images from the
camera.
30
For assistance, please visit http://shop.panasonic.com/support
Setup
HN7001(enen)0209ver.140.pdf30 2018/02/0911:33:53
Loading ...
Loading ...
Loading ...