Loading ...
Loading ...
Loading ...
Note:
R I
f registration fails, the camera sounds
several short beeps.
Using the app
Y
ou can change the name of the camera
using the [HomeHawk] app. For more
information, refer to the User’s Guide
(page 32).
Confirming the camera
i
nstallation area
Before deciding where to install the camera,
carefully read the chapter “Installation
Location”, beginning on page 12, to confirm
the installation location and direction.
Camera installation
Installation precautions
R D
o not use an impact driver. (This may lead
to damaged screws or over-tightening.)
R Mount the camera on the stable location
with a height of 2.2 m (7 feet 3 inches)
where the unit can be adequately
supported when installing.
R Do not mount the camera on a soft
material. It may fall down, break or cause
injury.
Wall material information
Siding
R U
se the included screws ø4 mm ´ 25 mm
(ø
5
/32 inches ´ 1 inch). Make sure the
pull-out capacity of each screw is at least
294 N (30 kgf).
R If the weight of the camera is supported by
the siding only, the siding could become
damaged. Make sure you mount the
camera in a location where the structure
behind the siding can be used to support
the weight of the camera. If this is not
possible due to the thickness of the siding,
use commercially-available screws ø4 mm
´
longer than 25 mm (ø
5
/32 inches ´ longer
than 1 inch).
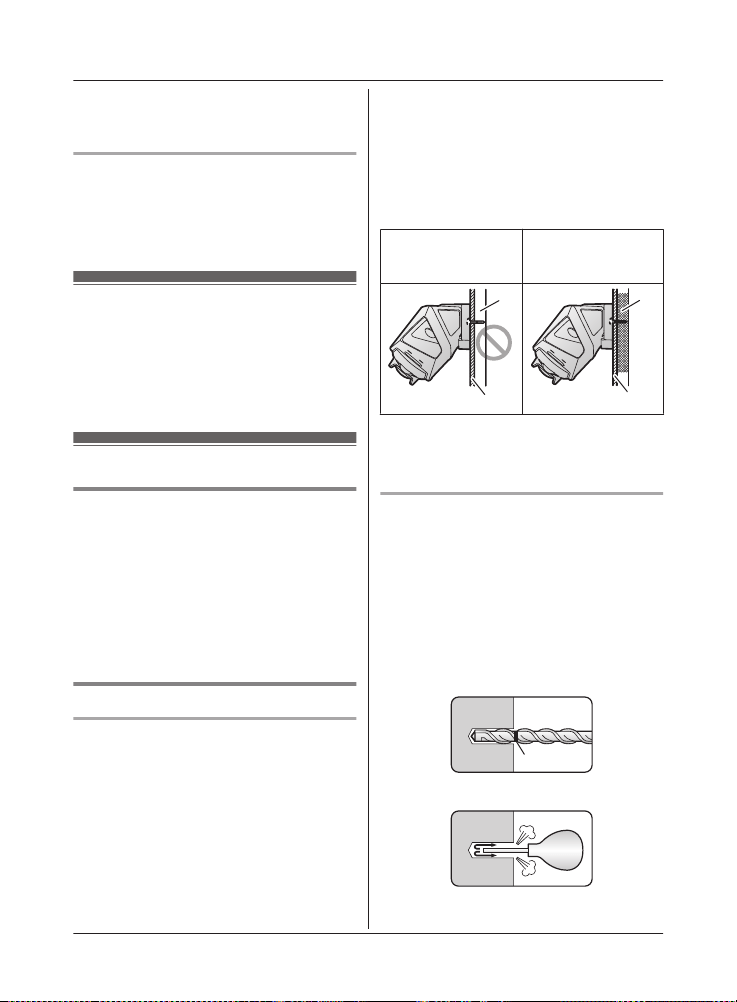
R Drill a pilot hole using a drill bit that is
appropriate for the type of siding. Remove
any debris after drilling the pilot hole. Do
not drill the pilot hole into the structure
behind the siding.
Poor example
N
o support behind
exterior surface
Ideal example
Structure supports
exterior surface
1
2
3
2
1
Open space, no support
2
Siding
3
Structure behind siding
Concrete
R D
o not use the included screws. Use screw
anchors (screw ø4 mm (
5
/32 inches))
designed for concrete walls.
R Carefully read the instructions supplied with
the anchors. Follow instructions regarding
drill bit diameter, hole depth, etc.
R Drill a pilot hole. Remove any debris after
drilling the pilot hole.
1 Mark the hole depth on the drill bit (
1
)
a
nd then drill a pilot hole.
1
2 R
emove debris.
26
For assistance, please visit http://shop.panasonic.com/support
Setup
HN7001(enen)0209ver.140.pdf26 2018/02/0911:33:53
Loading ...
Loading ...
Loading ...