Loading ...
Loading ...
Loading ...
3 I
nsert an anchor, tighten the screw, then
remove the screw to secure the anchor.
4 I
nsert the screw and tighten it.
2
2
Wall mounting adaptor
ALC (autoclaved lightweight cellular
c
oncrete)
R Depending on the type of ALC panel, you
may not be able to attach the camera.
Consult the ALC panel manufacturer.
R Do not use the included screws. After
consulting the manufacturer of the ALC
panel, use only commercially-available
metal screw anchors (screw ø4 mm
(
5
/32 inches)) designed for ALC panels.
R Carefully read the instructions supplied with
the anchors. Follow instructions regarding
drill bit diameter, hole depth, etc.
R Drill a pilot hole. Remove any debris after
drilling the pilot hole.
R Seal the pilot hole with a
commercially-available waterproof sealant.
Other materials (mortar, tile, etc.)
R Do not use the included screws.
R Consult the builder or licensed professional
regarding the type of anchor appropriate for
the installation location and materials.
R Do not install on gypsum board or concrete
blocks.
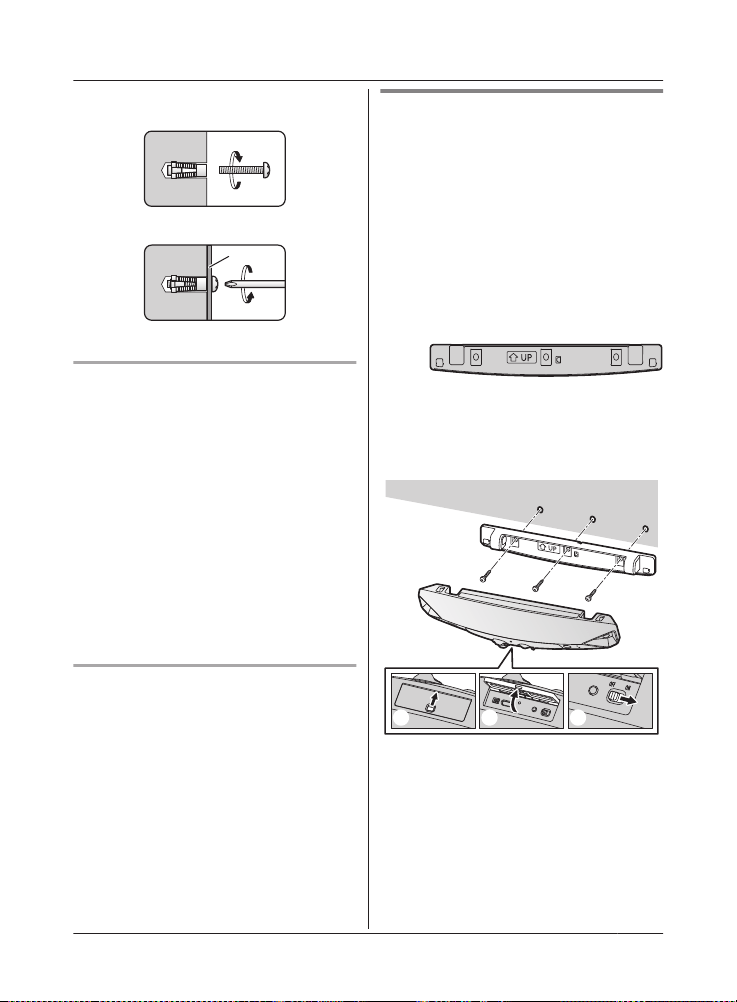
Installing the front door camera
1 A
ttach the wall mounting adaptor to a
porch wall.
R Secure the wall mounting adaptor to
the wall by tightening the 3 supplied
screws (A).
R The spacer can be used to adjust the
installation angle of the camera as
necessary (“Using the spacer”,
page 28).
R Do not attach the wall mounting
adaptor at an angle or vertically. (This
will result in the sensors being unable
to correctly make detections.)
2 Slide the lock key of the interface cover
on the bottom of the camera (B).
3 Open the interface cover (C).
4 Slide the power slide switch to ON (D).
1
1
1
432
For assistance, please visit http://shop.panasonic.com/support
27
Setup
HN7001(enen)0209ver.140.pdf27 2018/02/0911:33:53
Loading ...
Loading ...
Loading ...