Control Panel. . . . . . . . . . . . . . . . . . . . . . . . . . . . . .3
Dishwasher Features . . . . . . . . . . . . . . . . . . . . . . 3
Wash Cycle Table . . . . . . . . . . . . . . . . . . . . . . . . . .4
Detergent . . . . . . . ... . . . . . . . . . . . . . . . . . . . . . . 5
Rinse Aid . . . . . . . . . . ... . . . . . . . . . . . . . . . . . . . 5
Loading the Dishwasher Rack . . . . . . . . . . . . . . .6
Silverware Basket .. . . . . . . . . . . . . . . . . . . . . . . . .7
Filtering System . . . . . . . . . . . . . . . . . . . . . . ... . 7
Turning On the Appliance . . . . . . . . . . . . . . . . . . . 8
Caring for the Dishwasher . . . . . . . . . . . . . . . . . .8,9
. . . . . . . . . ....... . .. . . . . . . . . .2
... . . . . . . . . . . . ....... . 1
Before calling for service . . . . . . . . . . 10,11
. . . . . . . .
FDW18SAS-SS
*This product is suitable for use in modular homes
and recreational vehicles.
CCD-0005580 | REV DATE: 10.14.2022

Thank you and congratulations for purchasing this Furrion® Dishwasher. Before placing your new appliance into
operation, please read these operating instructions carefully. This instruction manual contains important
infor-mation for safe use, installation and maintenance of the appliance.
P
lease keep this instruction manual in a safe place for future reference. This will ensure safe use and reduce the
risk of injury to persons. Pass it onto possible new owners of the appliance.
The manufacturer does not accept responsibility for any damages that may arise due to non-observation of
these instructions.
If you have any further questions regarding our products, please contact us at support@furrion.com
Welcome
REV DATE: 10.14.2022 | CCD-0005580
The ele ctric dishwash er of m odel, bes ides the com mon char acteris tics of o ther
househol d dis hwashe rs, it ha s its own specia ltie s:
FDW 18 SAS-SS
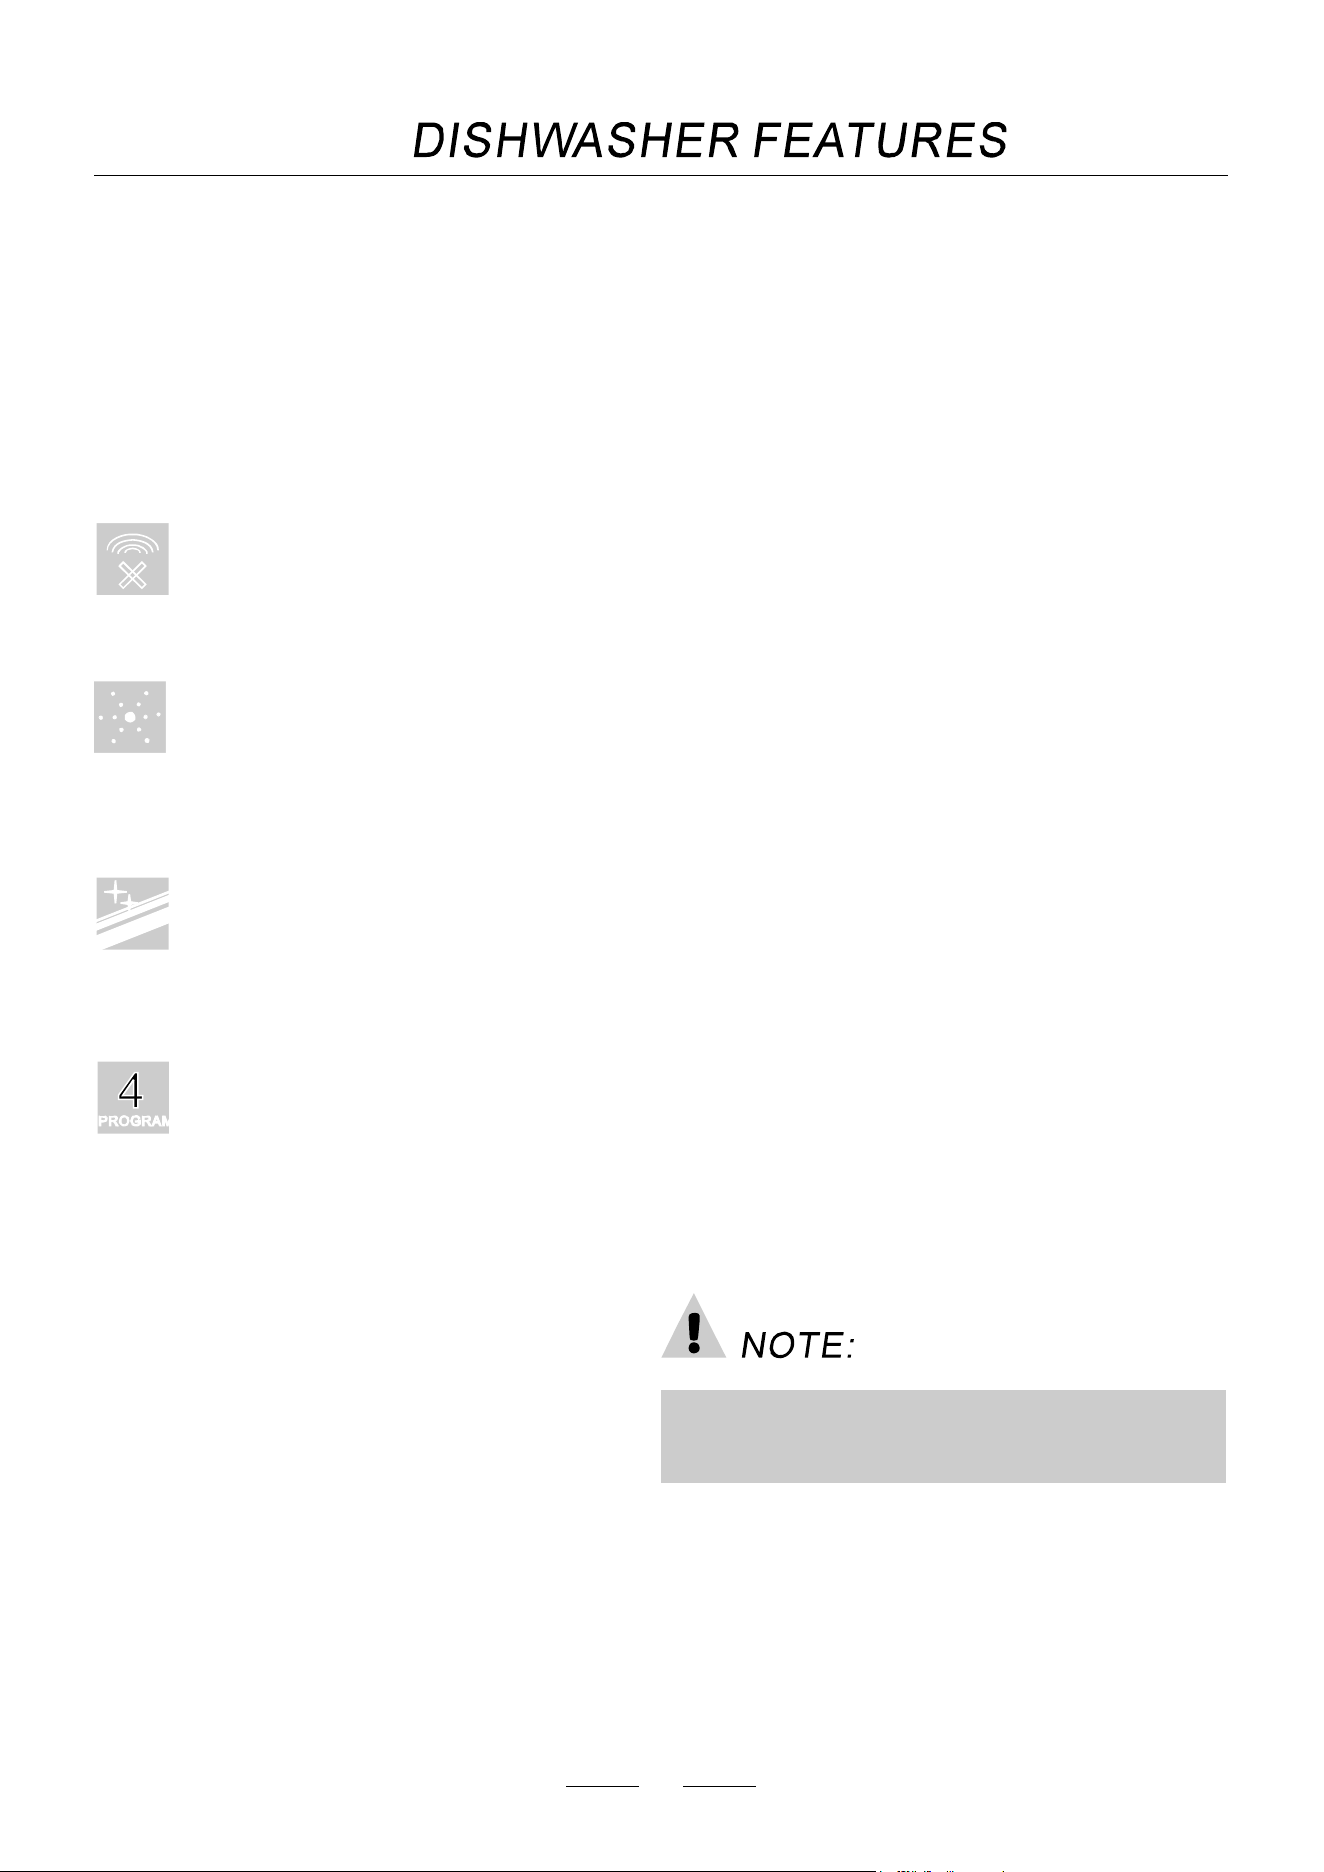
Error alarm
F ault cod e s d isplay wou l d in fo rm t he use r o f
abnormal status of the machine.
4washprograms
You can choose desired program according to the
soiled level. Such as: heavy, normal, light, speed.
Stainless steel tub
You nee d n ot war ry abo ut st ain of tub.
Rinse aid Warning Indicator
If the ri nse ai d ar e running lo w, t her e wil l be clearly
displayed on the pane l alerting you to top them up,
to ensure that the machine continues to operate at
optimu m perf ormance.
1
The manufacturer, following a policy of constant
devel opm ent a nd up-da t ing of th e produc t, ma y
m ake mo d ifications without givin g pr io r n otice .
CCD-0005580 | REV DATE: 10.14.2022
T his appliance must be grounded. In the event
of a malfunction or breakdown, grounding will
reduce the risk of electric shock by providing a
path of least resistance of electric current. This
appliance is equipped with a cord having an
equipment-grounding conductor and a grounding
plug. The plug must be plugged into an appropriate
outlet that is installed and grounded in accordance
with all loc al codes and ordinances.
Improper connection of the equipm ent-
grounding conductor can result in a risk
of electric shock. Check with a qualified
electrician or service representative if you
are in doubt whether the appliance is
properly grounded. Do not modify the plug
provided with the appliance ;If it is not fit
for the outlet .have a proper outlet installed
by a qualified electrician.
Under certa in co ndit ions, H ydrogen gas may be pr odu ced in a hot-wate r s y ste m tha t ha s no t been
used for two weeks or mo re. HYDROGEN GAS IS EXPLOSIVE.
If th e h ot-water sys te m has not b een used for su ch a pe riod, be fore u sing t he di shwashe r tur n on al l
hot- water faucet s an d let th e water f lo w from each for seve ra l minu tes . This will release any
accumulated hyd ro gen g as . As the ga s is flam ma ble, do n ot smoke or us e an op en flam e during this
time .
2
Do not operate your dishwasher unless all
enclosure panels are properly inplace. Open the
door very carefully if the dishwasher is operating,
there is a risk of water squirting out.
Do not place any heavy objects of stand on the door
when it is open. The appliance could tip forward.
When loading items to be washed:
1) Load sharp items so that they are not likely to
damage the door seal;
2) Load sharp knives with the handles up to reduce
the risk of cut-type injuries.
When u sing you r dis hwasher, you sh ould p rev ent
plast ic item from con tacting w ith heat ing element.
I f t he su p ply cord is dam aged, it must be re pl a ced
by th e m an ufacture r or its s e rvice a gent or a
similarly qualified person in order to avoid a
haz ard.
Please dispose of packing materials properly.
Use the dishwasher only for its intended function.
Remove the door to the washing compartment when
removing an old dishwasher from service or discarding it.
Do not abuse, sit on, or st and on the door or dish
rack of the dishwasher.
Do not touch the hea ting element during or
immediately after use.
Do not wash plastic items unless they are marked
dishwasher safe or the equivalent. For plastic
items not so marked, check the manufacturers
recommendations.
Use only detergent and rinse additives designed
for an aut omatic dishwasher. N ever use so ap ,
laundry detergent, or hand washing detergent
in your dishwasher. Keep these products away
from children.
K eep child away from d ete rgen t and rinse ai d, keep
child away from the open door of the dishwasher,
there c ould still be some detergent l eft inside.
The door should not be left in the open posi tion
since this coul d pr esent a tripping ha zar ds.
Dur ing installation, t he power sup ply must n ot
be exc e ssiv ely or dangerously bent or fl atten ed.
Do not t amper with controls.
T he appliance i s not intended for use by young
children or infirm persons without superv isio n.
D i shwasher detergents are strongly alkaline,they
can be extremely dangerous if sw all owe d.Avoid
contact with ski n and ey es and keep c hildr e n a way
from the dishwas her when the door is o pen.
Yo un g c hildren sho uld be s upe rvise d to ensure that
they do not play with the appliance.
Check th at t he det ergent re ceptable is empty aft er
co mplet i o n o f the wash c ycl e .
REV DATE: 10.14.2022 | CCD-0005580
To get the best perfo rma nce from y our dish washer, read all o perating ins tructions be for e using
it for the first time.
3
1
2
2
3
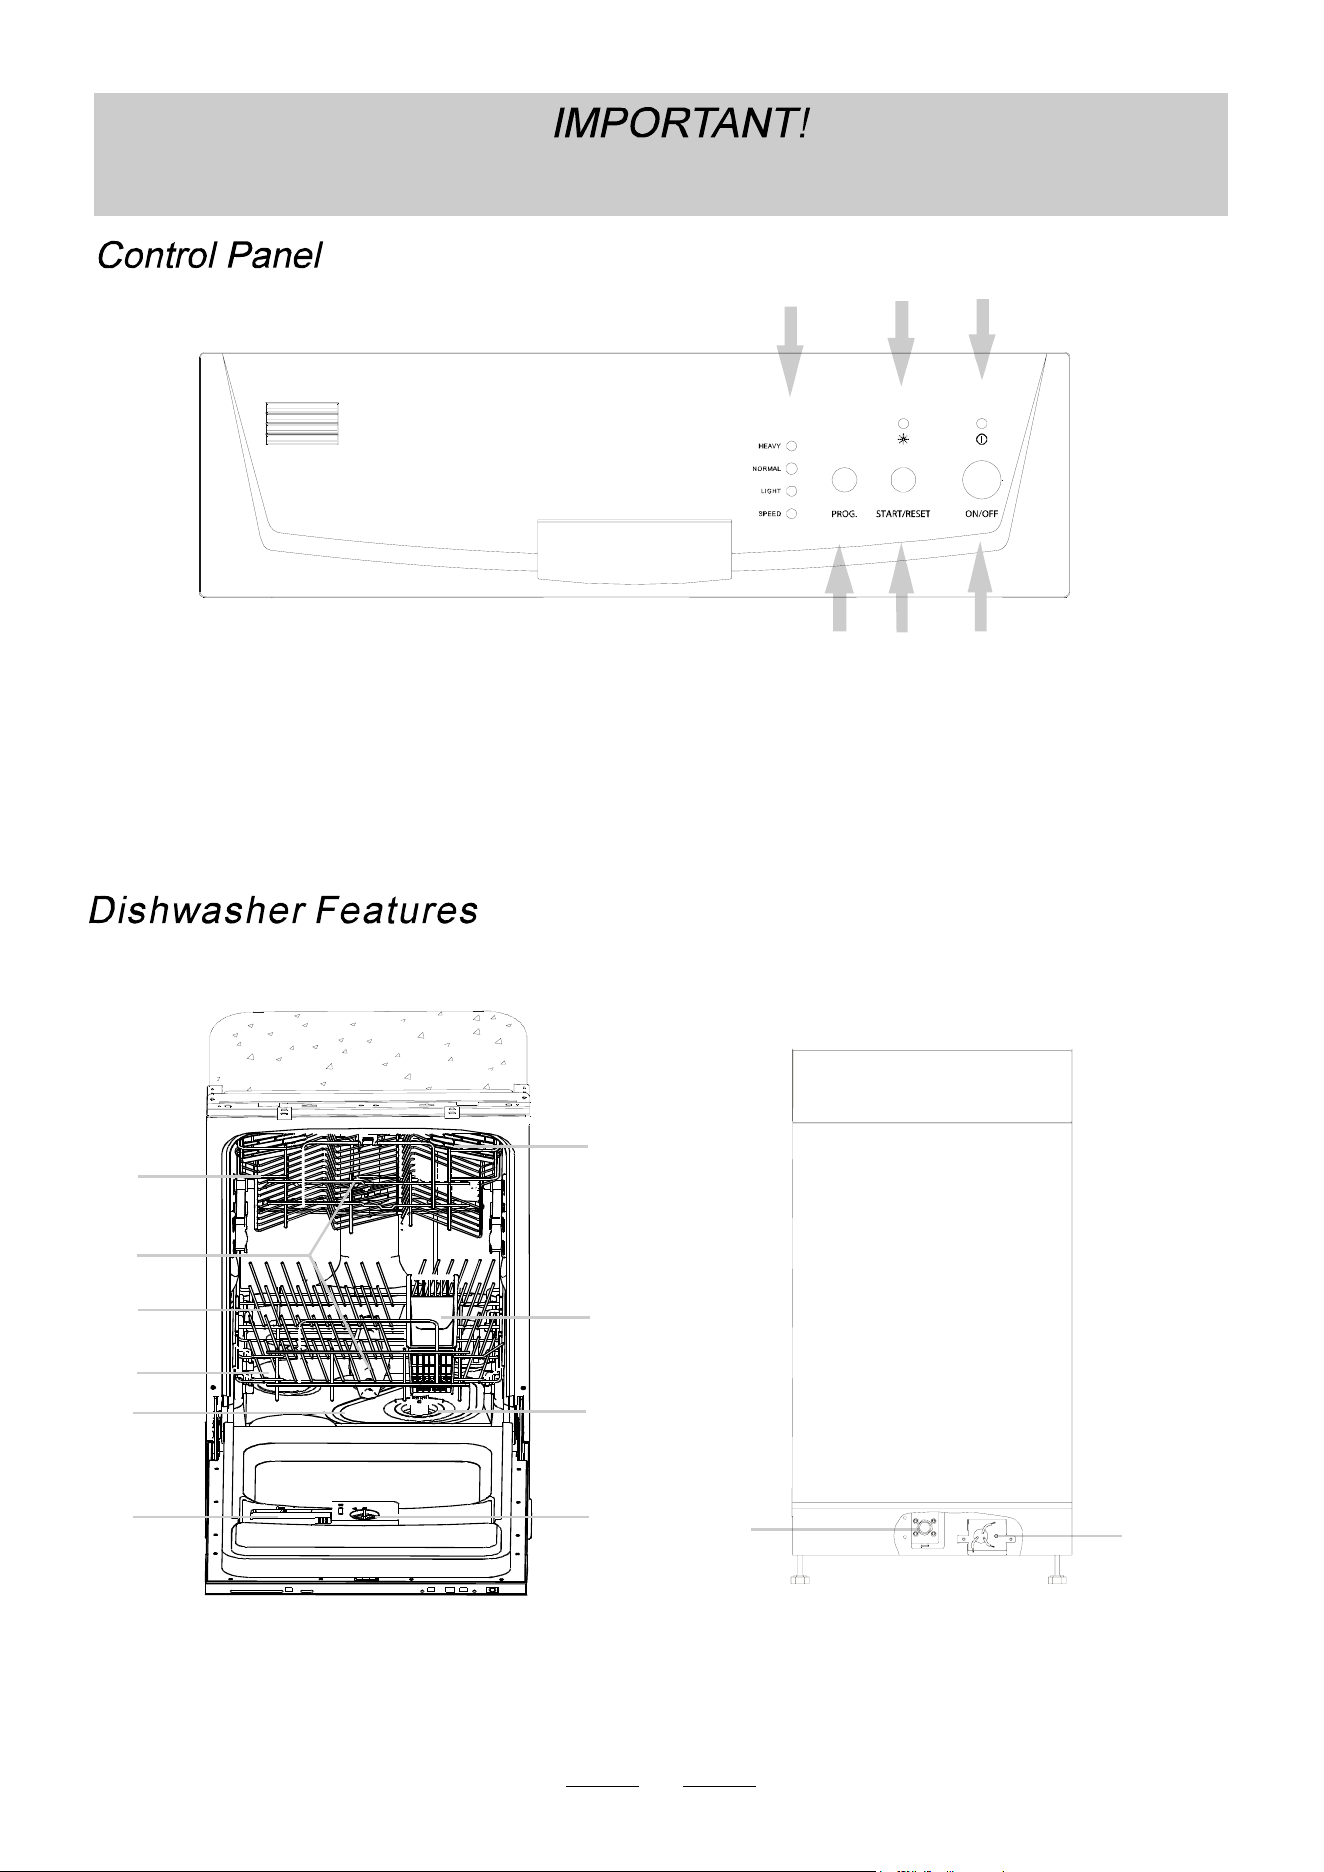
ON/O FF Butt on: To tu rn o n/of f t he pow er s upply.
1
2
Program button :press the but ton
to select wash cycles.
3
4
5
6
6
5
1
2
3
4
5
6
7
8
9
10
Upper Rack
Spr ay A rms
Low er Rack
Water Sof t en e r
Detergent Dispenser
Sil verware Basket
Main F ilter
Cup She lf
5
6
7
8
R inse A id Disp ens er
Coarse Filter
Inlet Valve
Ju nction Bo x
9
10
12
11
3
2
14
4
S t art /P aus e bu t t on: To start the sele c ted
w ashi ng prog ram or p au se the washin g pr ogram
w hen th e mac hine i s w ork ing.
Power onlight:Tocomeon whenPowerON/OFF
button is pressed down.
Rinse Aid Warning Light: To come on when the
dispenser
needs to be refilled.
Power indicator light: To show the power supply.
11
12
CCD-0005580 | REV DATE: 10.14.2022
4
Lig ht .
Hea vy
Normal
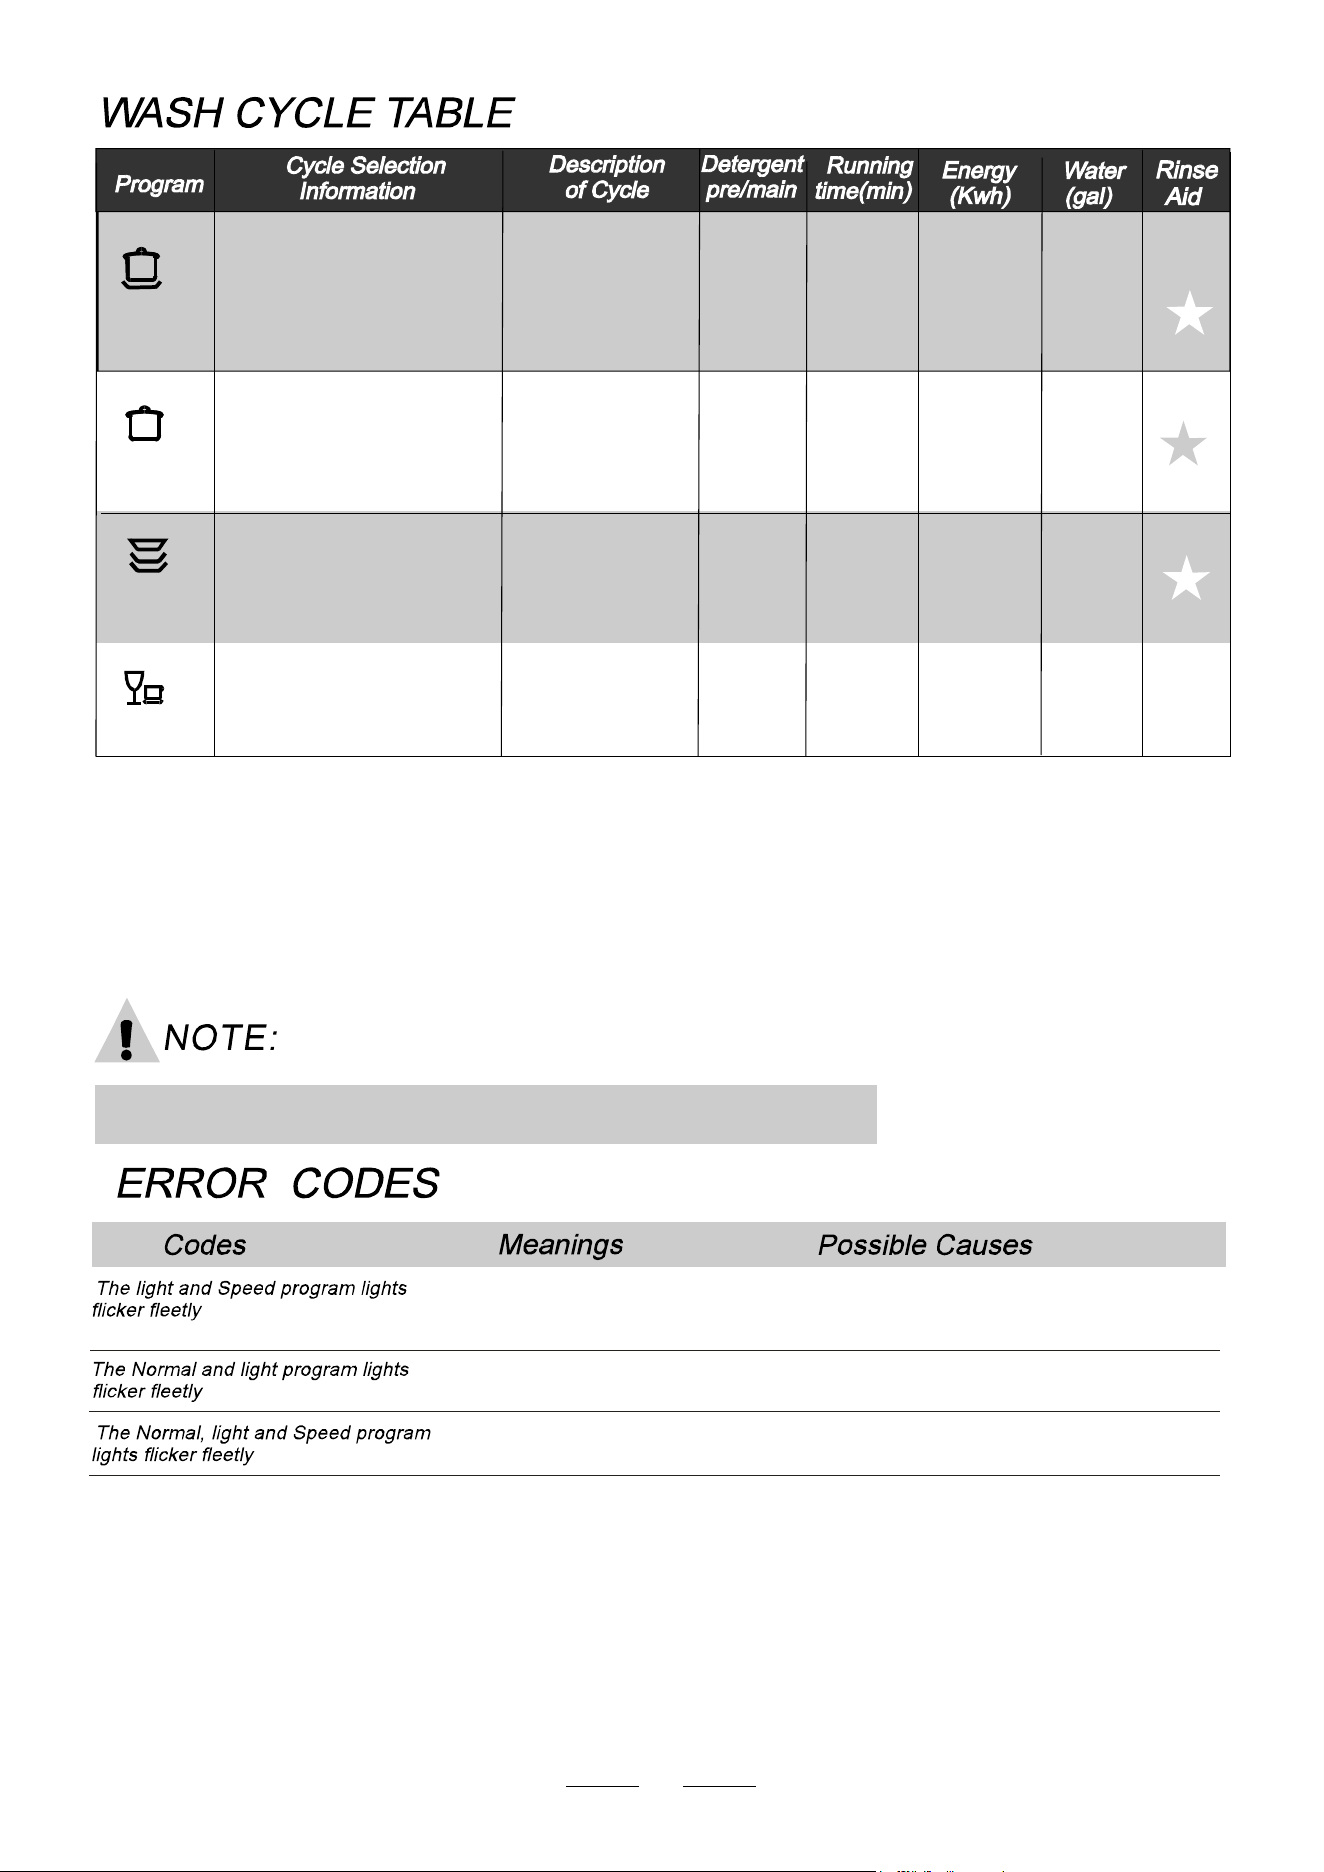
Fo r n o rm a ll y s o ile d loads ,
su ch a s , p la te s,gl ass es
and lightly soiled pans.
standard daily cycle.
pots
For lightly soiled loads,s uch
as pl ates,gl asses ,bowls a nd
lightly soiled pans.
For the heaviest soiled
loads, such as pots, pans,
casse role dishes and dishes
that have been s itting with
dried food on them for a
whi le.
A shorter wash for li gh tl y
soiled loads that do not
need drying.
Speed
15g
95
85
4.4 1
3. 5 4
3.54
2.7
125
(AHA M)
The inlet water tem p e ratu re is 120 °F, If not , the wash performance will reduce.
Wash (50 )
Rins e
Dryin g
Pre- wash
(5 5 )
℃
℃
0. 5 1
0.37
0.291
Pr e-w ash
Was h ( 5 1 )
Rin se
Rinse (67 )
Dr yin g
℃
℃
Was h ( 50 )
Rin s e
Dr yin g
Pr e-wa sh
Rin s e
(55 )
℃
℃
Pre-wash
Pre-wash (5 0 )
Wash (53 )
Ri nse
Rinse (62 )
Dry ing
℃
℃
℃
18g
18g
18g
Longer heating time,
but not reaching required
temperature
Malfunction of temperature sensor or of
heating element.
Failure of temperature sensor
Short circuit or break of temperature sensor
Open circuit or break of temperature sensor
Failure of temperature sensor
65
0.29
REV DATE: 10.14.2022 | CCD-0005580
5
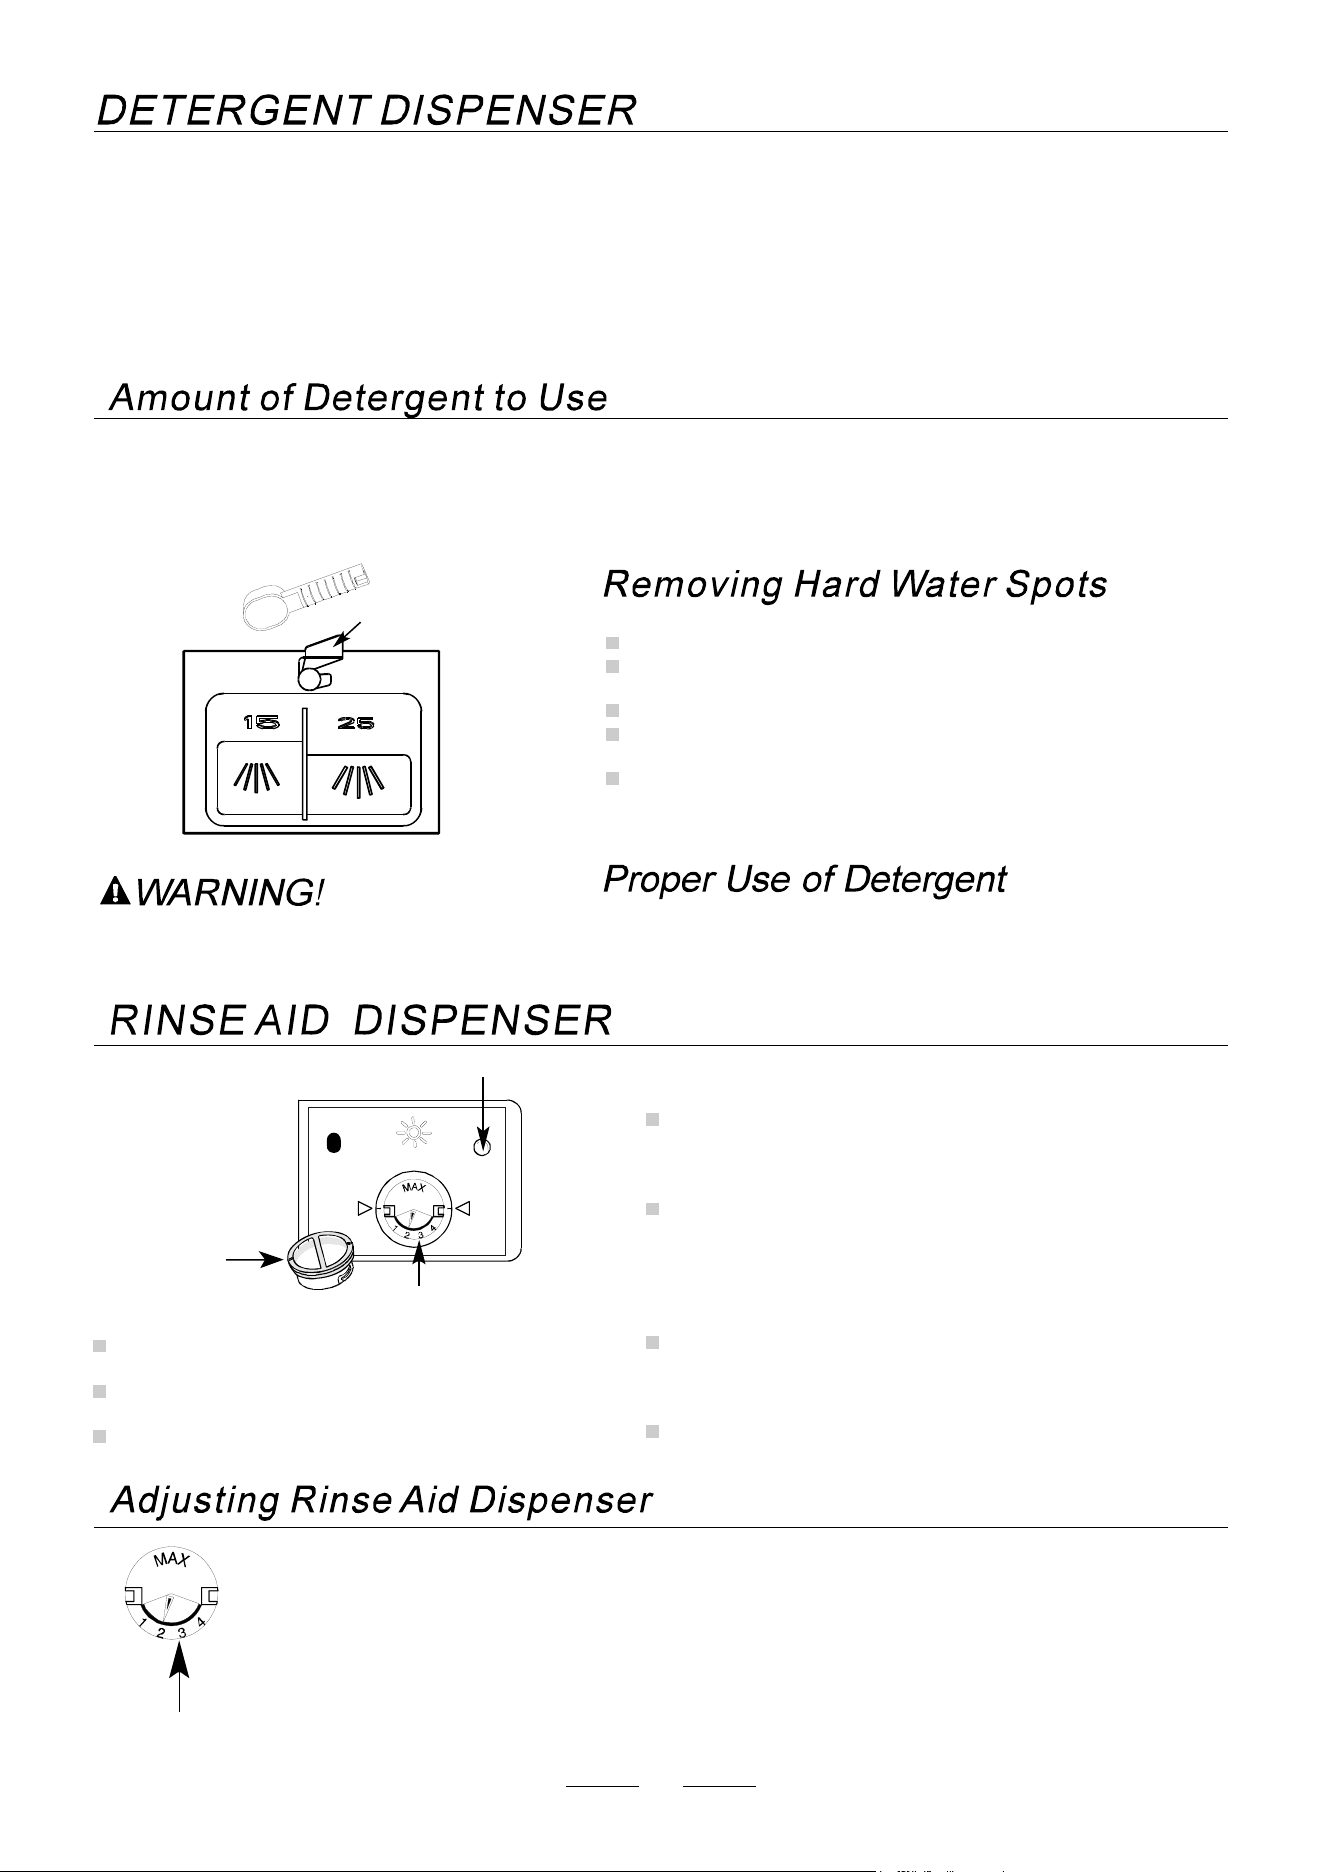
Dishwasher deterge nt is co rr osiv e!
Take ca re to kee p it out o f rea ch o f ch ildren .
IFTHE WATER ISN'T TOO HARD,YOUMAY ALSO PREVENT THE FORMATIONOF DEPOSITS BY ADDING
DETERGEN T.
The a mo unt of d et er gent needed c an v ary due to d ifferenc es in wa te r h ardness . To de te rmine th e wat er h ard ness in
your area, contact your local water utility or area water softening company. The harder the water, the more detergent
you may need . Re me mb er, y ou s houl d adjust the a mo un t o f de tergent you u se b y small amounts unt il you fi nd the
correct a mo unt.
To remove hard water spots, try the following:
Ru n d ishe s throug h a n orm al wash pro gr am.
Remove all metal dishware, such as cutlery, pans, etc.,
fr o m th e dishw ash e r.
Do not add detergent.
Po ur t wo c ups of v inegar in to a bow l an d se t t he bow l f ace
up on t he l owe r rac k of the dish was he r.
Run the dishes through a normal w ash program.
If th is doe sn't wor k, tr y the sam e p rocess with 1 / 4 cup of
c itric acid cry stals ins t ead of v inega r.
U se o nly dete rgent specifi cally ma de f or use in dis hw asher s.
Keep your detergent fresh and dry. Don't put powder detergent
into the dispenser until You're readyto wash dishes.
Th e r inse a id is released dur ing the final r inse to pr event
wa ter f ro m forming dropl ets o n yo ur d ishes tha t ca n l eave
spots and streaks. It also improves drying by allowing
water to "sheet" off the dishes.
Yo ur di shwashers ar e de sign ed t o us e l iquid ri nse aids .
Th e r in se a id dispe nser i s loc ated ins ide t he door n ext t o
the det ergent dispense r. To fi ll th e d ispenser, open th e
cap an d po ur th e rinse ai d int o the d ispenser u ntil t he l evel
ind icat or tu rns c omp lete ly bl ack. The dispenser ho lds
about 1 00 ml of liqu id r inse a id.
Be careful not to overfill the dispenser, because this could
cause o ver su dsing. Wip e away a ny s pills with a damp cloth .
Do n't forge t to r epla ce t he cap before you clo se the
dis hw asher doo r.
If y ou h ave soft water, yo u m ay n ot ne ed ri nse aid f or i t may
causeawhitefilmtodeveloponyourdishes.
YOU MAY NOT ADD TOO MUCH DETERGENT TO PREVENT THE FORMATION OF DEPOSITS BECAUSE YOUR
DISHWASHERS
HAVE SPECIALLY-DESIGNED WATER SOFTENERS.
The dispe nser mus t be refilled bef ore the start o f each w ash cycle following the i nstructions pro vi ded i n the " Wash
Cycle
Tab le".Your dishwasher s than conve ntional dishw ashers. G enerall y, o nly one
tabl espoon o f
deterge nt i s ne eded f or a nor mal w ash load. Al so, more hea vily soiled item s need more det ergent. A lways add th e
deterge nt j ust
before st arting dishw asher, othe rwis e it c ou ld get d amp a nd w ill no t dissol ve p roperly.
us e l es s d eter gen t and r ins e a id
To op en t h e d i spenser, tu rn t h e ca p to the "op e n" (lef t)
ar row an d li f t i t out.
Po ur th e rin se a id in to t he d ispe nse r, be ing care ful
not to overfill.
Replace the cap by inserting it aligned with "open"
arrow and t urni ng it to the c lose d (right) arrow.
Ameasured amount of rinse aid is released during the final rinse. As with detergent, the amount
of rins e aid nee ded for your dish es de pends on t he h ardn ess of th e wa ter in y our ar ea. Too much
rinse aid can result in lather of foaming and cause cloudiness or steaks on your dishes. If the
waterinyourareaisverysoft,youmaynotneedrinseaid.Ifyoudo,youcandilutetherinseaid
with an equal a mount of water.
Th e rin se a id d ispe nser has fou r se ttings.A lways sta rt w ith t he d is penser set on " 2 ". If sp ots a nd
poor drying are problems, increase the amount of rinse aid dispensed by removing the dispenser
lid and r ota ting the dia l to "3 ". If the di sh es st ill a re no t dry ing prope rl y or ar e s pott ed, a djust the
dial to" 4". . We suggest y ou to se t on "2" .
Button
Indicator
Dispen ser cap
A djustable sett ing
Adjustable setting
CCD-0005580 | REV DATE: 10.14.2022
6
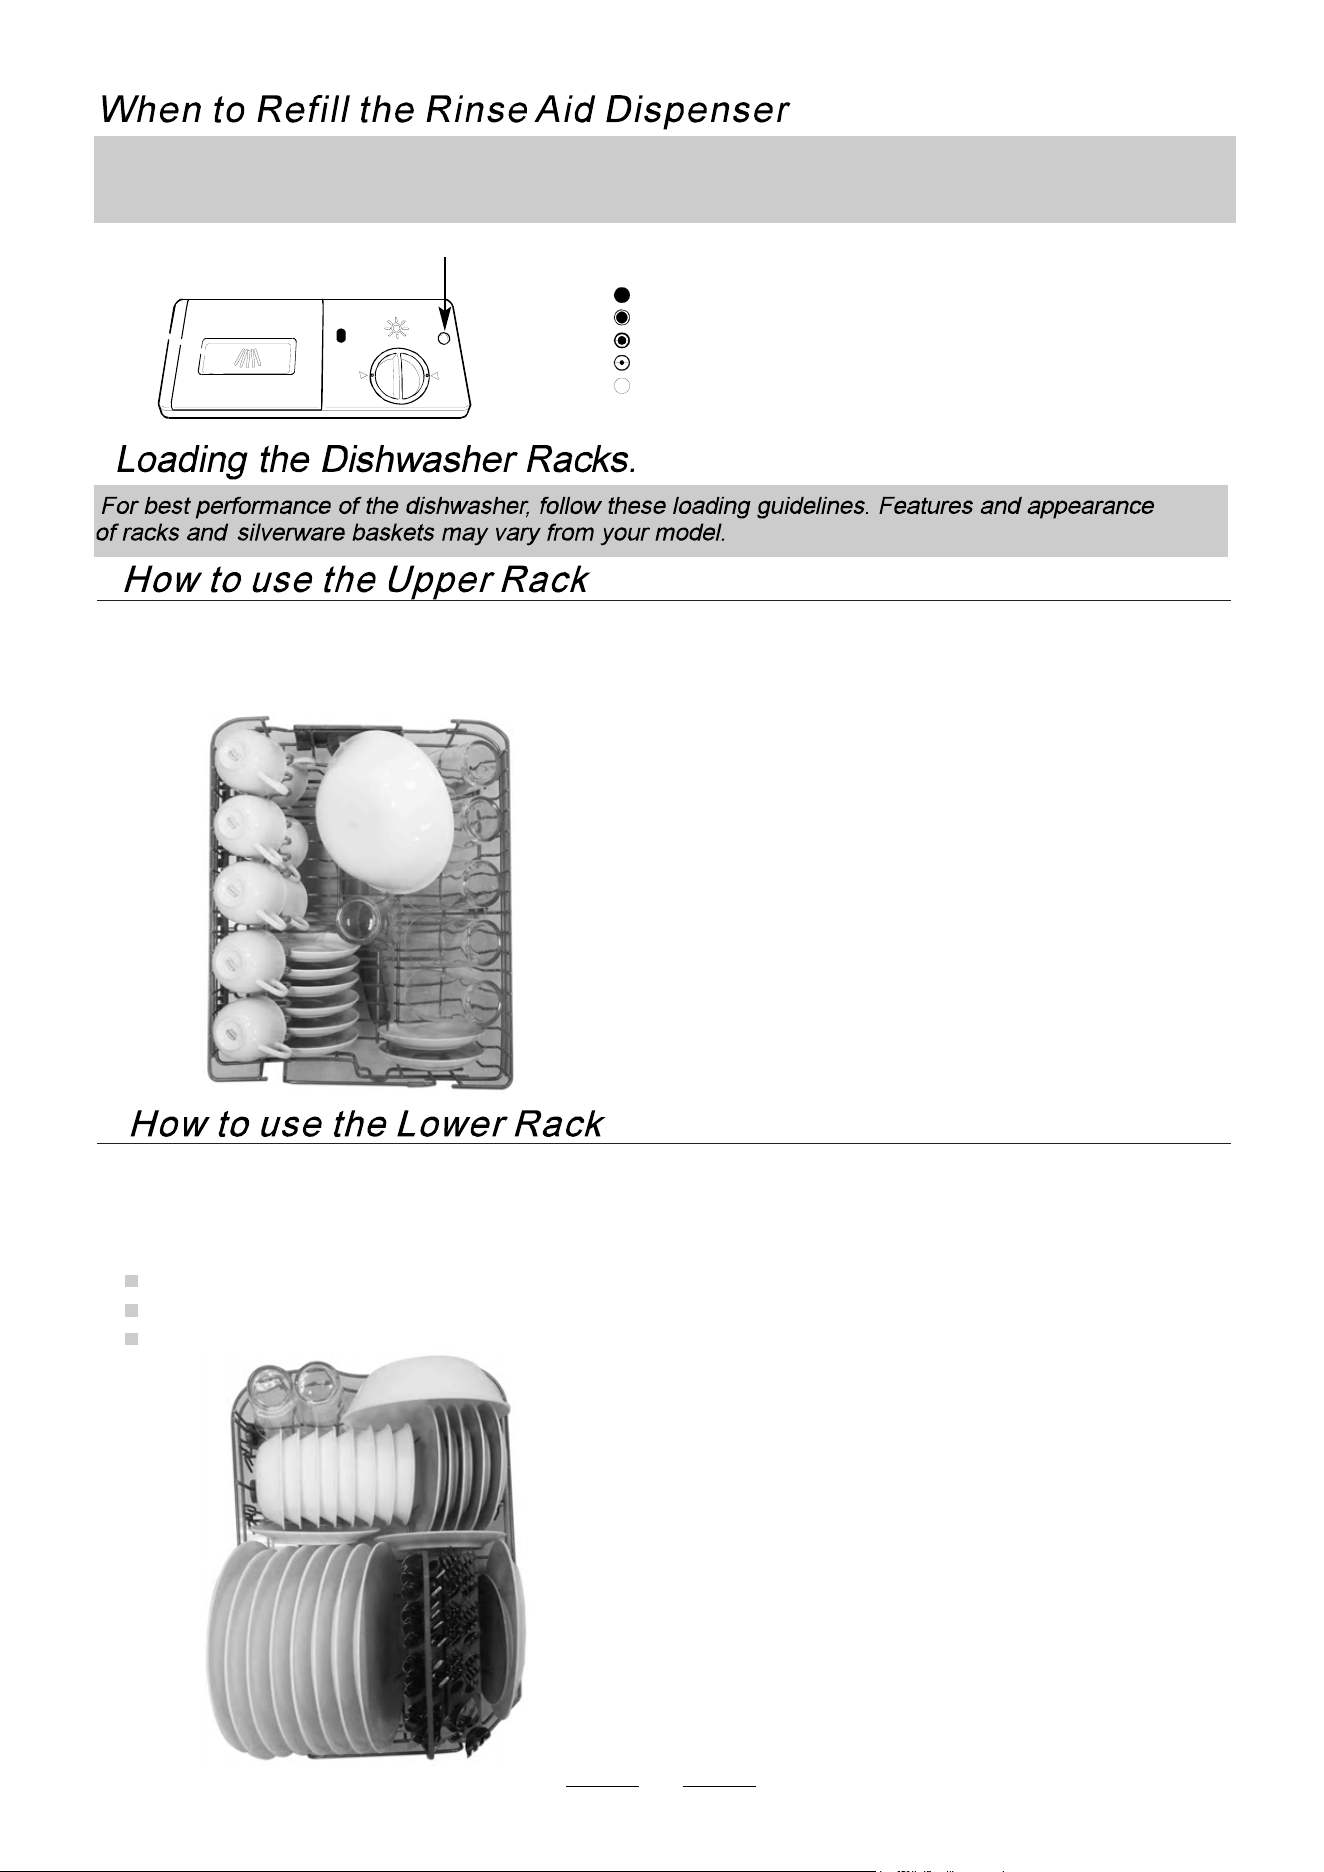
If t here i s no rinse ai d warning l i gh t i n the c ontr ol p an el, y ou can judge t h e amo unt o f r inse aid by the fo llowing m eans.
The black dot on the rinse aid dispenser indicates the amount of rinse aid in the dispenser. As therinse aid diminishes,
th e s i z e o f t he blac k do t d ecre ase s. Yo u sh o uld n eve r let th e rinse ai d get b elow 1 / 4 full.
As the ri ns e ai d d im i nis hes , t he s iz e of t h e black dot on t he r in s e
aid l eve l i ndicato r c h ang es, a s il lustrat ed b el ow.
Full
3/4full
1/2full
1 / 4 full - Should refill to eliminate spotting
Empty
Indicator
Th e u ppe r rac k i s design ed to hol d more d elicat e a nd lighter d ishware such as glasses , coff ee a nd tea c up a nd
saucers, as well as plates, small bowls and shallow pans(aslong as they arenot too dirty).
P osition t he dishes and cookw ar e s o th at t h ey d o n o t g e t moved by the s pra y of wat er.
Theupperrackcanbeadjustedforheightbyputtingwheelsofdifferentheightintotherails.
We r ecommend th at yo u p lace larg e item s whic h are most d iffi cult to cle an i nto t he lo wer rack: po ts, p ans, lid s,
ser vin g d ishes an d bowls, as s hown in the fi gur e t o the righ t.
It is p referable to pl ace servi ng dish es a nd lids on th e si de o f the racks in ord er to avo id bl ock ing the ro tati on of the
top spray arm.
Pots, serving bowls, etc, must always be placed top down.
Deep pots should be slanted to allow water to flow out.
The bott om rack f ea ture fold dow n ti ne r ows so th at l arger or more po ts and pa ns c an b e lo aded.
1 Cups
2
3
3Glasses
2Saucer
1
3
2
Se r ving bo wl
4
Fru i t bowl
8
7
9
Dinner plates
Silverware basket
6
Bread and butter p lates
Serv in g pla t e
4
4
6
6
5
5
7
8
3
9
REV DATE: 10
.14.2022 | CCD-0005580
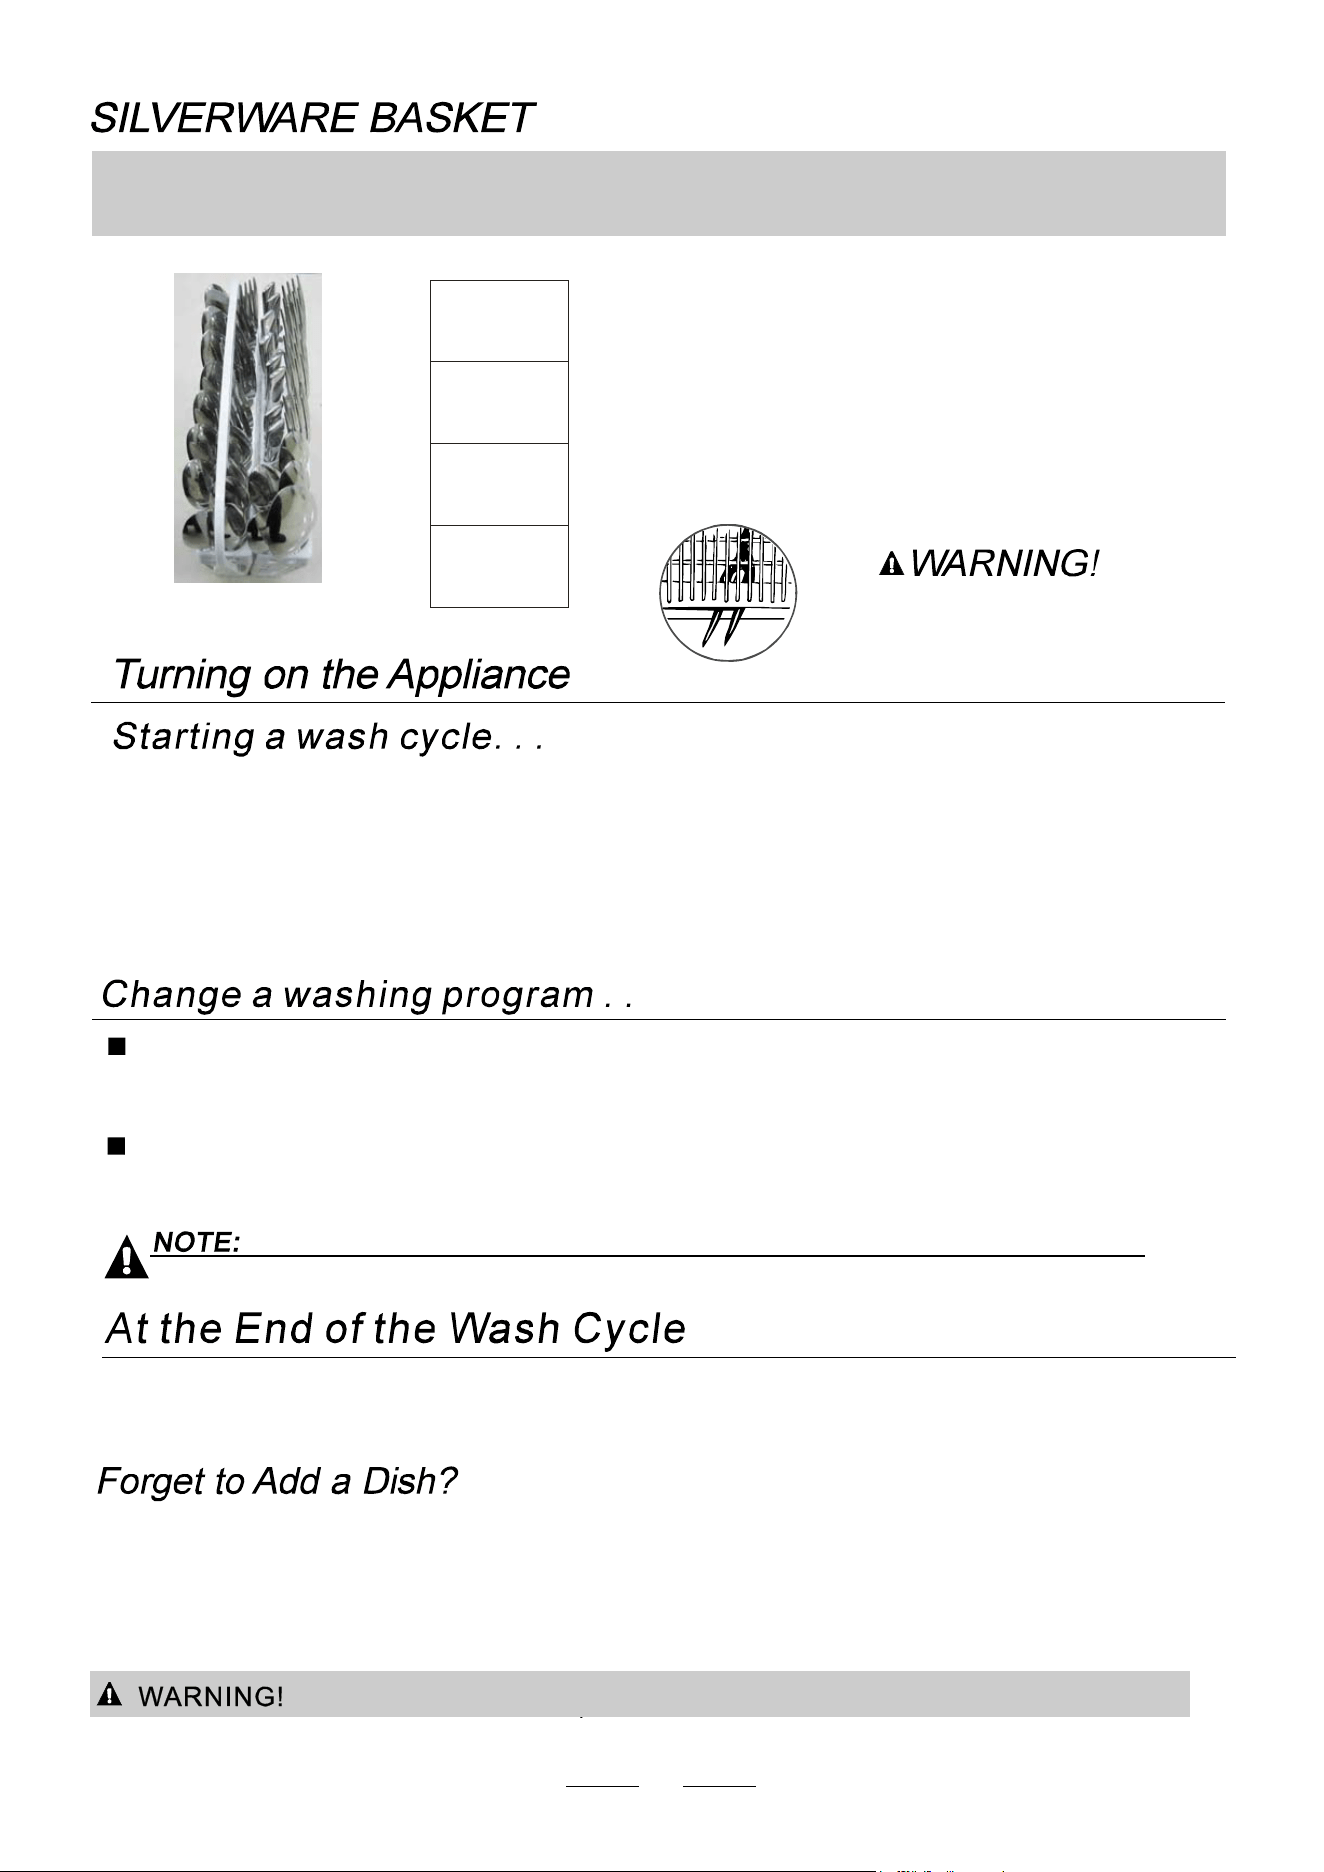
Silverware should be placed in the silverware basket with handles at the bottom: If the rack has side baskets,
the spoon sh ould be loaded individually into the appropriate slots, Especially long utensils should be placed
in the horizontal position at the front of the upper rack.
7
When the washing cycle has finished, the buzzer of dishwasher will sound 8 seconds , then stop. Open the door,
turn off the appliance using the ON/OFF button,. Wait a few minutes before unloading the dishwasher to avoid
handling the dishes and utensils while they are still hot and more susceptible to breakage. They will also dry better.
A forgotten dish can be added any time before the detergent cup opens.
Press the start/reset button to stop the washing.
After the spray arms stop working,you can open the door
completely.
Add forgotten dishes.
ehtpdna,roodehtesolC
dishwasher will work after 3 seconds.
ress the start/reset button
4
3
2
1
1. Make sure that the plug 0f the appliance is inserted into the wall socket;
2. Make sure that the water supply is turned on to full pressure;
7.
3. Load the dish (see the section entitled "loading the dishwasher");
4. Pour the detergent (see the section entitled “detergent and Rinse aid");
5. Press the on/off button ,the on/off light will turn on;
6. Press the program button to select program ;
Close the door and press the start/pause button, the machine will work.
It is dangerous to open the door when washing, because the hot water may scald you.
the machine will working after 10 seconds.continue
If you open the door , the machine will paus e. When you close th e door ,during a wash cycle
A cycle that is underway can only be modified if it has only been running for a short
time. Otherwise, the detergent may have already been released, and the appliance may
have already drained the wash water. If this is the case, the detergent dispenser must
be refilled (see the section entitled " Loading the Detergent " ).
to stop the washing. Press the program button more than 3 seconds
to cancel the running program. Then you can select other programes (see the section entitled "
Starting a wash cycle. . . " ).
1
2
press the start/pause button
8
Do not let any item extend through bottom.
1
1
1
1
1
4
7
1
1
1
6
4
4
4
4
4
4
4
3
3
3
3
3
5
5
5
5
5
5
5
5
3
3
3
6
2
2
2
2
2
2
2
2
Teaspoons
4
Soup spoons
2
Salad Forks
1
Serving fork
Serving spoon
6
Knife
5
3
Dinner forks
7
CCD-0005580 | REV DATE: 10.14.2022
9
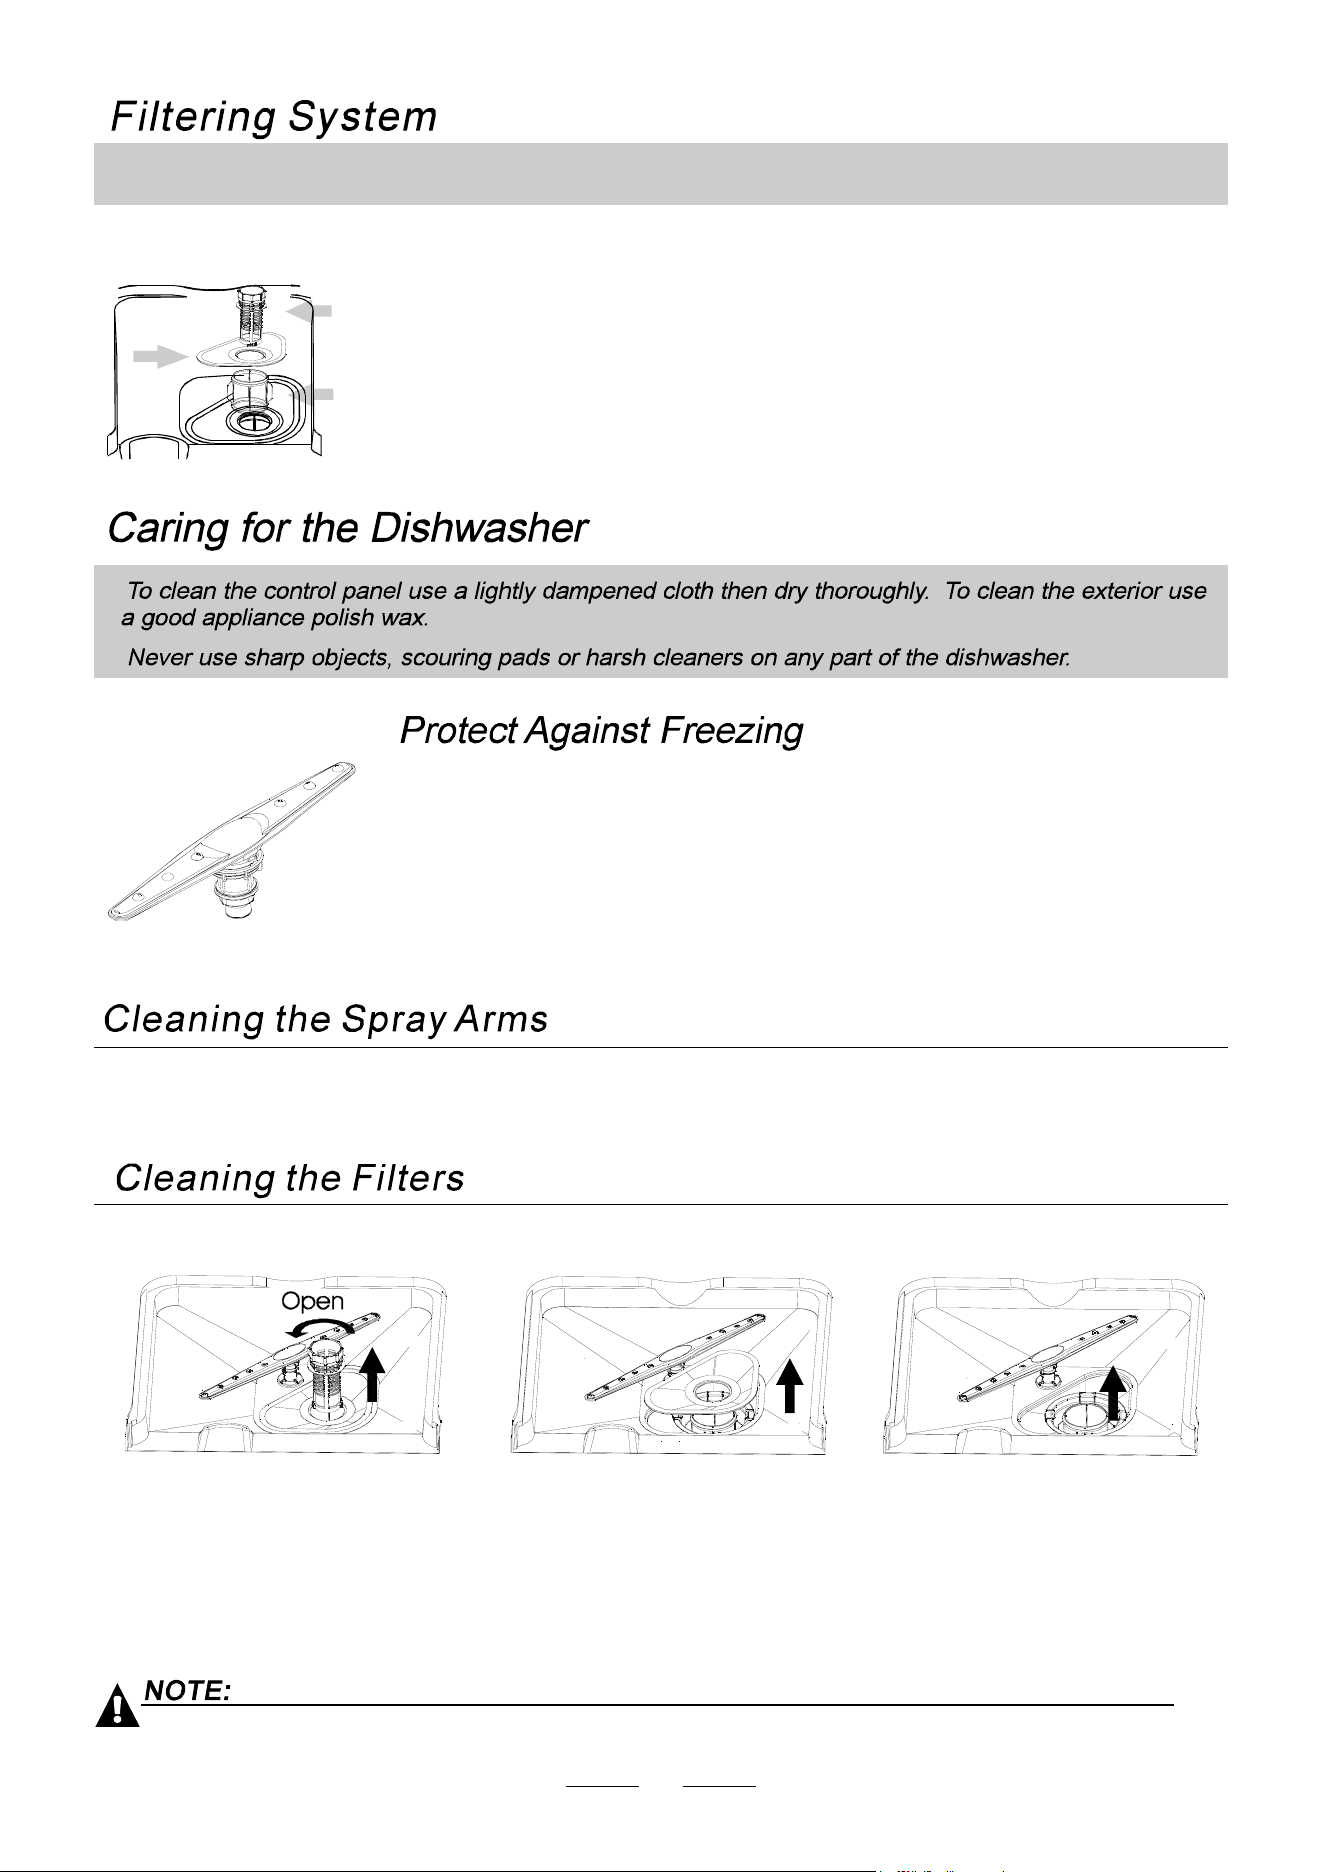
Coa rse filter
Larg er i tems, s uch a s p ie ces of b one or glass, that co uld cl og the d rain are t rapped
in th e co ars e f il te r. To re mov e a n i tem cau ght i n th i s fi lt er, g en tly s q uee ze t h e t ab s
on t op o f this f ilter and lif t it out .
F or your c on ve nienc e, w e have pla ced the dr ai n pu mp and f i lteri ng s yste m wi thi n e as y re ach in side th e tu b.
Th er e ar e t hr ee comp one nts o f th e fil tering sy stem : the main fi lter, the coar se fi lter, and t he fi ne filter.
2
2
Fine filte r
This fi lte r holds s oil a nd foo d residu e i n the sum p a rea and preve nts i t from being
rede posite d on the di shes during a cycle.
Main fil ter
Food and soil part icles trapp ed b y t his f ilter a re pulve riz ed by a sp ecial jet on
the low er s pray ar m an d wa she d down the dr ain.
1
3
3
If your dishwasher is left in an unheated place during the winter, ask a service technician to:
Cut o ff electrical power to the dishwasher. Remove
fuses or trip circuit breaker.
Turn off the water supply and disconnect the water
inlet pipe from the water valve.
Drain water from the inlet and water valve.pipe
(Useapantocatchthewater.)
Reconnect the water inlet to the
water valve.
pipe
Remove the plastic sump cover in the
tub bottom and use a sponge to soak
up water.
5
4
3
2
1
It i s necessa ry t o cl e an the spra y arm s regula rly f or ha rd wate r che mic a ls will c l og the s p ray a r m jet s an d bea rings.
To remove thespray arm, Wash thearms in soapy and warm water and use a soft brush to cle an the jets.
Repl ace them aft er ri nsin g the m th oroughly.
1
Step Turn the filter in anti-clockwise direction,
t hen lift it up.
:
1
Step lift the Main filter up:
2
Step lift the Fine filter up:
3
2
1
3
Follow from step 1 to step 3 to remove the filter; Reverse the order to install.
REV DATE: 10.14.2022 | CCD-0005580
10
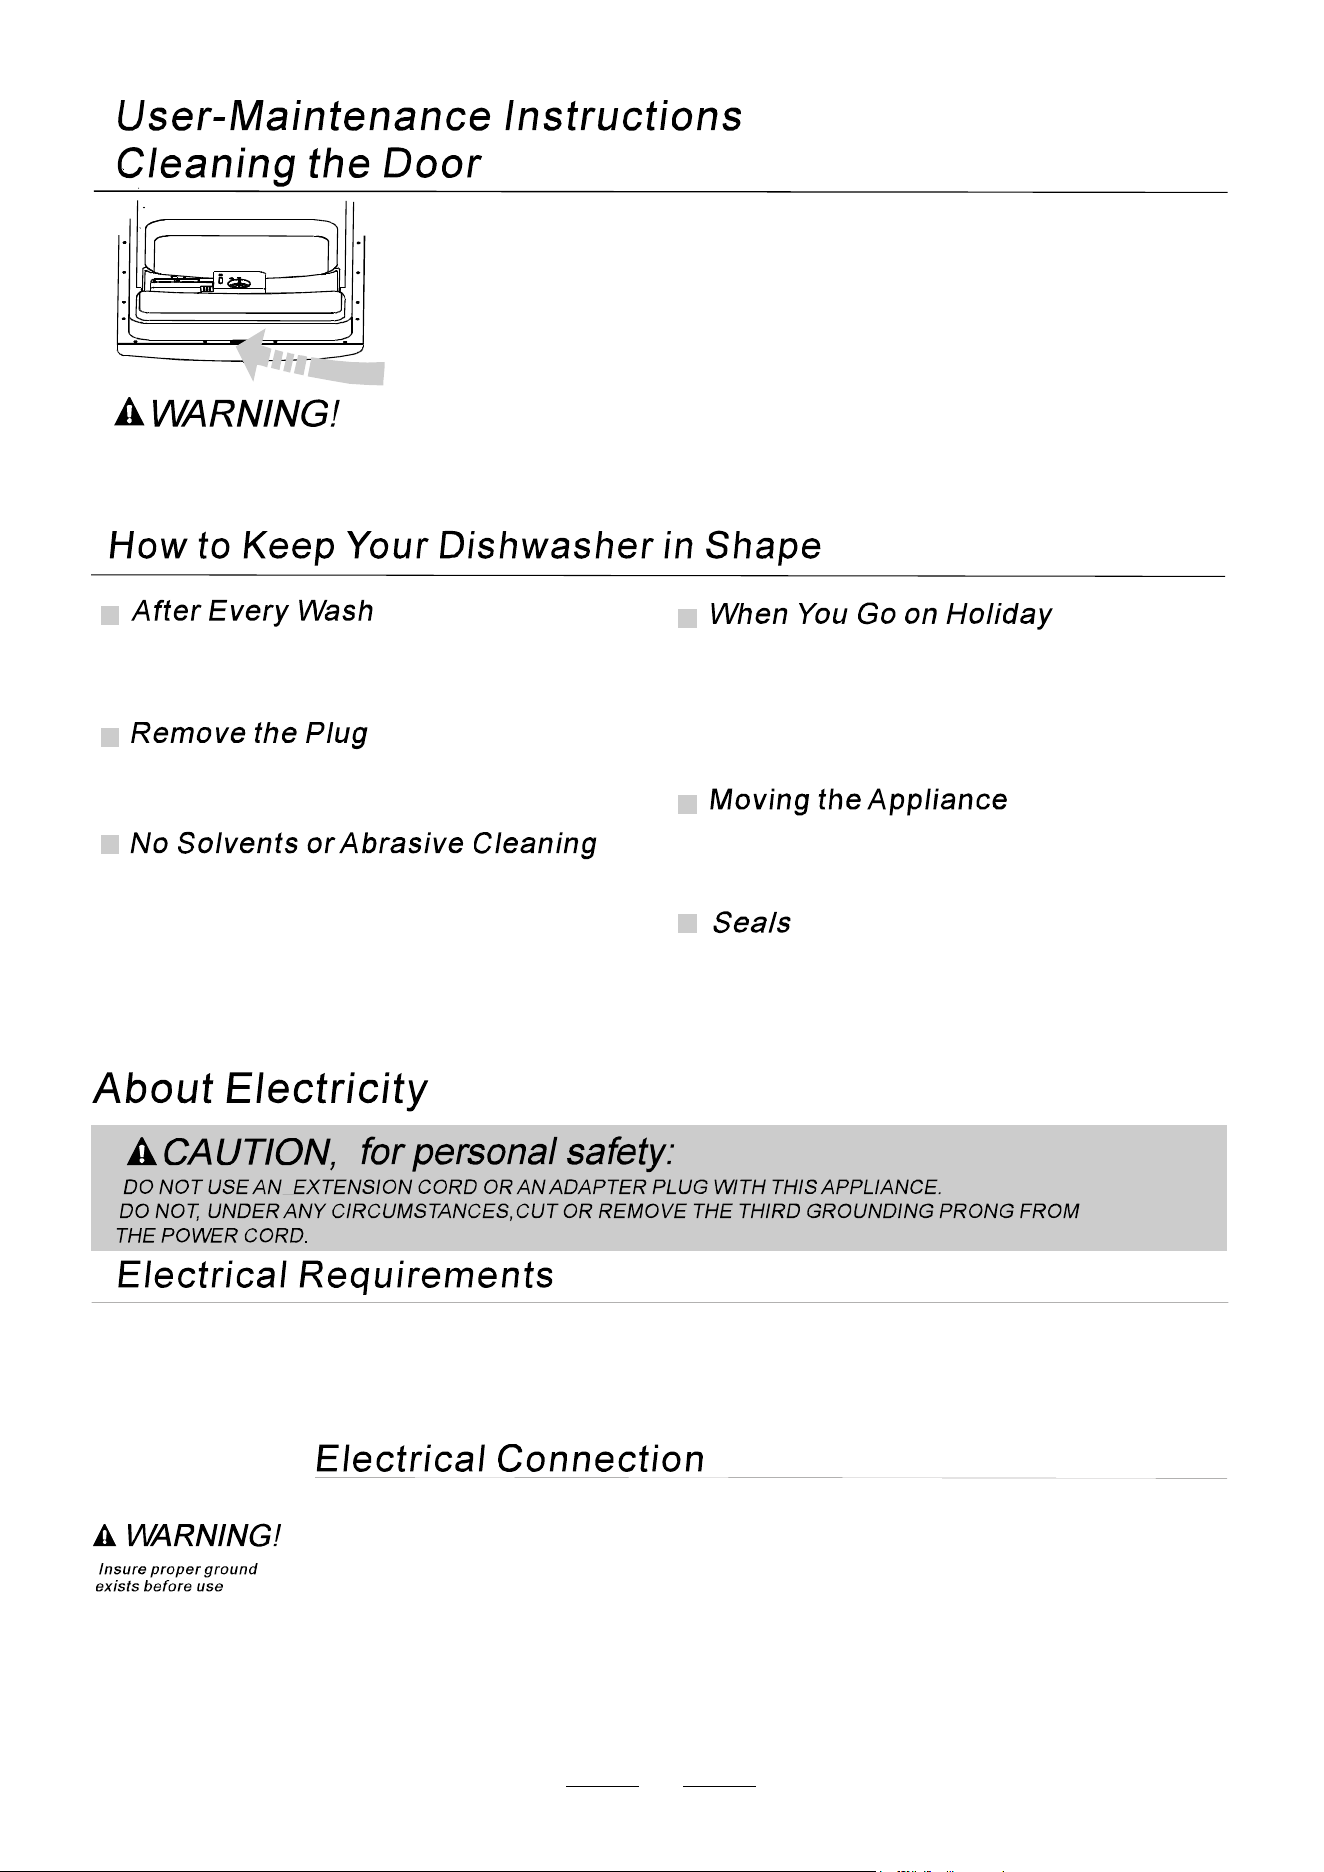
Never use a spray cleaner to clean the door panel for it could damage the door lock and electrical components.
Do not use an abrasive agent or some paper towels because of the risk of scratching or leaving spots on the
stainless steel surface.
To clean the edge around the door, you should use only a soft warm, damp rag.
To prevent penetration of water into the door lock and electrical compon ents,
do not use a spray cleaner of any kind.
Also, never use abrasive cleaners or scouring pads on the outer surfaces because
they will scratch the finish. Some papers towels can also scratch or leave marks
on the surface.
After every wash, turn off the water supply to the
appliance and leave the door slightly ajar so that
moisture and odors are not trapped inside.
Before cleaning or performing maintenance, always
remove the plug from the socket. Do not run risks.
To clean the exterior and rubber p arts of the dishwasher,
do not use solvents or abrasive cle aning products.
Rather, use only a cloth and warm soapy water.
To remove spots or stains from the surface of the
interior, use a cloth dampened with water and a little
white vinegar, or a cleaning product made specifically
for di shwashe rs.
When you go on holiday, it is recommened that you
run a wash cycle with the dishwasher empty and then
remove the plug from the socket, turn off the water
supply and leave the door of the appliance slightly ajar.
This will help the seals last longer and prevent odors
from forming within the appliance.
If the appl iance must be moved, try to keep it in the
vertical position. If absolutely necessary, it can be
positioned on its back.
One of the factors that cause odors to form in the
dishwasher is food that remains trapped in the seals .
Periodic cleaning with a damp sponge will prevent this
from occurring.
This dishwasher is designed for operation on an adequately wired individual 120VAC,60Hz.Use required fuse
16 amps. Fused electrical supply is required-copper wire only. Time delay fuse or circuit breaker recommended
and provide separate circuit serving only this ap pliance. Outlet should be placed in adjacent cabinet.
After making sure that the voltage and the frequency values for the current in the home
correspond to those on the rating plate and that the electrical system is sized for the maximum
voltage on the rating plate, insert the plug into an electrical socket which is earthed properly.
If the electrical socket to which the appliance must be connected is not appropriate tor the plug,
replace the socket, rather than using a adaptors or the like as they could cause overheating
and burns.
Connections
CCD-0005580 | REV DATE: 10.14.2022
11
Before you call for serv ice
Problem Possible Causes What To Do
Noise Some of the sounds you’ll Detergent cup opening.
hear are normal
The motor starting during the drying period.
Water draining out of the tub immediately after you
start the dishwasher.
Utensils are not secure in the
Make sure everything is secured in dishwasher.
rack or something small has
dropped into the rack
Motor hums
.
Det ergent left in
Dishes block the
Reposition the dishes.
dispenser cups
Detergent cover
Water will not pump
Drain is clogged
out of the tub
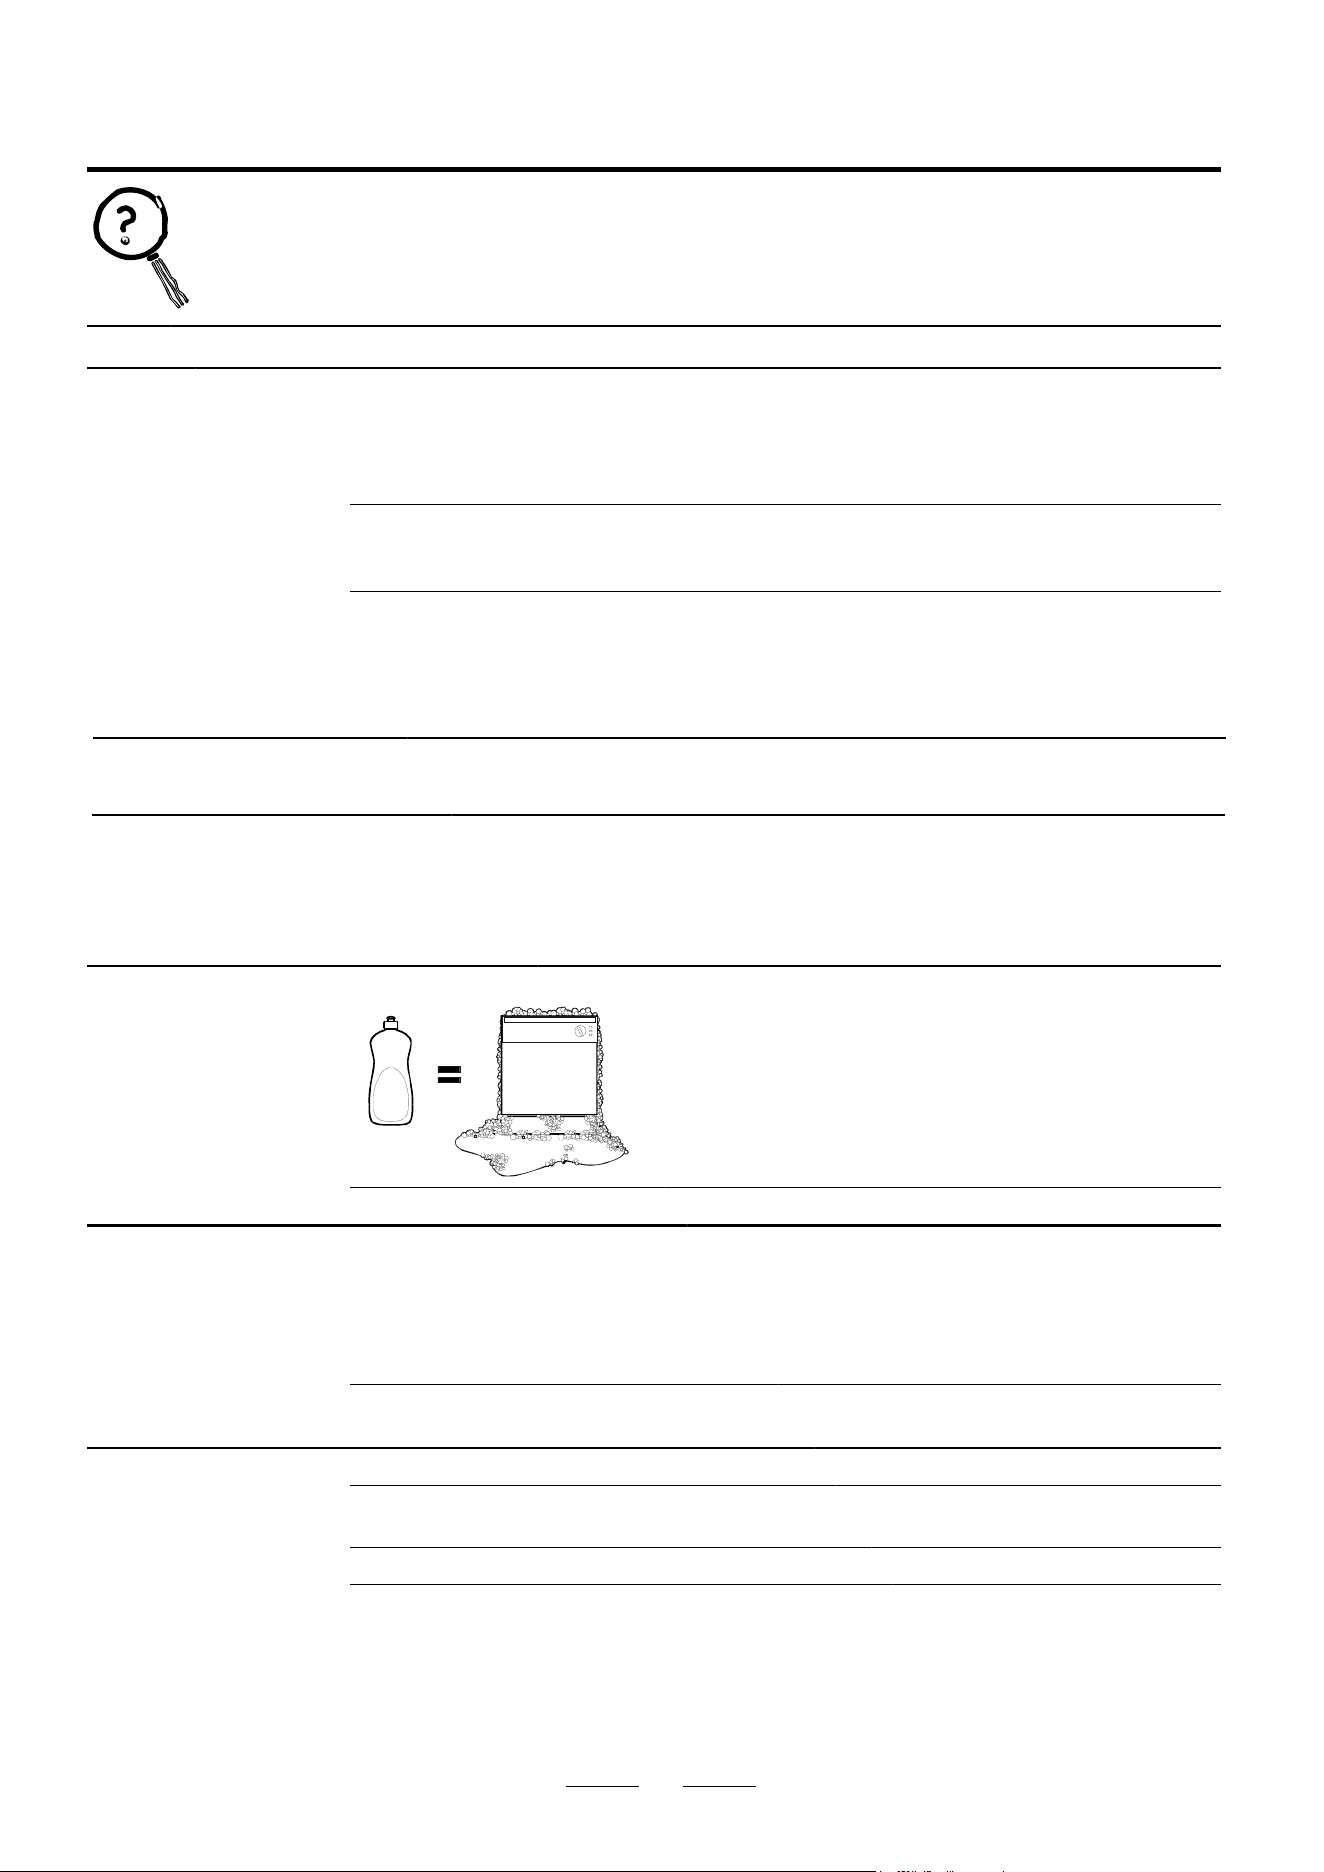
Suds in the tub
Rinse agent was spilled Always wipe up rinse agent spills immediately.
Stained dishwasher parts Detergent with Some detergents contain colorant (pigment or dyes) that
Colorant was used will discolor the tub interior with extended use. Check the
detergent cup for signs of any discoloration. If cup is
discolored, change to detergent without any colorant.
Cascade, Cascade Completeand Electrasol Dishwashing
Detergents have been approved for use in our dishwashers.
Some toma to-based
f oods can stain
Use of the RINSE ONLY
cycle after adding the dish to the
load can decrease the level of staining.
Dishes and flatware Low inlet water temperature
Make sure inlet water temperature is correct (see page 4).
not clean
Water pressure is temporarily low
Turn onafaucet. Is water coming out more slowly than usual?
If so, wait until pressure is normal before using your dishwasher.
Air gap is clogged
Clean the air gap.
Improper rack loading
Make sure large dishware does not block the detergent
dispenser or the wash arms.
Troubleshooting Tips
Save time and money! Review the charts on the following pages.
You may not need to call for service.
Correct deterg ent was not used
Dishwasher has not been used on a regular basis.
If you do not use your dishwasher for long time,
please select and run the shortest wash program
once every week. This will help keep the seal
moist to avoid Motor hums.
.
Use only the special dishwasher detergent to avoid
suds. If this occurs, open the dishwasher and let suds
evaporate. Add 1 gallon of cold water to the tub. Close
and latch the dishwasher, then Start the wash
cycle to drain out the water . Repeat if necessary.
Check drain hose.
Check coars
e filter
(see section titled " Cleaning The Filter ")
Check if your kitchen sink is draining well. If not,
please ask plumber to deal with.
REV DATE: 10.14.2022 | CCD-0005580

12
Problem Possible Causes What To Do
Spots and filming
UseJet-Dry rinse agent to remove spo ts and prevent new film bu ildup.
on glass es and
To r emo v e stubbor n spots and pre-e xist ing film fro m glass ware:
fla tw are
1 Remove all m etal utensils fro m the dishwas her.
2 Do not add detergent.
3 Start the dishwasher an d allow to run for 30 minutes. Dishwasher
will n ow be in the ma in wa sh .
4 Op en the door and pou r 2 cups (500 ml) of white vinegar into the
bottom of the dishwasher.
5 Close the doo r and allow to comple te the cycle. If vine ga r rinse does not
work: Repeat as above, E xcept u se 1/4 cup (60 ml) of
citri c acid crystals
instead of vinegar.
Cloudiness on
Combination of soft water and
This is called Etching and is permanent. To prevent this fro m happening,
glassware
too much deter gent
Use less deter gent if you have soft water. Wash glassware in the shortest
cycle that will get them clean .
Water temperature entering
Lower th e water heater tempe rat ure .
the dishwashe r exceeds 150°F
Black or gray
Aluminum utensils ha ve
Remove marks with a mild, abrasi ve cl eaner.
marks on dishes
rubbed against dishes
Yellow or brown film
Tea or coffee stains
Remove the stain by hand, using a solution of 1/2 cu p bleach and
on inside surfaces
3cupswarmwater.
CAUTION
Before cleaning i nterior wait at least 20 mi nute s a f ter a cyc le for th e
temperature to cool down. Failure to do can result scald.
An overall yellow or brown fi lm can
A spec ial filter in the water su pply line i s the onl y way to co rrect
be caused by iron deposits in water
this problem. Contact a water softener company.
Whi te film on inside H ard water min era ls
To clean th e interior, apply dishwasher detergent to a da mp sponge.
su rf aces
Wear rubber gloves.
Do not
use an y type of clean ser other than
dishwasher detergen t because it may caus e foami ng or sud sing.
Cascade Complete And Electrasol Automatic Dishwashing Detergents
have bee n approved for use in you r dishwasher.
Dishes don t dry
'
Low inlet water temperature
Make su re i nlet wa ter temperature is correct (see page 4 ) .
Rinse agent dispens e r is empty
Check the rinse a gent di spenser.
Di shwasher won t
'
Fuse is blown, or the
Replace fuse or reset circuit breaker. Remove any other appliances
circuit breake r tripped
from the circuit.
Steam Thisisnormal
Steam comes through t he ve nt during washing, d rying and when
water is being pump ed out.
Extremely hard water
L ow inlet water temperatu re
Overloading the dishwasher
Improp er loading
Old or damp powder detergent
Rinse agent dispenser empty
Too l ittl e d ete rgent
Before you call for servic e
run
The installation of the pip es
and electricalequipments
sh ould b e done by professio nal s.
Electr ical S hock H azard Disconnec t
electrical power before installing dishwasher.
Failure to do so can result in death or
electr ical s hock.
CCD-0005580 | REV DATE: 10.14.2022
13
REV DATE: 10.14.2022 | CCD-0005580

IM-FHA00012 V2.0
The contents of this manual are proprietary and copyright protected by Lippert. Lippert prohibits the copying or
dissemination of portions of this manual unless prior written consent for an authorized Lippert representation
has been provided. Any unauthorized use shall void any applicable warranty. The information contained in this
manual is subject to change without notice and at the sole discretion of Lippert. Revised editions are available
for free download from lippert.com.
Please recycle all obsolete materials.
For all concerns or questions, please contact Lippert
CCD-0005580 | RE
V DATE: 10.14.2022
