A
CarpetXpert Tank
B
Dirty Water Tank
C
StainStriker Tank
D
Crevice Tool
E
Tough Stain Tool
F
2x Reversible Bristles
G
177ml Deep Clean Pro Formula
H
355ml OXY Multiplier Formula
I
Spray Trigger
J
Power Button
K
Detach Button
L
Wide Tough Stain Tool
M
Pet Stain Trapping Tool
PX200 SERIES
IMPORTANT SAFETY INSTRUCTIONS – FOR HOUSEHOLD USE ONLY
READ CAREFULLY BEFORE USE – SAVE THESE INSTRUCTIONS. FOR HOUSEHOLD USE ONLY;
READ ALL INSTRUCTIONS BEFORE USING THIS SPOT CARPET/UPHOLSTERY CLEANER
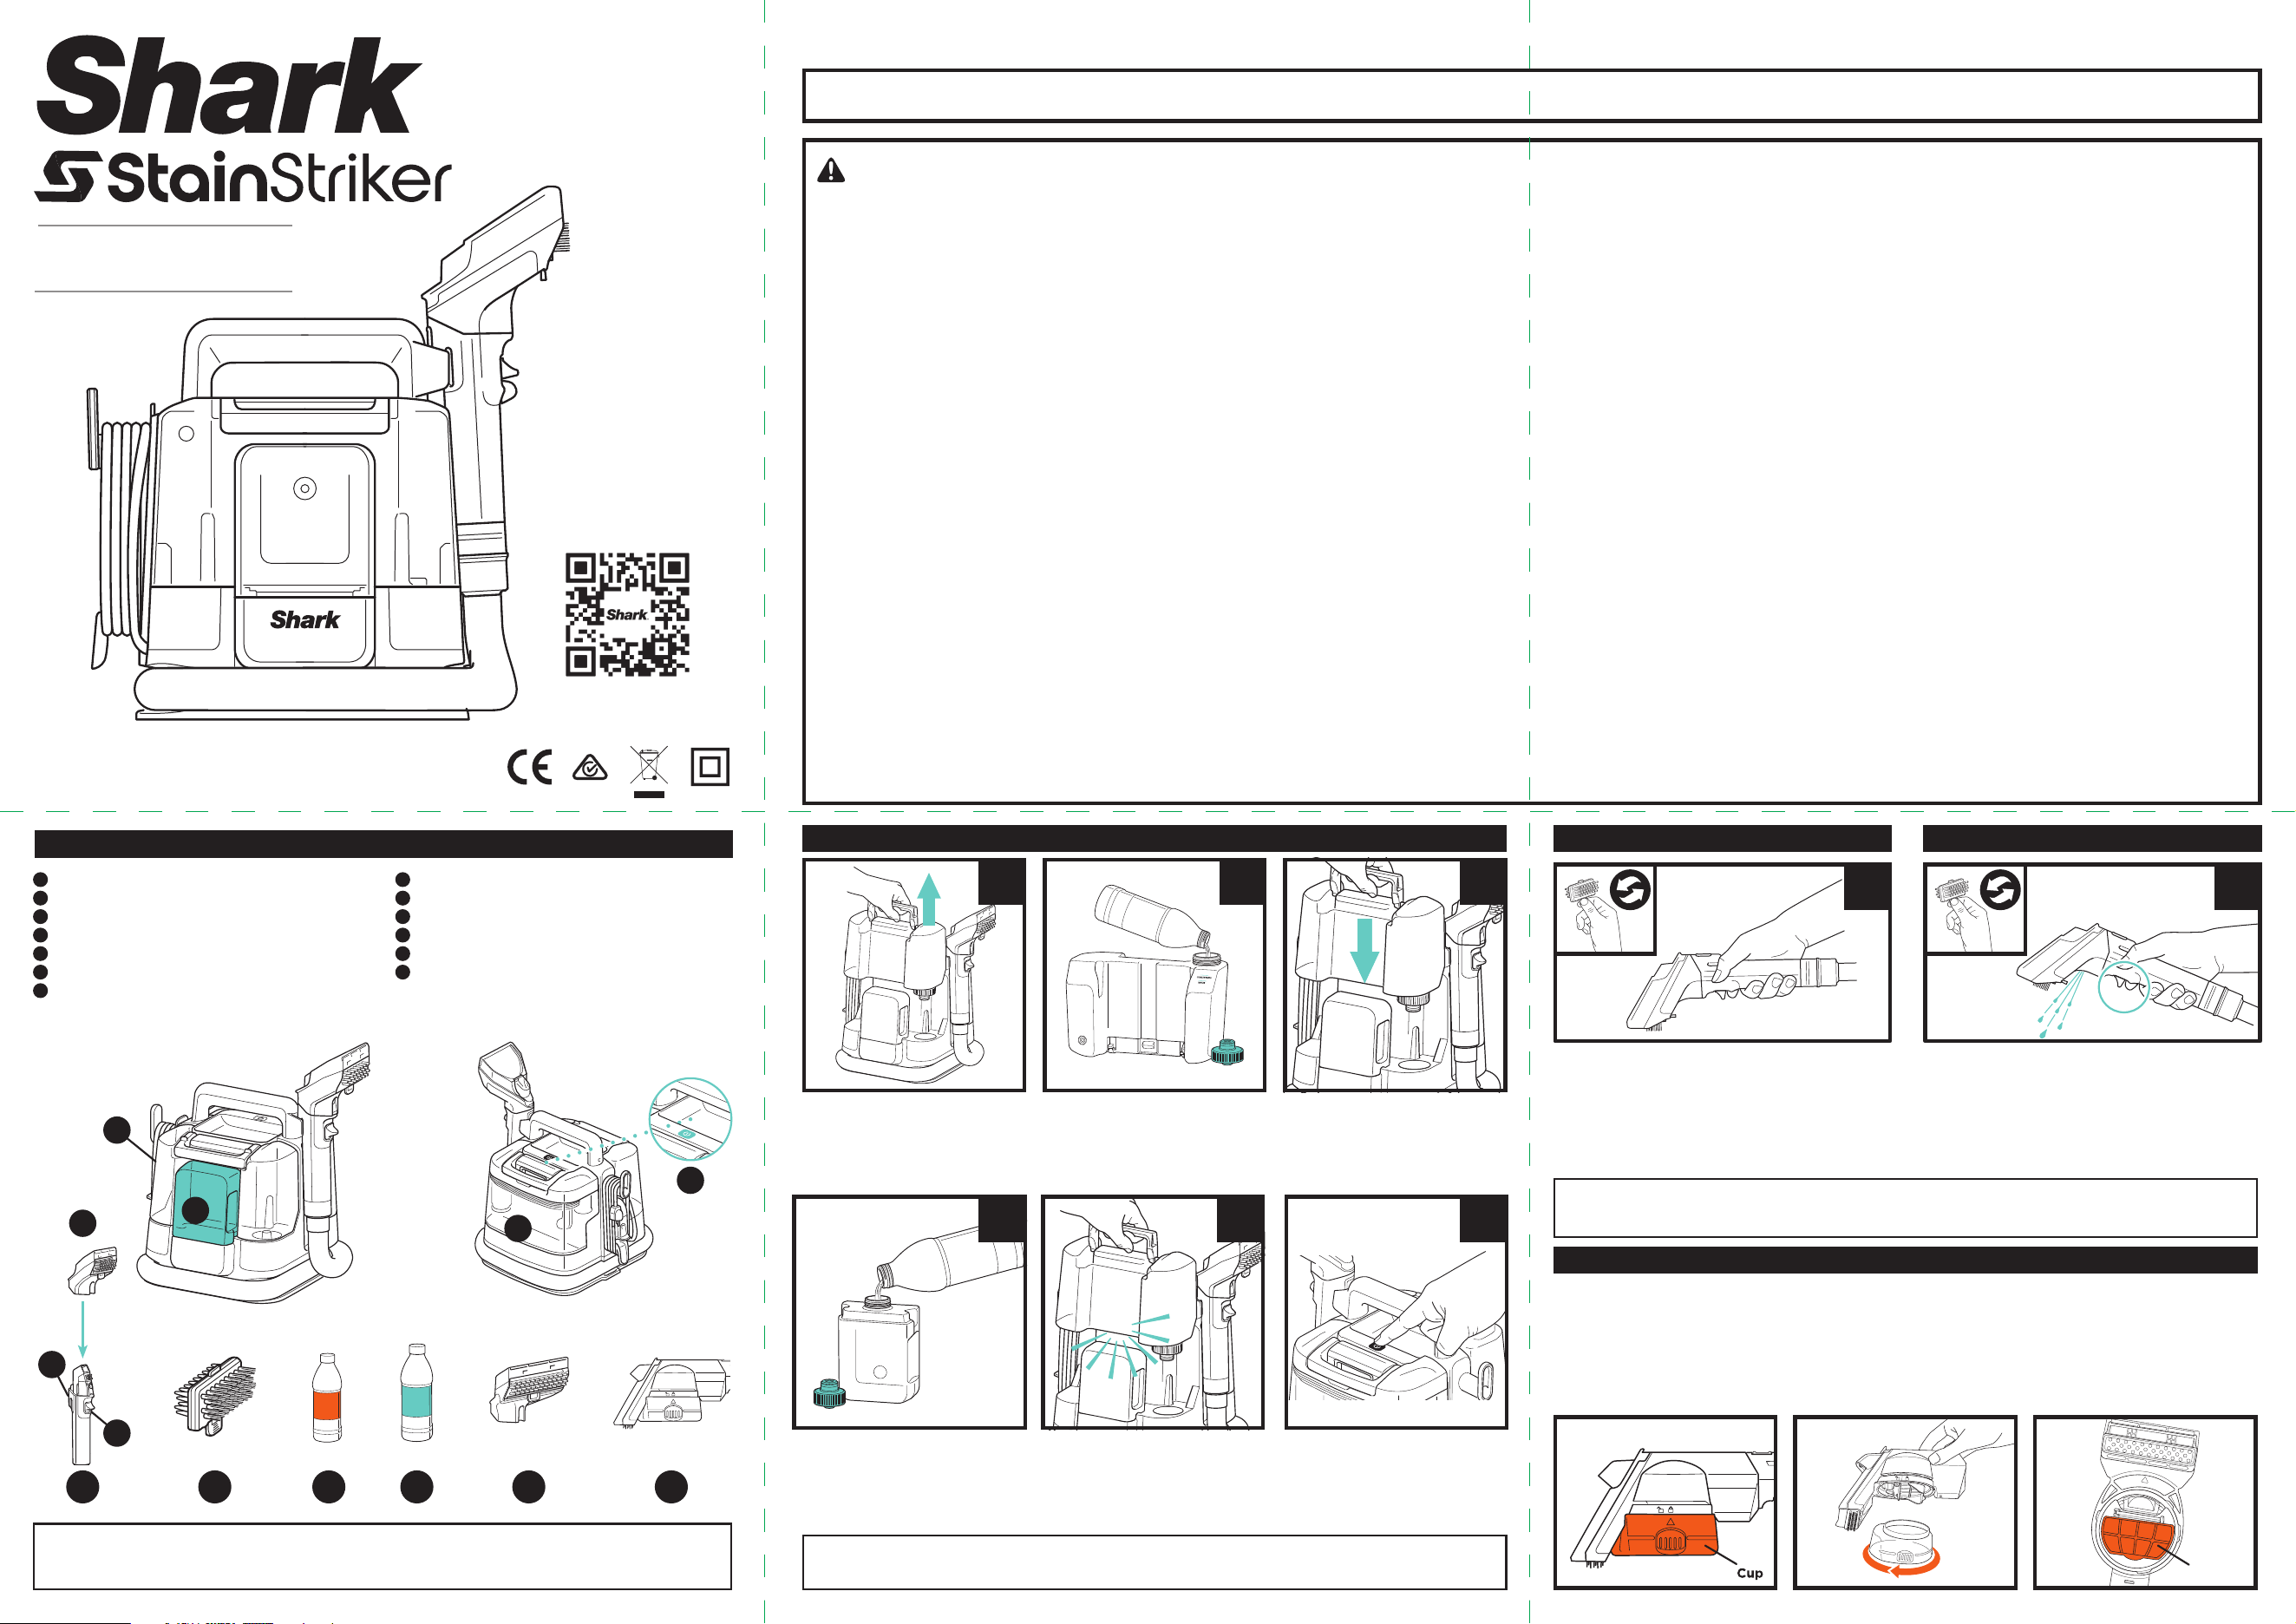
PARTS
NOTE: Not all accessories come with all units. Tools may vary by model.
For additional accessories available, please visit sharkclean.com.au/collections/accessories-parts or
sharkclean.co.nz/collections/accessories-parts
GETTING STARTED
2. Add water to the
CarpetXpert Tank up to
the Water fill line. Then
add CarpetXpert formula
to the Concentrate fill line.
2
WET STAIN CLEANING DRY STAIN CLEANING
5. Replace the cap and
reinstall the tank until it
clicks into place.
5 64
Note: For hard to reach areas, tool can be used without a hand tool attachment using only the crevice tool set up.
Tip: Choosing the bristles - The rubber bristles are best suited for more delicate surfaces and upholstery.
The tough bristles are ideal for stubborn agitation on hard wearing surfaces.
1.
For Wet Stains, follow the Stain Guide located on
the hand tool. Turn ON using the power button
and vacuum up the liquid mess. Spray the stain
area. Scrub with the bristles, then tilt hand tool
forward and drag across the stain area to extract
liquid. Repeat if needed. To avoid longer dry times,
do not over spray.
2.
For Dry stains, follow the Stain Guide located
on the hand tool. Turn ON using the power
button. Scrub the stained area, then spray and
scrub again, then tilt hand tool forwards and
drag across the stain area to extract liquid.
Repeat if needed. To avoid longer dry times, do
not over spray.
3
IMPORTANT: Vacuum with traditional vacuum cleaner first before using Stain Striker.
Use ONLY Shark branded cleaning solutions, CarpetXpert/Oxy Multiplier.
1. Detach the CarpetXpert
Tank from the unit. Turn
the tank over, unscrew cap
and remove.
1
6. Unwrap the power cable
and plug into a power
power point. Turn ON unit
to begin cleaning.
3. Replace the cap, then
reinstall the tank until it
clicks into place.
4.
Detach the StainStriker
tank from the unit and
turn over. Unscrew the cap
and pour the StainStriker
formula into the tank.
21
PET STAIN TRAPPING TOOL
Scan QR to view
HOW-TO VIDEOS
and more.
The Shark Pet Stain Trapping Tool is included with select models. This extracts unhygienic messes,
preventing the mess from reaching the hose and the interior of the unit. DO NOT use the tool to remove
pet hair. To use, spray the wet mess, then extract it as advised above. To avoid oversaturating, do not
over spray. DO NOT exceed the MAX FILL line on the Pet Tool Cup.
Keep the tool level, without tipping to prevent the mess from reaching the hose. After use, turn off the
power of the main unit and empty the tool cup where appropriate. Wash the cup, filter, and the rest of
the tool thoroughly with soap and water after each use.
B
K
C
E
D F
A
J
L
I
G
1
H
2
Filter
WARNING
To reduce the risk of fire, electric shock, Injury, or property damage:
1.
Improper connection of the equipment grounding conductor can result in a risk of electric shock. Check with a qualified electrician or
service person if you are in doubt as to whether the power point is properly grounded.
2.
DO NOT modify the plug provided with the appliance.
3.
DO NOT force into power point or try to modify it.
4.
DO NOT pull, close door, or wrap around sharp edges or corners on the cord. To unplug, grasp the plug, not the cord. Keep cord away
from heated surfaces.
5.
To reduce the risk of fire or electric shock due to internal component damage, use ONLY Shark CarpetXpert/StainStriker formula in the
correct tanks, as intended for use with this appliance. See instructions within this guide.
6.
The areas around where you are cleaning may become wet, use care to avoid slipping and falling.
7.
Use care when removing and reattaching the hand tool to the Spot Cleaner to avoid accidental activation of the cleaning solution.
8.
DO NOT spray solution on your skin or in your eyes.
9.
DO NOT fill solution tanks while installed on the appliance. Remove before filling.
10.
DO NOT operate if there is any wetting of the exterior surfaces of the appliance. If the appliance is wet, dry with a cloth before use.
11.
To reduce the risk of shock and unintended operation, turn off and unplug Spot Cleaner before any adjustment, cleaning,
maintenance, or troubleshooting.
12.
Before each use, carefully inspect each part for damage or wear. If a part is damaged or worn out, immediately discontinue use.
DO NOT use if any part is damaged or if Spot Cleaner is not working as it should, has been dropped, left outdoors, or dropped into
water.
13.
DO NOT immerse or spray water on the body of the Spot Cleaner. To clean the surface, wipe with a dry cloth.
14.
DO NOT allow to be used by children or as a toy. Close supervision is necessary when used near children.
15.
DO NOT handle plug or Spot Cleaner with wet hands.
16.
DO NOT use without the dirty water tank, clean solution tank, or filter in place.
17.
Use only a identical Shark® replacement parts. Only use Shark® branded filters and accessories.
18.
If plugging unit into extension cord, ensure cord is no more than 15m to prevent damage to the motor.
19.
DO NOT place Spot Cleaner on uneven surfaces.
20.
DO NOT use to pick up:
a)
Large objects
b)
Hard or sharp objects (glass, nails, screws, or coins)
c)
Large quantities of dust (e.g., drywall, plasterboard or gyprock dust).
d)
Smoking or burning objects (hot coals, cigarette butts, or matches)
e)
Flammable or combustible materials (lighter fluid, petrol, or kerosene)
f)
Toxic materials (chlorine bleach, ammonia, or drain cleaner)
21.
DO NOT use in the following areas:
a)
Poorly lit areas
b)
Outdoor areas
c)
Spaces that are enclosed and may contain explosive or toxic fumes or vapors (lighter fluid, petrol, kerosene, paint, paint
thinners,
mothproofing substances, or flammable dust).
DO NOT: Engage spray trigger unless pointing at the affected area. WARNING: May still spray when the unit is powered off.
22.
The appliance is not to be used by persons (including children) with reduced physical, sensory or mental capabilities, or lack of
experience and knowledge, unless they have been given supervision or instruction
23.
Children being supervised not to play with the appliance
• If the supply cord is damaged, it must be replaced by the manufacturer, its service agent or similarly qualified persons in order
to avoid a hazard.
24.
The plug must be removed from the socket-outlet before cleaning or maintaining the appliance.
25.
A liquid dispensing system shall specify the amount and type of the liquid to be used.
M
MAINTENANCE MAINTENANCE
STORAGE
CLEANING & DRYING GUIDE
TROUBLESHOOTING
Problem Solution
Inconsistent
spray or no
spray
Ensure there is cleaning solution In both of the solution tanks.
Make sure the CarpetXpert Tank is installed correctly.
Make sure the unit is plugged in and the power is on.
Low suction
or no suction
Make sure the dirty water tank is not overfilled and is installed correctly.
Check the clog access point underneath the unit and clear any debris trapped
inside at the end of the hose.
If a cleaning tool is attached, make sure it is connected correctly.
Remove any debris from the cleaning attachments.
Unit not
turning on
Make sure the unit is plugged in completely.
Try a dierent power point.
Ensure On/O button was pressed.
Liquid leaking
from unit
The dirty water tank may be overfilled.
Make sure the dirty water tank and the CarpetXpert Tank are both installed
correctly.
Make sure the float valve in the dirty water tank is not stuck.
Make sure the unit is on a stable, flat surface.
Solution tanks
leaking
Make sure the caps on the solution tanks are tightened full.
Make sure both tanks are installed correctly and the caps have clicked into
place.
NOTE: Clean unit after every use to avoid odours, bacteria, and mould.
For guarantee claims, you will need to submit a proof of purchase in the form of a valid receipt
that displays date and place of purchase. This warranty does not replace but is in addition to your
statutory rights.
If your product becomes defective due to faulty material or workmanship
• For New Zealand Consumers: We will replace the defective/faulty part with a new product,
free of charge or if the unit is deemed defective/faulty we replace the unit with an equivalent
or upgraded model, at our discretion.
• For Australian Consumers: Our goods come with guarantees that cannot be excluded under
the Australian Consumer Law. You are entitled to a replacement or refund for a major failure
and for compensation for any other reasonably foreseeable loss or damage. You are also
entitled to have the goods repaired or replaced if the goods fail to be of acceptable quality
and the failure does not amount to a major failure.
Replacement items will be covered by the limited warranty for the balance of the warranty period
from the date of the original purchase. Please note: Your warranty is subject to the following
conditions:
• DO NOT operate the appliance with a damaged plug or cord or if the unit has been dropped
damaged or dropped in water.
• To avoid the risk of electric shock, do not disassemble or attempt to repair the appliance
on your own. If the supply cord is damaged, it must be replaced by a qualified electrician to
avoid a hazard. Incorrect re-assembly or repair can cause a risk of electric shock or injury to
persons when the appliance is used.
• The item has not been misused, abused, neglected, altered, modified or repaired by anyone.
The item has been subjected to fair wear and tear.
• The item has not been used for trade, professional or hire purposes.
• The item has not sustained damage through foreign objects, substances or accident
What is not covered?
• Accessories supplied with the item.
• Components that are subject to natural wear and tear caused by normal use in accordance
with operating instructions.
• Unauthorised/improper maintenance/handling or overload is excluded from this warranty.
Where can I buy genuine Shark spares and accessories?
Shark spares and accessories are developed by the same engineers who developed your Shark
floorcare appliance. You’ll find a full range of Shark spares, replacement parts and accessories
for all Shark machines at sharkclean.com.au/collections/accessories-parts. Please remember that
damage caused by the use of non-Shark spares may not be covered under your warranty.
PX200ANZ_IB_MP_Mv4
PLEASE READ CAREFULLY AND KEEP FOR FUTURE REFERENCE.
SHARKNINJA PTY. LTD.
Suite 23.02, Level 23, 45 Clarence St, Sydney NSW 2000
AU 02 8801 7666
NZ 0800 112 660
sharkclean.com.au | sharkclean.co.nz/
Illustrations may dier from actual product. We are constantly striving to improve our products, therefore the
specifications contained herein are subject to change without notice.
This product may be covered by one or more U.S. patents. See sharkninja.com/patents for more information.
© 2024 SharkNinja Operating LLC.
TECHNICAL SPECIFICATIONS
PX200 Series: =220V - 240V, 60 Hz, 450W
RECORD THIS INFORMATION
Model Number: _____________________________________________________________
Date of Purchase: ___________________________________________________________
(Keep receipt)
Store of Purchase: ___________________________________________________________
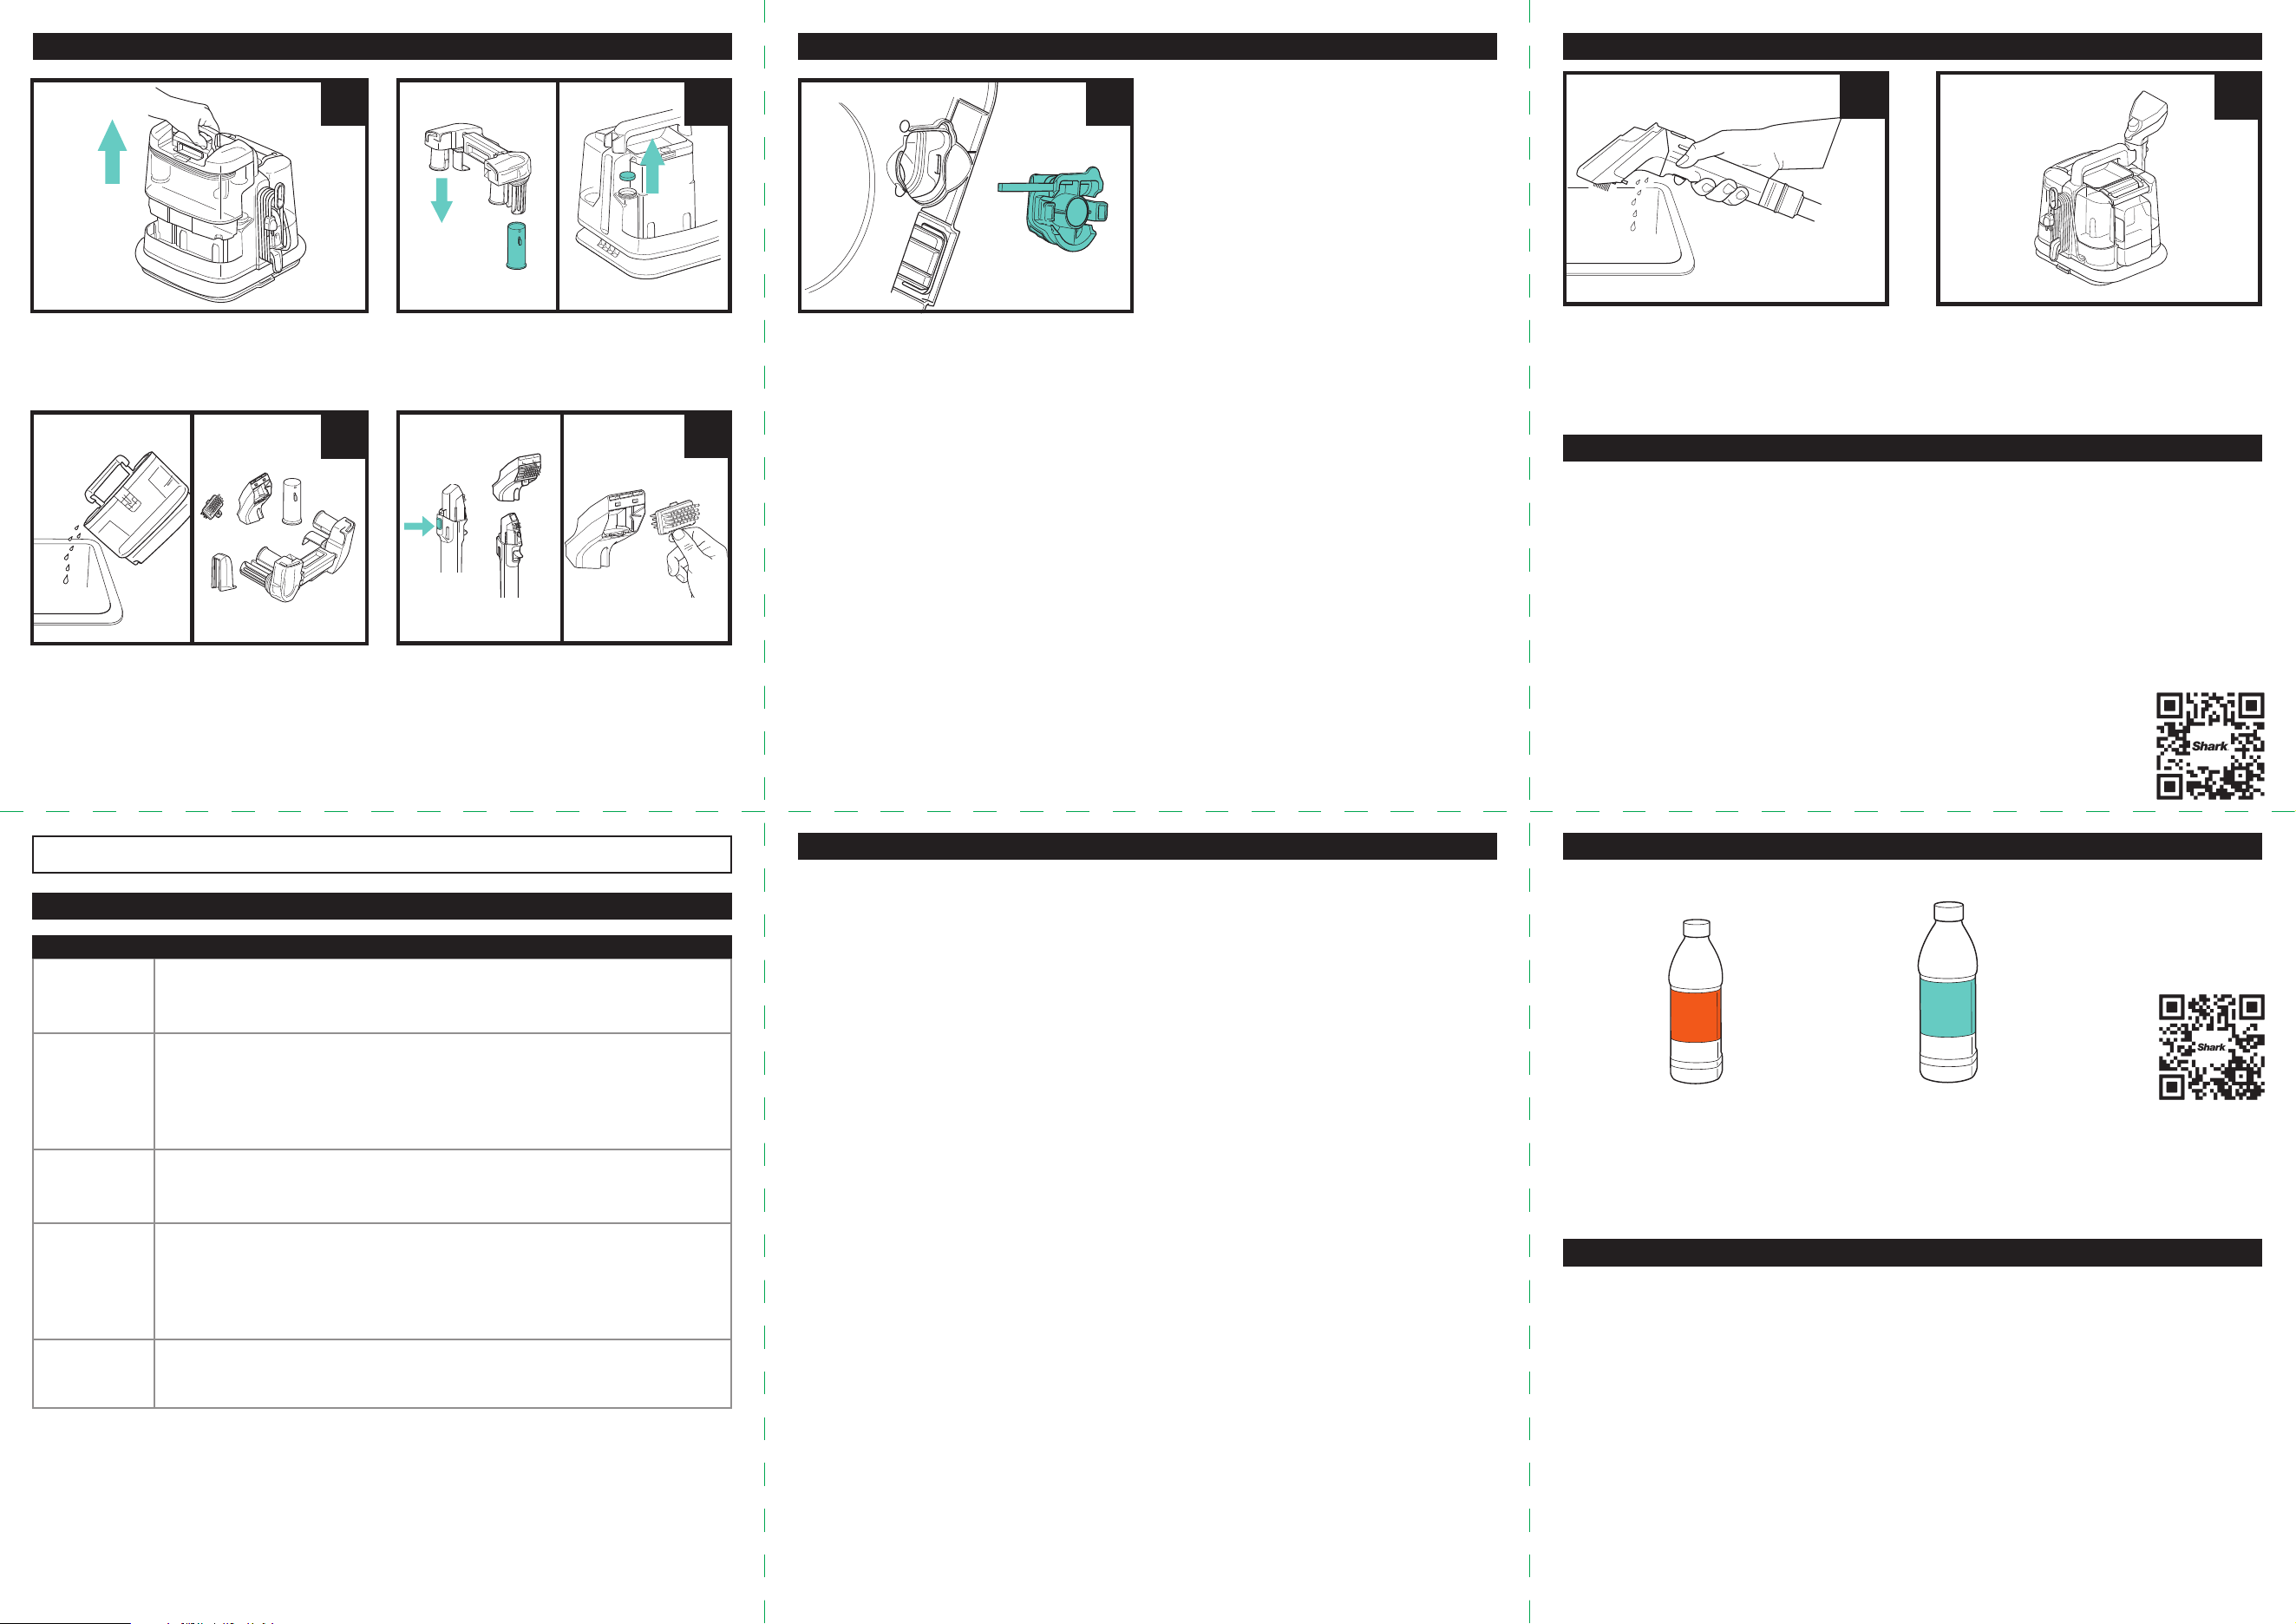
CLEANING FORMULASTWO (2) YEAR LIMITED REPLACEMENT WARRANTY
Shark Deep Clean Pro
Deep carpet cleaning
pro formula for removing
dirt & grime.
Shark OXY Multiplier
Tough stain eliminating
formula for those stubborn
stains & odours.
For information,
scan QR to view
HOW-TO VIDEOS.
1. Unplug the unit and place it near a sink,
toilet, or drain to empty the remaining
liquid from the attached Tool. Clean the
unit and all parts (See Maintenance and
Cleaning the Hose sections).
1
2
2. Clean the float valve and make sure it can
move freely. Remove the foam filter from
the unit whilst cleaning.
2. When cleaning is complete and all parts
have dried, reattach all the tools. Wrap
up the power cord and wrap the hose
around the base for the hand tool in its
holder.
1. Detach the dirty water tank. keeping
the tank upright and set down on a level
surface. Push the handle all the way back
until it clicks, then lift off the lid.
5. To clear any clogged debris, remove the
connecting clip on the bottom of the unit.
Clear all debris, then close the door.
DRYING:
• When extracting the liquid, pass
over the cleaning area in a uniform
pattern, applying downward pressure
throughout.
• Angle the hand tool to engage the
suction vents parallel to the cleaning
surface for optimum suction.
• Continue to pass over the cleaning
area until liquid is no longer extracting
through the hand tool window.
CLEANING:
• When applying the cleaning solution, only
cover the stain at the beginning of the
cleaning process. Avoid oversaturating the
area, or continual spraying during cleaning.
• For older and tougher stains, allow between
5-20 minutes for the cleaning solution to
settle into the stain and get to work.
• For fresh stain cleaning, these can be cleaned
immediately after spraying.
• Always agitate the area thoroughly to break
up the stain. Brush in multiple directions for
best results.
• Always ensure to use the correct solution
dilution measures when setting up the unit
for cleaning.
To order refills of
Shark® Deep Clean
Pro and Shark
OxyMultiplier,
scan the QR code.
1
2
1
2
4
4. Detach the hand tool by pressing the
release button. Remove the cover from
the hand tool to clean the air path. Wash
the bristles on the hand tool thoroughly.
3. Suitably pour away the dirty liquid from
the dirty water tank, tapping off any loose
debris. Clean off any other debris on the
hand tools, bristles, lid and float valve.
Rinse all parts thoroughly with soap and
water and allow to air-dry completely
before reinstalling.
3
5
