Loading ...
Loading ...
Loading ...
13
7. Electricalwork
F1 F2 F3 F4
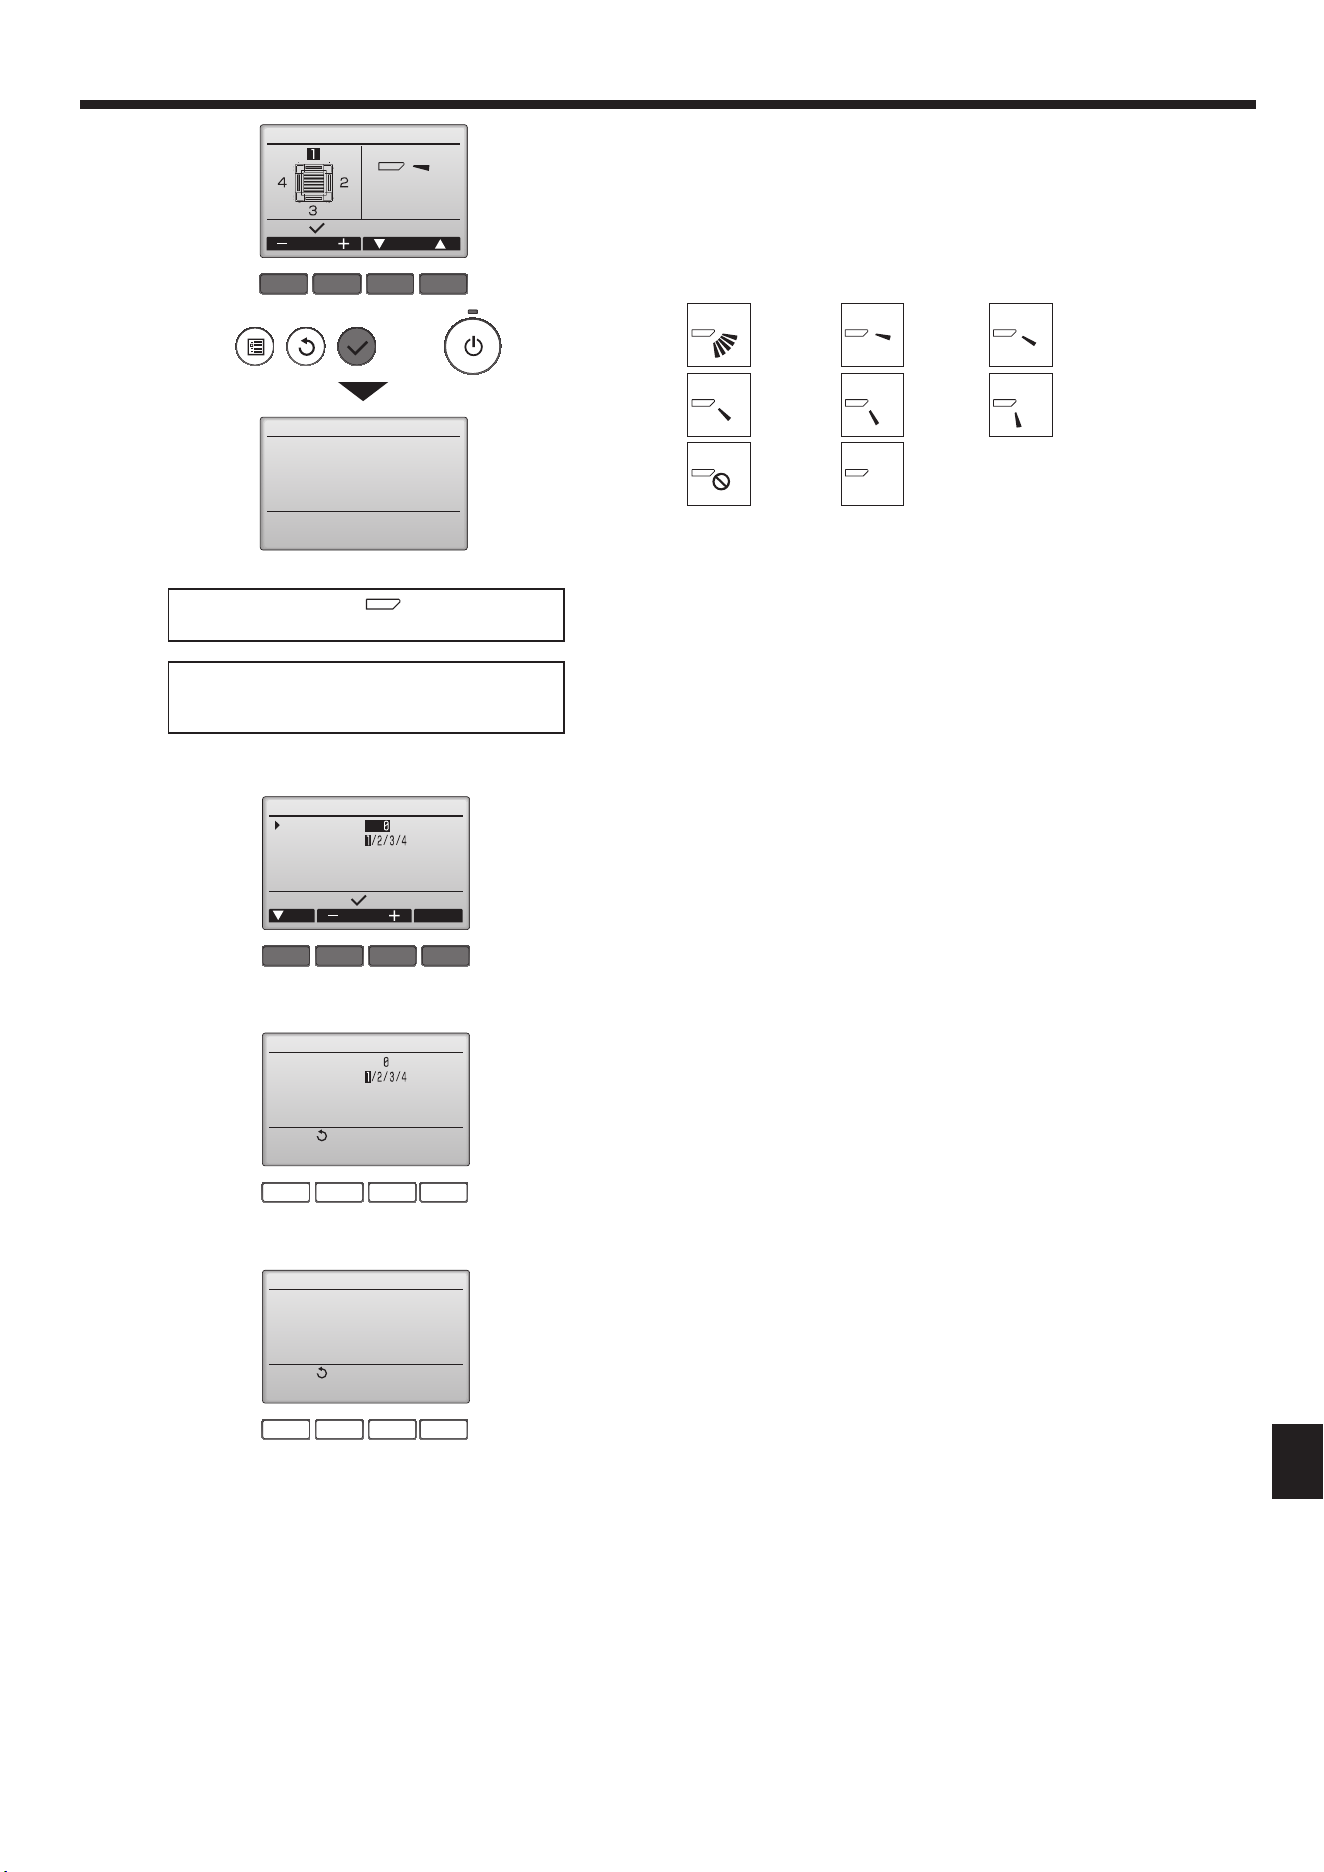
Manual vane angle
Manual vane angle
Select:
Setting
Outlet Angle
Ifalloutletsareselected, willbedisplayedthe
nexttimetheunitgoesintooperation.
Navigatingthroughthescreens
• TogobacktotheMainmenu ..........[MENU]button
• Toreturntothepreviousscreen .....[RETURN]button
Thecurrentvanesettingwillappear.
Selectthedesiredoutletsfrom1through4withthe[F1]or[F2]button.
• Outlet:"1","2","3","4",and"1,2,3,4,(alloutlets)"
Pressthe[F3]or[F4]buttontogothroughtheoptionintheorderof"Nosetting(re-
set)","Step1","Step2","Step3","Step4","Step5",and"Draftreduction*".
Select the desired setting.
■Vanesetting
* Draft reduction
Theairowdirectionforthissettingismorehorizontalthantheairowdirectionfor
the“Step1”settinginordertoreduceadraftyfeeling.Thedraftreductioncanbe
setforonly1vane.
Pressthe[SELECT]buttontosavethesettings.
Ascreenwillappearthatindicatesthesettinginformationisbeingtransmitted.
The setting changes will be made to the selected outlet.
The screen will automatically return tothe one shownabove (step4) when the
transmission is completed.
Makethesettingsforotheroutlets,followingthesameprocedures.
No setting
Step 3
Draft
reduction*
Step 1
Step 4
Alloutlets
Step 2
Step 5
F1 F2 F3 F4
Manual vane angle
Input display:
Cur. Address Check
Ref. address
Unit No.
Identify unit Check button
Conrmationprocedure
1First,conrmbysetting“Ref.address”to0and“UnitNo.”to1.
• Movethecursorto"Ref.address"or"UnitNo."withthe[F1]buttontoselect.
• Selecttherefrigerantaddressandtheunitnumberfortheunitstowhosevanes
aretobexed,withthe[F2]or[F3]button,andpressthe[SELECT]button.
• Ref.address:Refrigerantaddress
• UnitNo.:1,2,3,4
Pressthe[F4]buttontoconrmtheunit.
2Changethe“UnitNo.”inorderandcheckeachunit.
• Pressthe[F1]buttontoselect“UnitNo.”.
Pressthe[F2]or[F3]buttontochangethe“UnitNo.”totheunitthatyouwant
tocheck,andthenpressthe[F4]button.
• Afterpressingthe[F4]button,waitapproximately15seconds,andthencheck
the current state of the air conditioner.
→Thevaneispointingdownward.→Thisairconditionerisdisplayedonthe
remote controller.
→Alloutletsareclosed.→Pressthe[RETURN]buttonandcontinuetheopera-
tion from the beginning.
→Themessagesshowntotheleftaredisplayed.→Thetargetdevicedoesnot
existatthisrefrigerantaddress.
• Pressthe[RETURN]buttontoreturntotheinitialscreen.
3Changethe“Ref.address”tothenextnumber.
• Refertostep1tochangethe“Ref.address”andcontinuewiththeconrmation.
F1 F2 F3 F4
Manual vane angle
Return:
No communication
Check Unit state.
F1 F2 F3 F4
Manual vane angle
Return:
Ref. address
Unit No.
Function setting for unit
with vane fully open.
Loading ...
Loading ...
Loading ...