Loading ...
Loading ...
Loading ...
8
How to Assemble
1. Ensure Gasket is properly inserted into
Lid. Align Gasket behind metal ring and
push Gasket firmly into place.
2. On underside of
Lid, screw Stem
Cap onto Steam
Release Valve
Stem. Push down
Steam Release
Valve Cover over
Stem Cap. Ensure that Steam Release
Valve and Float Valve are clean and free
of debris.
3. Install Condensation Collector at back of
Cooker by aligning top of Collector with
guides on Cooker and snap into place.
4. Place Cooking Pot into Base, and add
liquid and food to Cooking Pot.
5. On top of Lid, place Steam Release
Valve on Valve Stem. Leave in open
position (
).
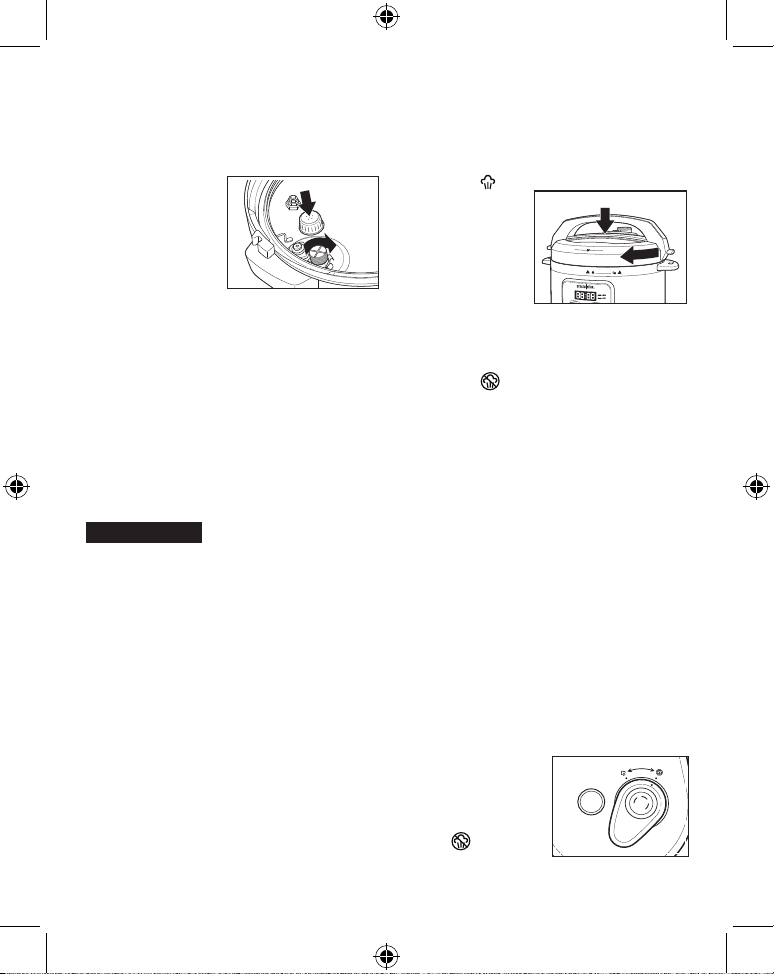
6. Place Lid on
Cooker by
matching arrow
icon on Lid with
unlock icon on
Base. Rotate Lid
clockwise to lock. Arrow icon and lock
icon should align.
7. Turn Steam Release Valve to closed
position ( ).
NOTE: Do not carry Pressure Cooker by
Lid Handle. This Handle is designed for
easy opening and locking Lid.
Using Pressure Cook Modes
w WARNING
Burn Hazard. Steam is hot. Avoid contact with steam. Use care when
releasing steam.
The Cooker has 2 modes that use pressure
and 3 modes that do not use pressure. Refer
to “Cooking Modes Chart” for descriptions,
recommendations, default cook times, and
time ranges for each mode.
1. Once Cooker is assembled (see “How to
Assemble”), add food to Cooking Pot.
• In order to create steam to build
pressure, pressure cooking requires
liquid in the Cooking Pot. Use a
minimum of 1 cup (237 mL) water or
other liquid.
• Do not fill Cooking Pot more than 2/3
full. For foods that expand such as
rice and beans, do not fill more than
1/2 full.
2. Press a mode to select. Once selected,
default cooking time will be displayed.
3. Adjust Cooking Time:
• Adjust cooking time by using the +
and – buttons.
• Steam
Release Valve
should be in
closed
(
) position
(Figure 1).
Open
Close
Figure 1
Loading ...
Loading ...
Loading ...