Loading ...
Loading ...
Loading ...
34
CROSSCUTTING
• NEVER use the fence as a guide or length stop when
crosscutting. The fence can be used to support a block being
used as a cut-o gauge, as discussed below.
• The cut-o piece MUST NEVER be conned in any through-
sawing (cutting completely through the workpiece) operation
to prevent pinching blade which may result in a thrown
workpiece and possibly injury.
• When using a block as a cut-o gauge, the block MUST be at
least 3/4 inch (19mm) thick. It is very important that the rear
end of the block be secured in a position where the workpiece
is clear of the block before it enters the blade to prevent
binding of the workpiece.
You can use the miter gauge in either table slot on non-bevel cuts.
To increase surface area of miter gauge face, add an auxiliary face
(See Cutting Aids section on page 37 of this manual).
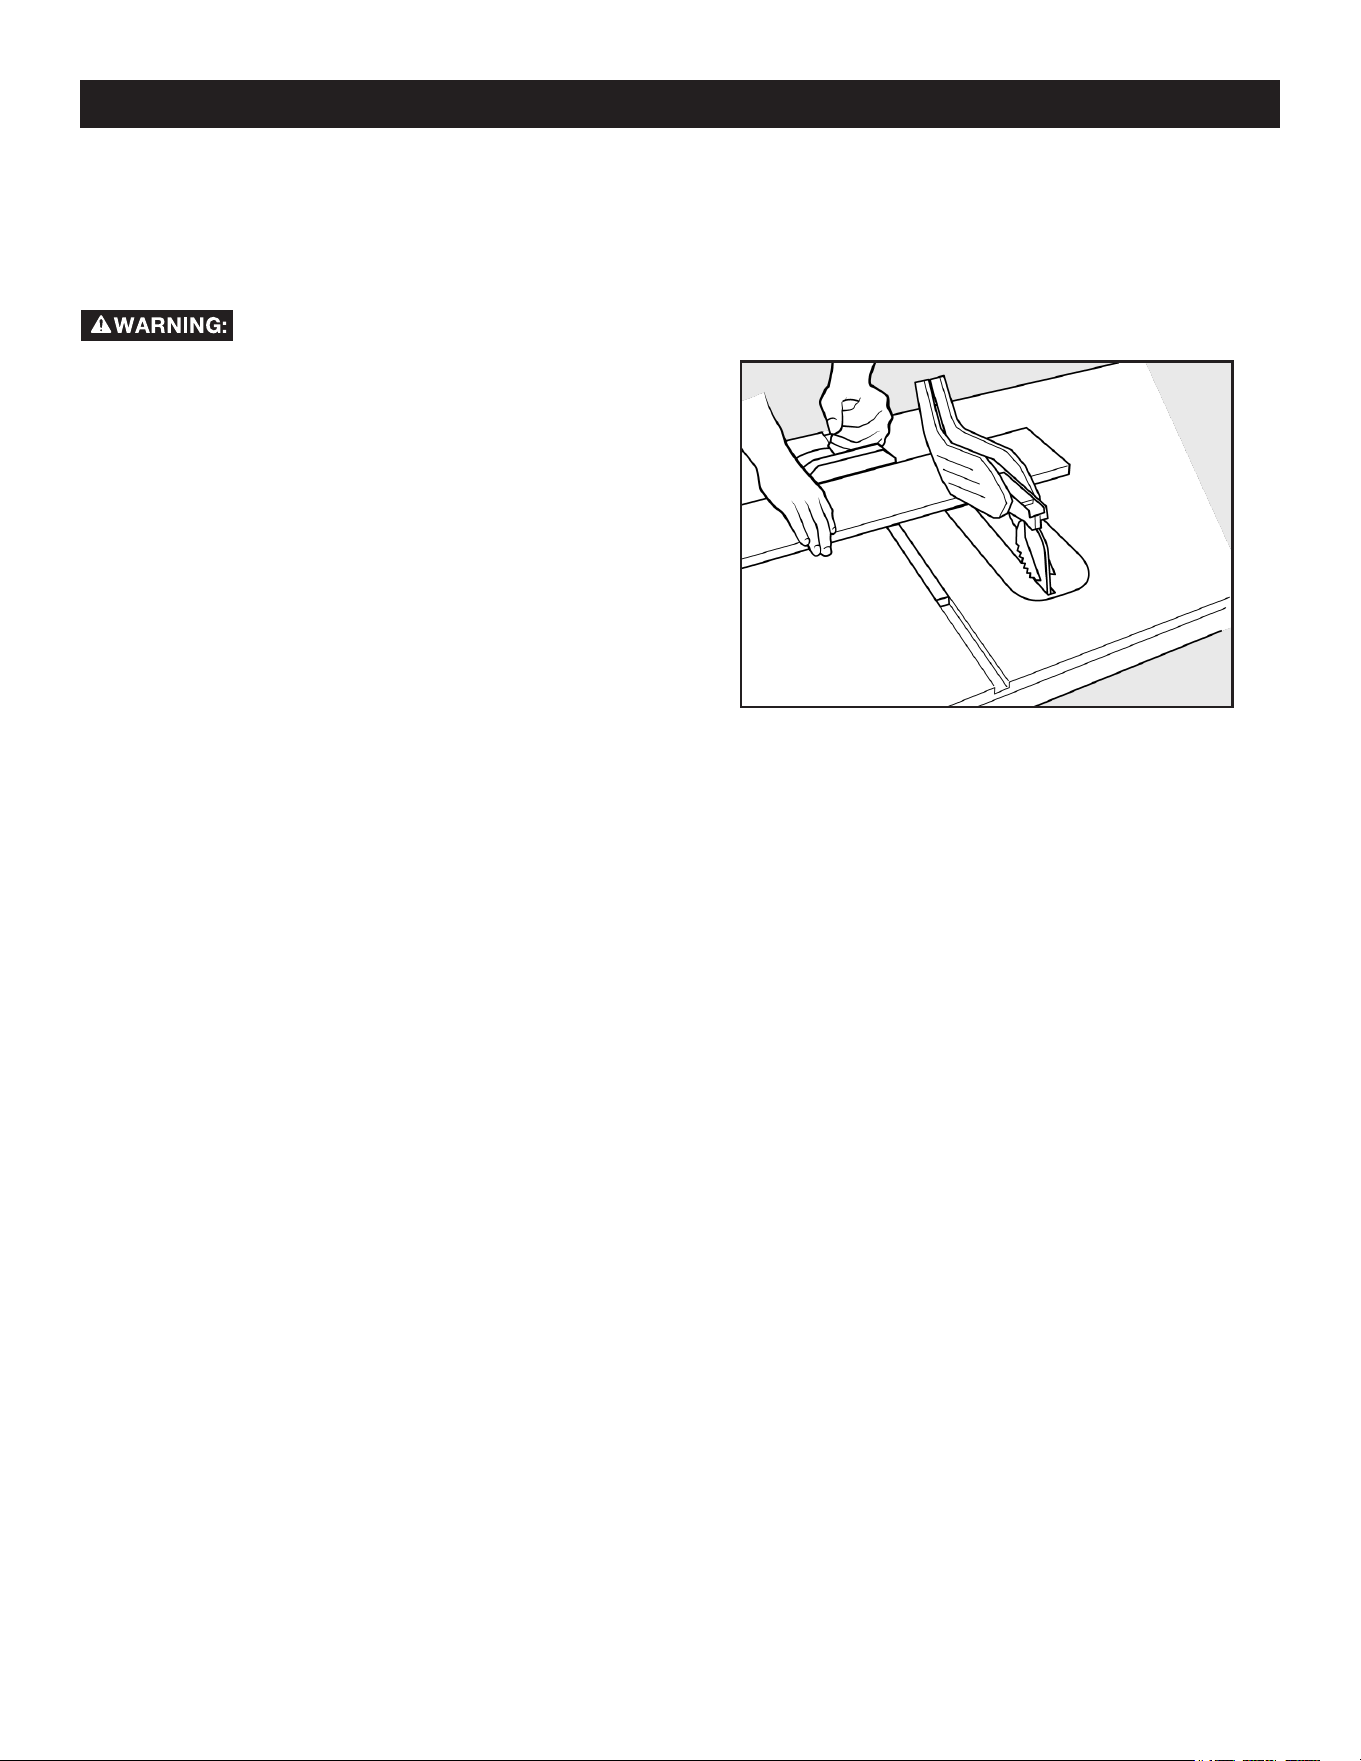
To make a crosscut, refer to Figure 52 and follow this process:
1. Remove rip fence.
2. Make sure bevel angle is set to 0°.
3. Set blade to correct height for workpiece.
4. Place miter gauge in either miter slot.
5. Set miter gauge to 0° and tighten miter gauge lock knob.
6. Stand alongside the workpiece on the same side of the
blade as the miter gauge.
7. Hands MUST remain at least 6 inches from blade
throughout entire cut. If workpiece is too small to KEEP
hands at least 6 inches away from the blade, select
a larger workpiece, or attach an auxiliary face to the
miter gauge and attach workpiece to auxiliary face, For
instructions about making auxiliary faces, see Cutting Aids
section on page 37 of this manual.
8. Make sure the workpiece is clear of the blade - at least 1
inch or 25mm away - before starting the saw.
9. Turn saw on.
10. Let blade build up to full speed before moving workpiece
into the blade.
11. Hand closest to blade should be placed on miter gauge
lock knob and hand farthest from blade should hold
workpiece rmly against the miter gauge face. DO NOT
push or hold onto the free or cut-o side of the workpiece.
12. Slowly feed the workpiece rearward all the way past the
saw blade. DO NOT overload the motor by forcing the
workpiece into the blade.
Figure 52
• Cross cutting is performed predominantly in a perpendicular
direction with the grain of the wood.
• Make sure blade is parallel to miter gauge slot prior to cutting.
Instructions for adjustment on page 29.
MAKING CUTS
13. When cut is complete, turn saw o. Wait for blade to come
to a complete stop before removing cut o piece from
table.
Loading ...
Loading ...
Loading ...