
Loading ...
Loading ...
Loading ...
Get t ing St ar t ed
2
2.1.2 Assigning an IP Address
By default, GV-Fisheye Camera that are connected to LAN without a DHCP server, are
assigned with the static IP address 192.168.0.10. Follow the steps below to assign a new IP
address to avoid IP conflict with other GeoVision devices.
Note:
1. The computer used to set the IP address must be under the same network with the
camera.
2. If your router supports the DHCP server, the camera will obtain a dynamic IP
address from the DHCP server each time it connects to the LAN, instead of using
192.168.0.10. The default setting for automatic IP assignment is not available for
GV-FE2301 / 4301 using firmware V1.06 or earlier.
1. Open your web browser, and type the default IP address
http://192.168.0.10
2. Type the default value admin. Click Apply.
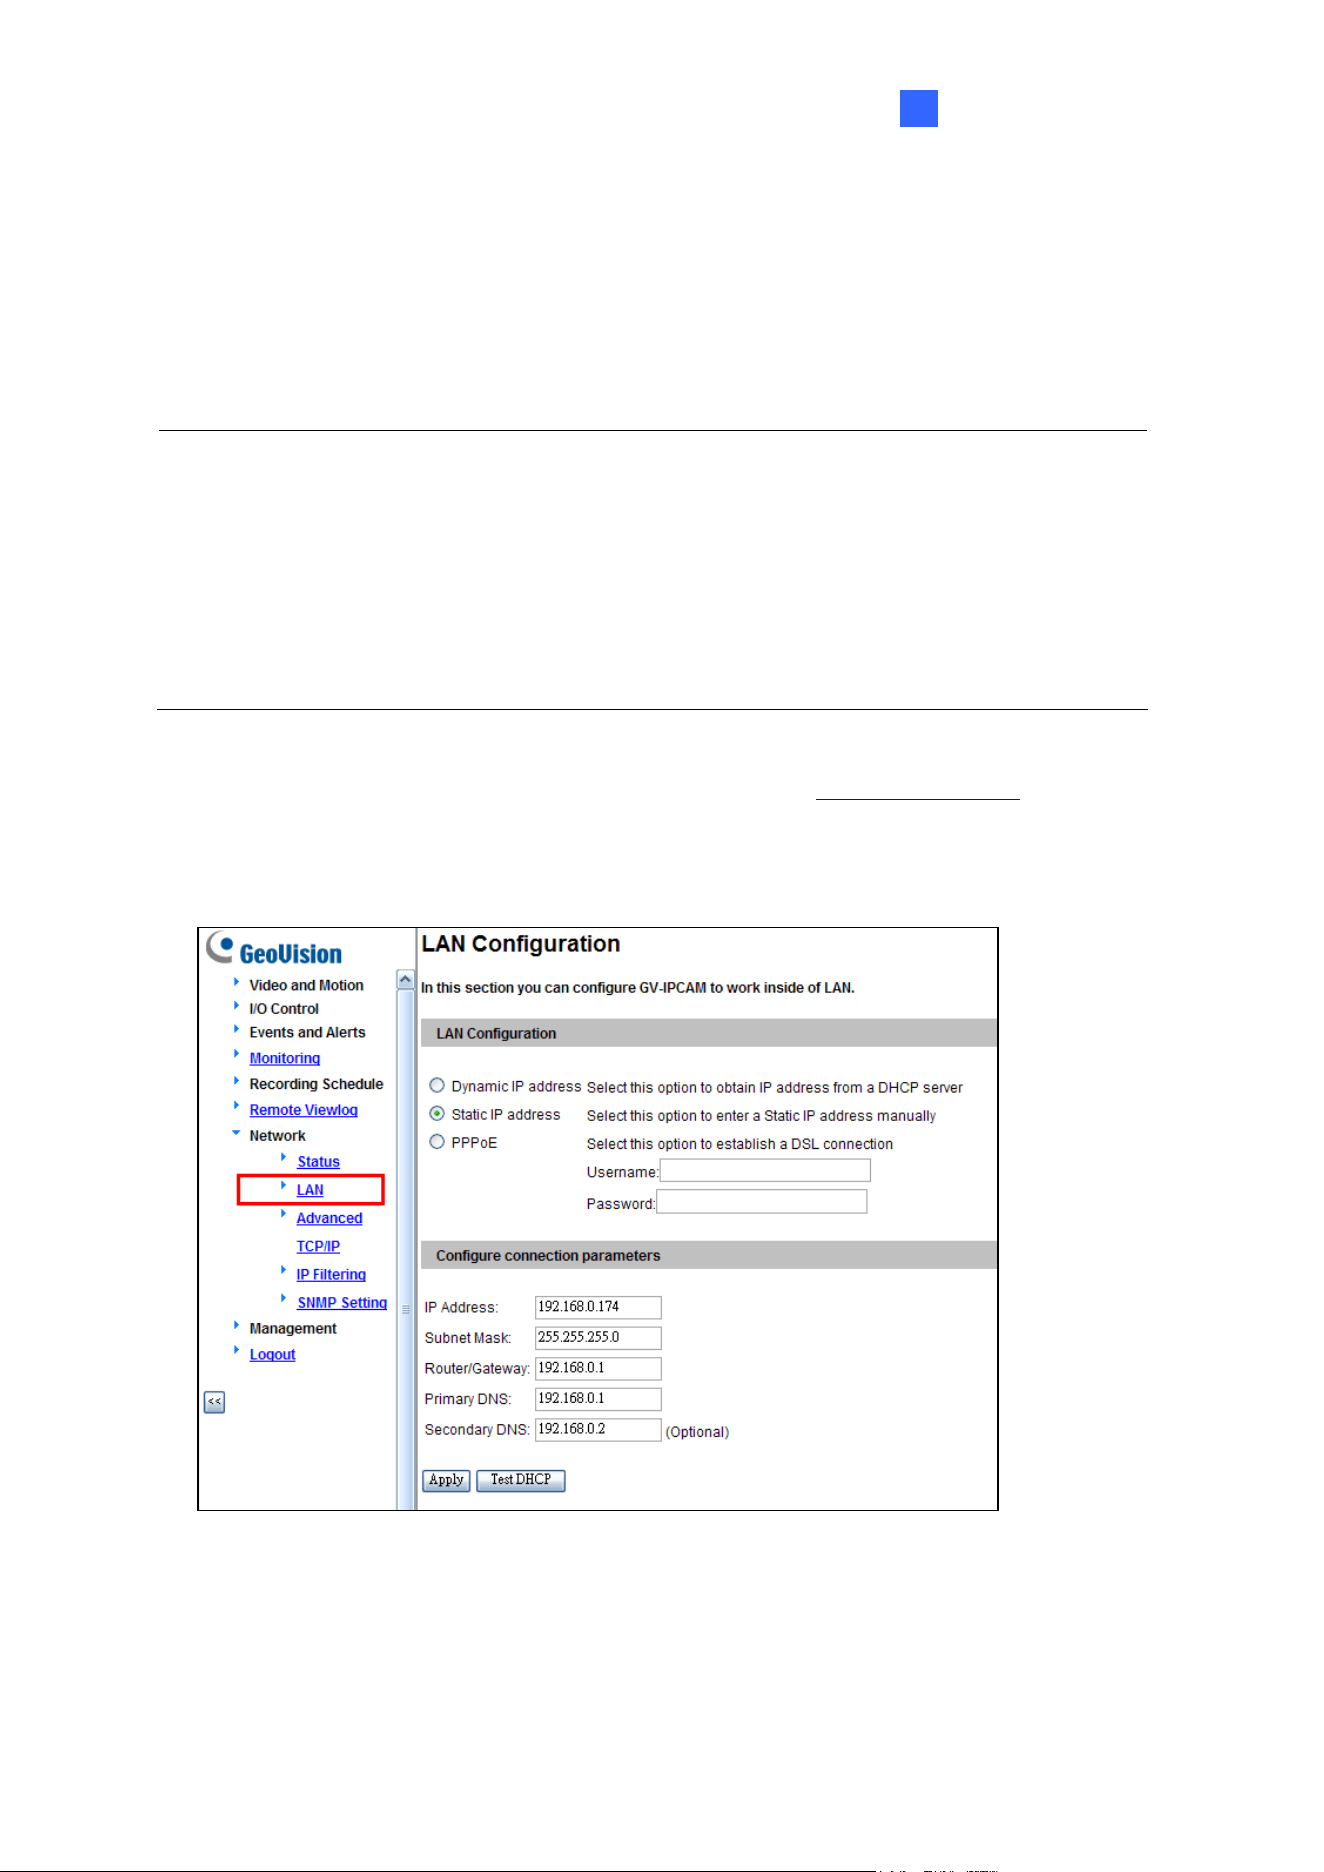
3. In the left menu, select Network and then LAN to begin the network settings.
Figure 2-5
4. Select Static IP address. Type IP Address, Subnet Mask, Router/Gateway, Primary DNS
and Secondary DNS in the Configure connection parameters section.
5. Click Apply. The camera is now accessible by entering the assigned IP address on the
Web browser.
63
Loading ...
Loading ...
Loading ...