Loading ...
Loading ...
Loading ...
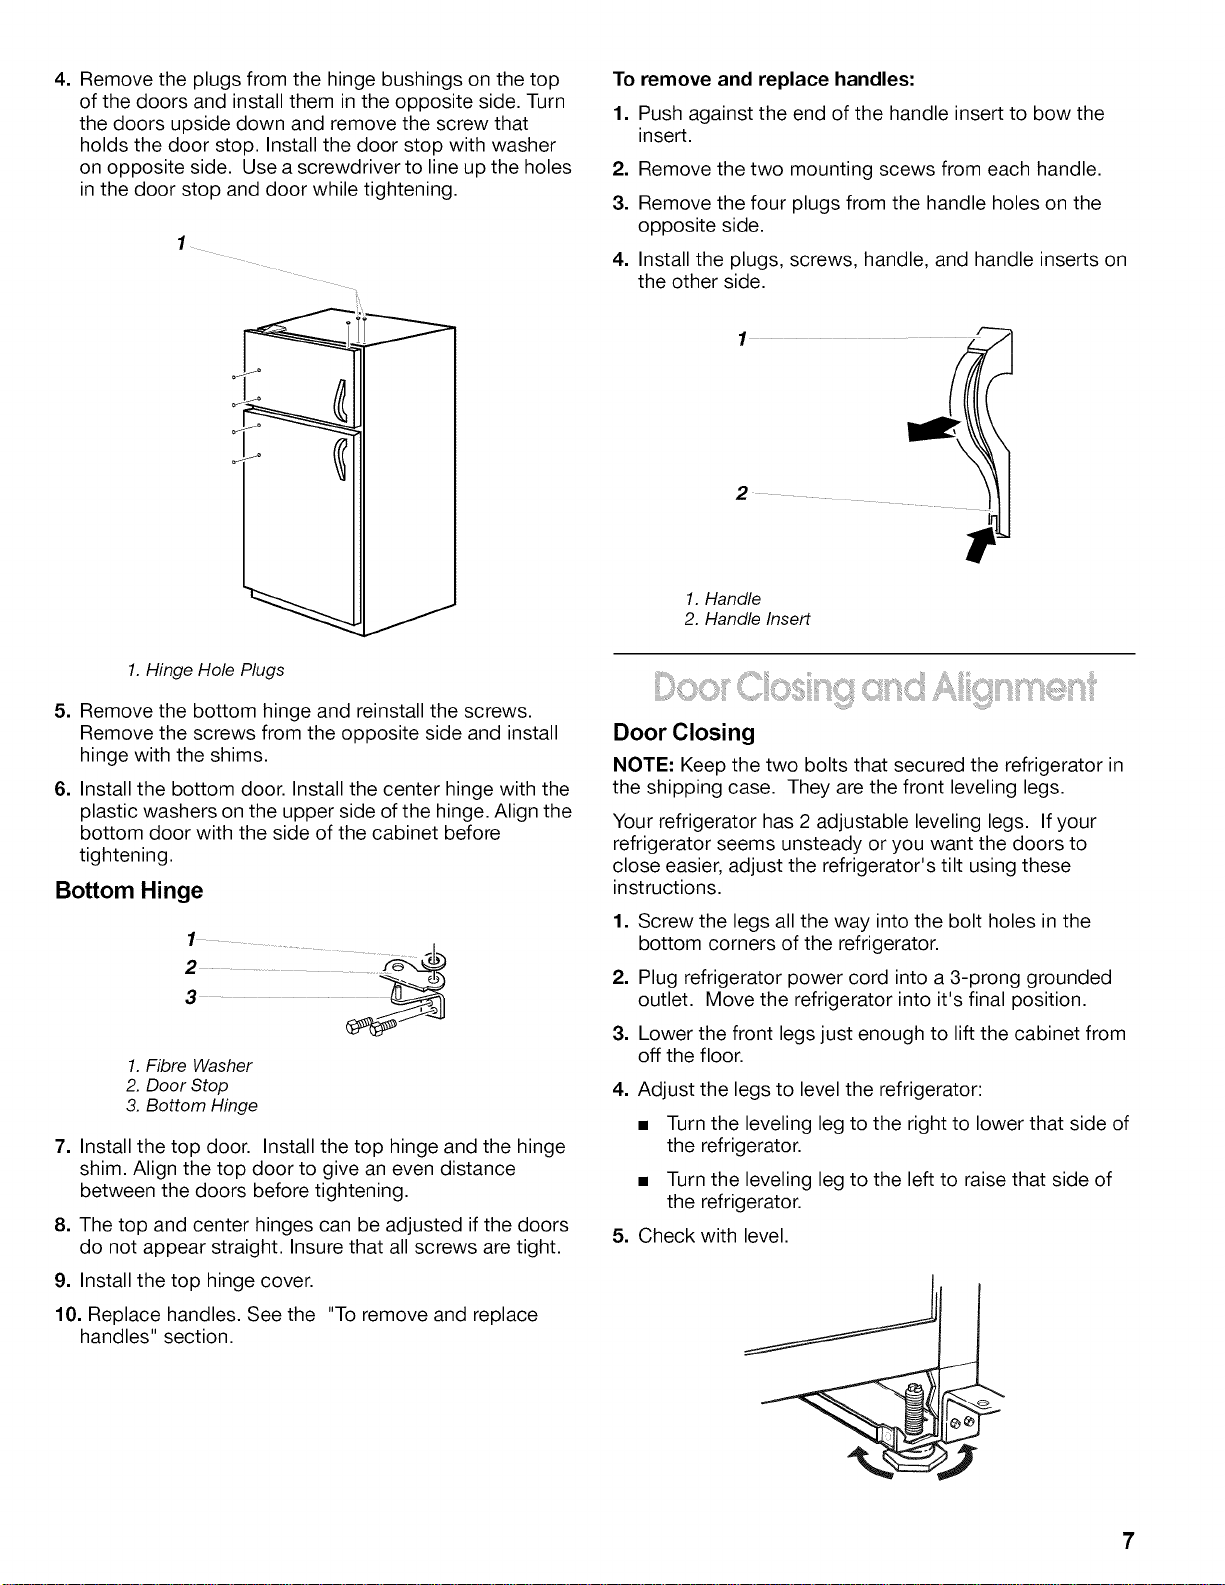
4. Remove the plugs from the hinge bushings on the top
of the doors and install them in the opposite side. Turn
the doors upside down and remove the screw that
holds the door stop. Install the door stop with washer
on opposite side. Use a screwdriver to line up the holes
in the door stop and door while tightening.
1. Hinge Hole Plugs
5. Remove the bottom hinge and reinstall the screws.
Remove the screws from the opposite side and install
hinge with the shims.
6. Install the bottom door. Install the center hinge with the
plastic washers on the upper side of the hinge. Align the
bottom door with the side of the cabinet before
tightening.
Bottom Hinge
1.Fibre Washer
2. Door Stop
3. Bottom Hinge
7. Install the top door. Install the top hinge and the hinge
shim. Align the top door to give an even distance
between the doors before tightening.
8. The top and center hinges can be adjusted if the doors
do not appear straight. Insure that all screws are tight.
9. Install the top hinge cover.
10. Replace handles. See the "To remove and replace
handles" section.
To remove and replace handles:
1. Push against the end of the handle insert to bow the
insert.
2. Remove the two mounting scews from each handle.
3. Remove the four plugs from the handle holes on the
opposite side.
4. Install the plugs, screws, handle, and handle inserts on
the other side.
1. Handle
2. Handle Insert
Door Closing
NOTE: Keep the two bolts that secured the refrigerator in
the shipping case. They are the front leveling legs.
Your refrigerator has 2 adjustable leveling legs. If your
refrigerator seems unsteady or you want the doors to
close easier, adjust the refrigerator's tilt using these
instructions.
1. Screw the legs all the way into the bolt holes in the
bottom corners of the refrigerator.
2. Plug refrigerator power cord into a 3-prong grounded
outlet. Move the refrigerator into it's final position.
3. Lower the front legs just enough to lift the cabinet from
off the floor.
4. Adjust the legs to level the refrigerator:
• Turn the leveling leg to the right to lower that side of
the refrigerator.
• Turn the leveling leg to the left to raise that side of
the refrigerator.
5. Check with level.
7
Loading ...
Loading ...
Loading ...