Loading ...
Loading ...
Loading ...
Preparing the Handle Unit and LCD Monitor
28
Preparing the Handle Unit and LCD Monitor
By attaching the LA-V1 LCD Attachment Unit
1
to the LM-V1 LCD Monitor
1
, you can attach the LCD monitor to
the HDU-2 Handle Unit
1
or directly to the camera body itself. For details on adjusting the LCD monitor, refer to
Using the LCD Monitor
(A 40) and
Adjusting the LCD Screen or Viewfinder
(A 41).
1
Supplied accessory for the C200; optional accessory for the C200B.
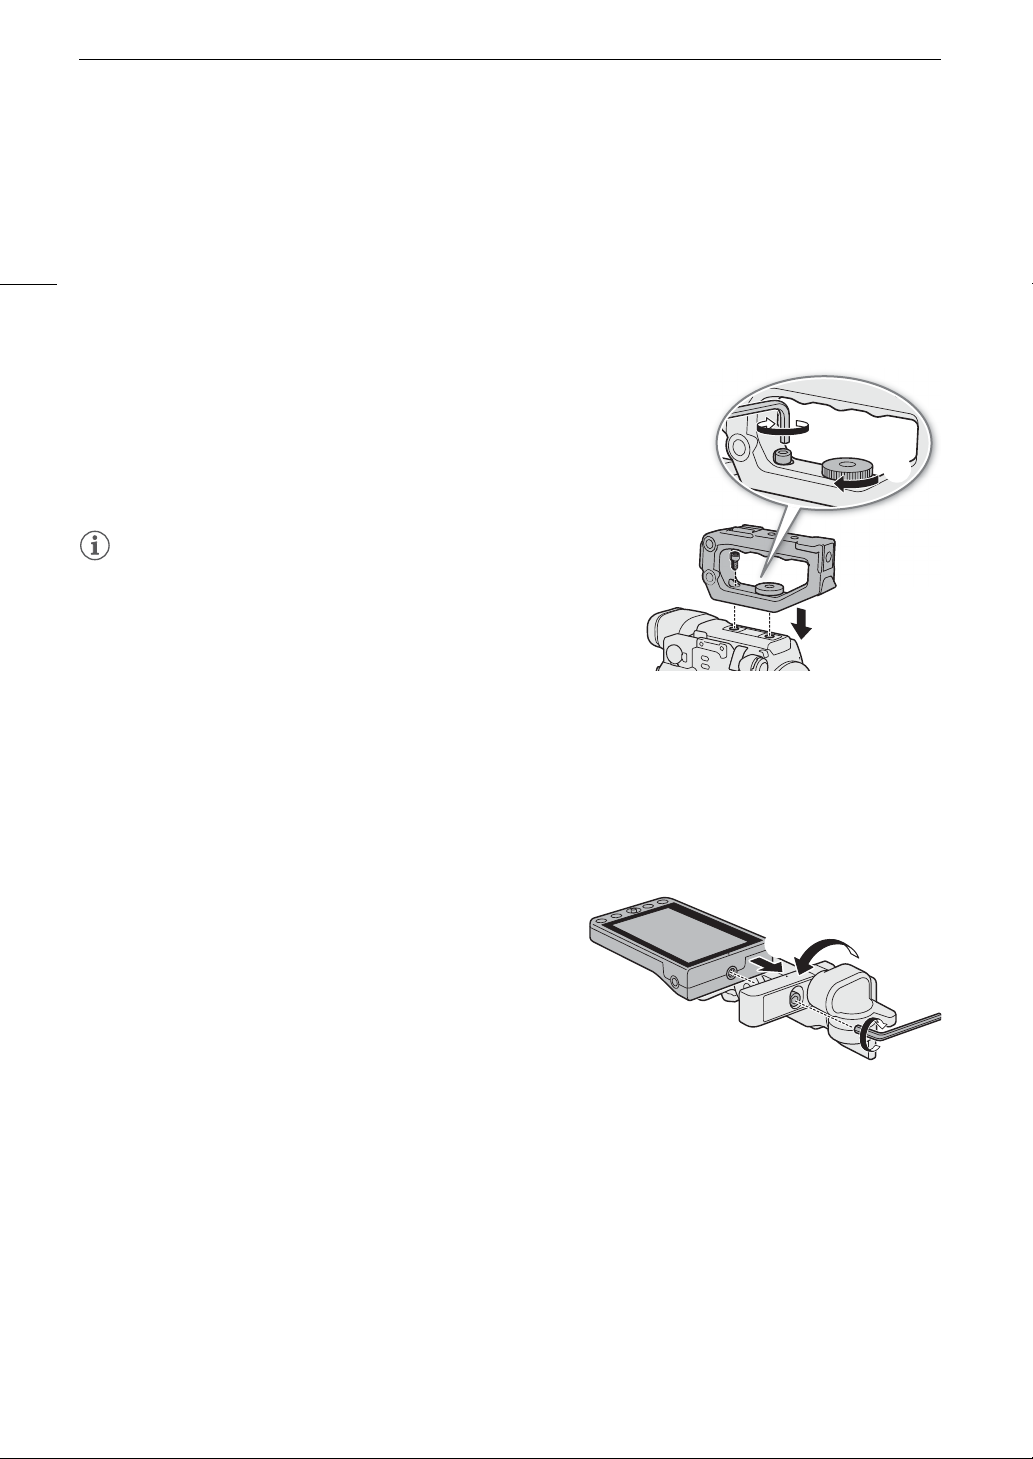
Attaching the HDU-2 Handle Unit
1 Attach the handle unit to the camera.
2Turn the lock screw.
3 Use the hex wrench
2
and hex socket head bolt
2
to secure the
handle unit firmly.
2
Supplied with the HDU-2.
NOTES
• The handle unit has 0.64 cm (1/4") sockets, giving you the option to
attach a variety of commercially available accessories.
• The handle unit has two through-holes (∅ 8.8 mm (0.35 in.)) that are
35.5 mm (1.4 in.) apart center-to-center.
Attaching and Removing the LM-V1 LCD Monitor
Once you attach the LCD monitor to the LCD attachment unit, you can attach it to the camera body or handle
unit. Further ahead you will find details about using the LCD panel and adjusting the LCD screen (A 40).
Attaching the LCD Monitor
To attach the LCD monitor to the handle unit
1 Set the
Q
switch to OFF.
2 Rotate the LCD monitor mount 180° toward the LCD
attachment unit lock screw and attach the LCD monitor.
•Align the
Í
marks on the LCD monitor and LCD
monitor mount.
• Use the hex wrench
1
(for 0.64 cm, 1/4" screws) to
secure it firmly with the LCD monitor fixation bolt on the LCD monitor mount.
1
Supplied with the HDU-2.
• Based on your needs, you can mount the LCD monitor so that it faces toward or away from you.
3 Align the LCD attachment unit mount to the handle unit’s front accessory mount and then tighten the LCD
attachment unit lock screw.
햲
햴
햳
햳
햳
Loading ...
Loading ...
Loading ...