Loading ...
Loading ...
Loading ...
INSTALLATION
PAGE 23
ENGLISH
Step 2.6
Step 2.7
Step 2.8A
Step 2.8B
2.6
Step 2.6
Drill the piping hole using a hole saw of the correct diameter.
Angle the drill with a downward pitch to the outside wall so
that the outside hole will be ¼” lower than the inside hole,
giving the hole the proper angle for condensate drainage.
2.7
Step 2.7
inside wall.
properly behind the wall unit housing.
2.8
Step 2.8A & 2.8B
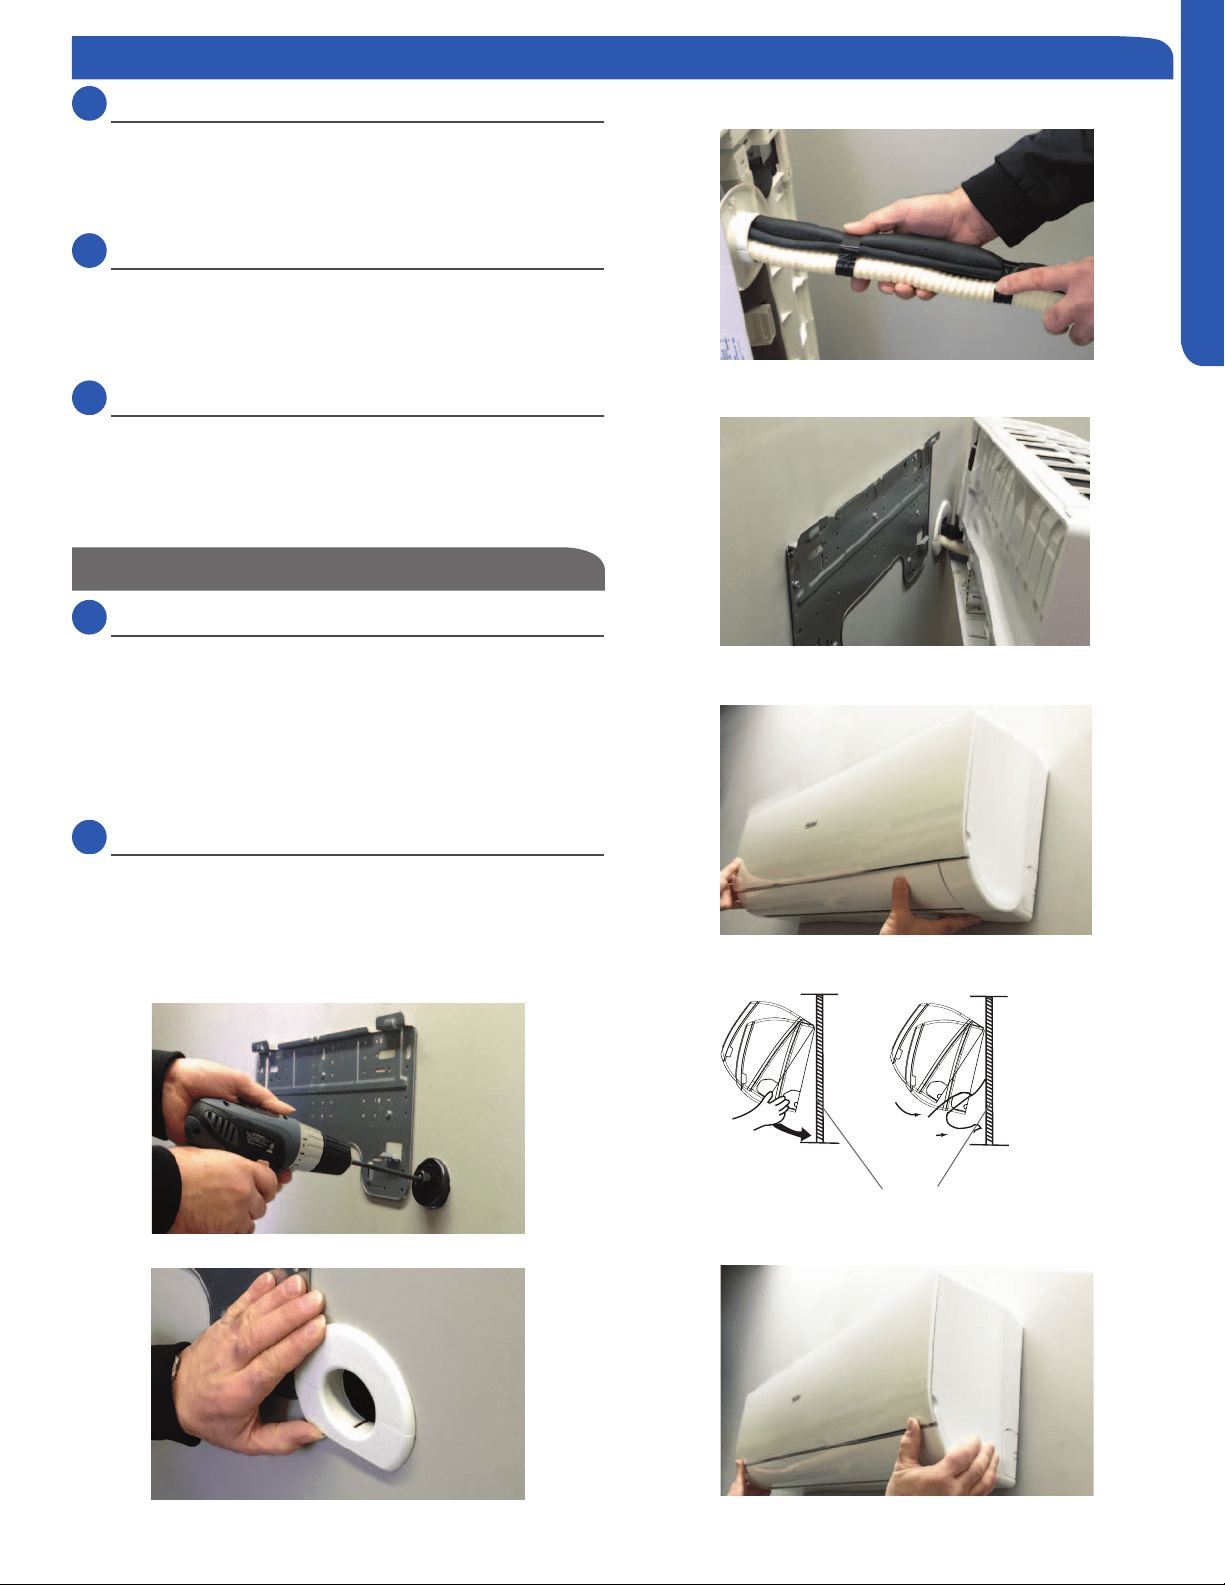
Bundle the refrigerant piping, drain piping and wiring with
tape and pass the bundle through the piping hole.
available in the indoor unit to make the connections to the
terminal block.
Mounting the Indoor Unit Onto the Wall Plate
2.9
Step 2.9
With the top of the indoor unit closer to the wall, hang the
indoor unit on the upper hooks of the mounting plate. Slide
the unit slightly side to side to verify proper placement of the
indoor unit on the mounting plate. Rotate the lower portion
of the indoor unit to the mounting plate, and lower the unit
onto the lower hooks of the mounting plate. (Illustration 2)
Verify the unit is secure.
2.10
Step - 2.10
Slightly raise the entire unit vertically, pull the lower portion
the upper hooks of the wall plate.
Step 2.9
Step 2.10
mounting plate
Illustration 2
Step 2 - Installation of the Wall Mount Unit
Loading ...
Loading ...
Loading ...