Loading ...
Loading ...
Loading ...
5
SET
CO DE
OSC
SET
CO DE
OSC
SET
CO DE
OSC
SET
CO DE
OSC
SET
CO DE
OSC
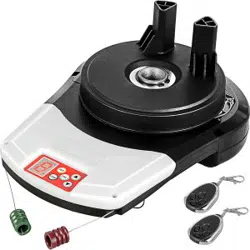
Side Room Requirements
Picture 1 shows the minimum side room that is
required: The distance between the edge of the
door curtain and the inside of the bracket should
be 85mm.; the distance between the edge of the
door curtain and the outside of the bracket
should be 135mm.
Picture 2 demonstrates the recommended side
room: The distance between the edge of the
door curtain and the inside of the bracket should
be more than 110mm; the distance between the
edge of the door curtain and the outside of the
bracket should be more than 160mm.
Picture 1
Picture 2
Picture 3
Picture 4
weight balancing
bars
Minimum side distance
Recommended side
distance
1 Check the door carefully
Before the installation of door opener, please check
the door opener carefully, and ensure the rolling
door is well balanced and in a good condition.
Therefore, the door can move smoothly in the
guide rail and can stay at around 90cm—120cm
above the ground. The force of door lifting or
downing should not over 20kg.
2 Fixing the door weight balancing bars
Move the door manually to half open position, and
place the weight balancing bars equally apart on
the door bottom, then fix them with the fasteners
provided . (see picture 3 ) Check the door again, if
the door moves heavily in the guide rail, it may
require extra tension to be added to the door
springs. In this case , please refer to the door
installation instructions from door manufacturer on
how to adjust the door spring.
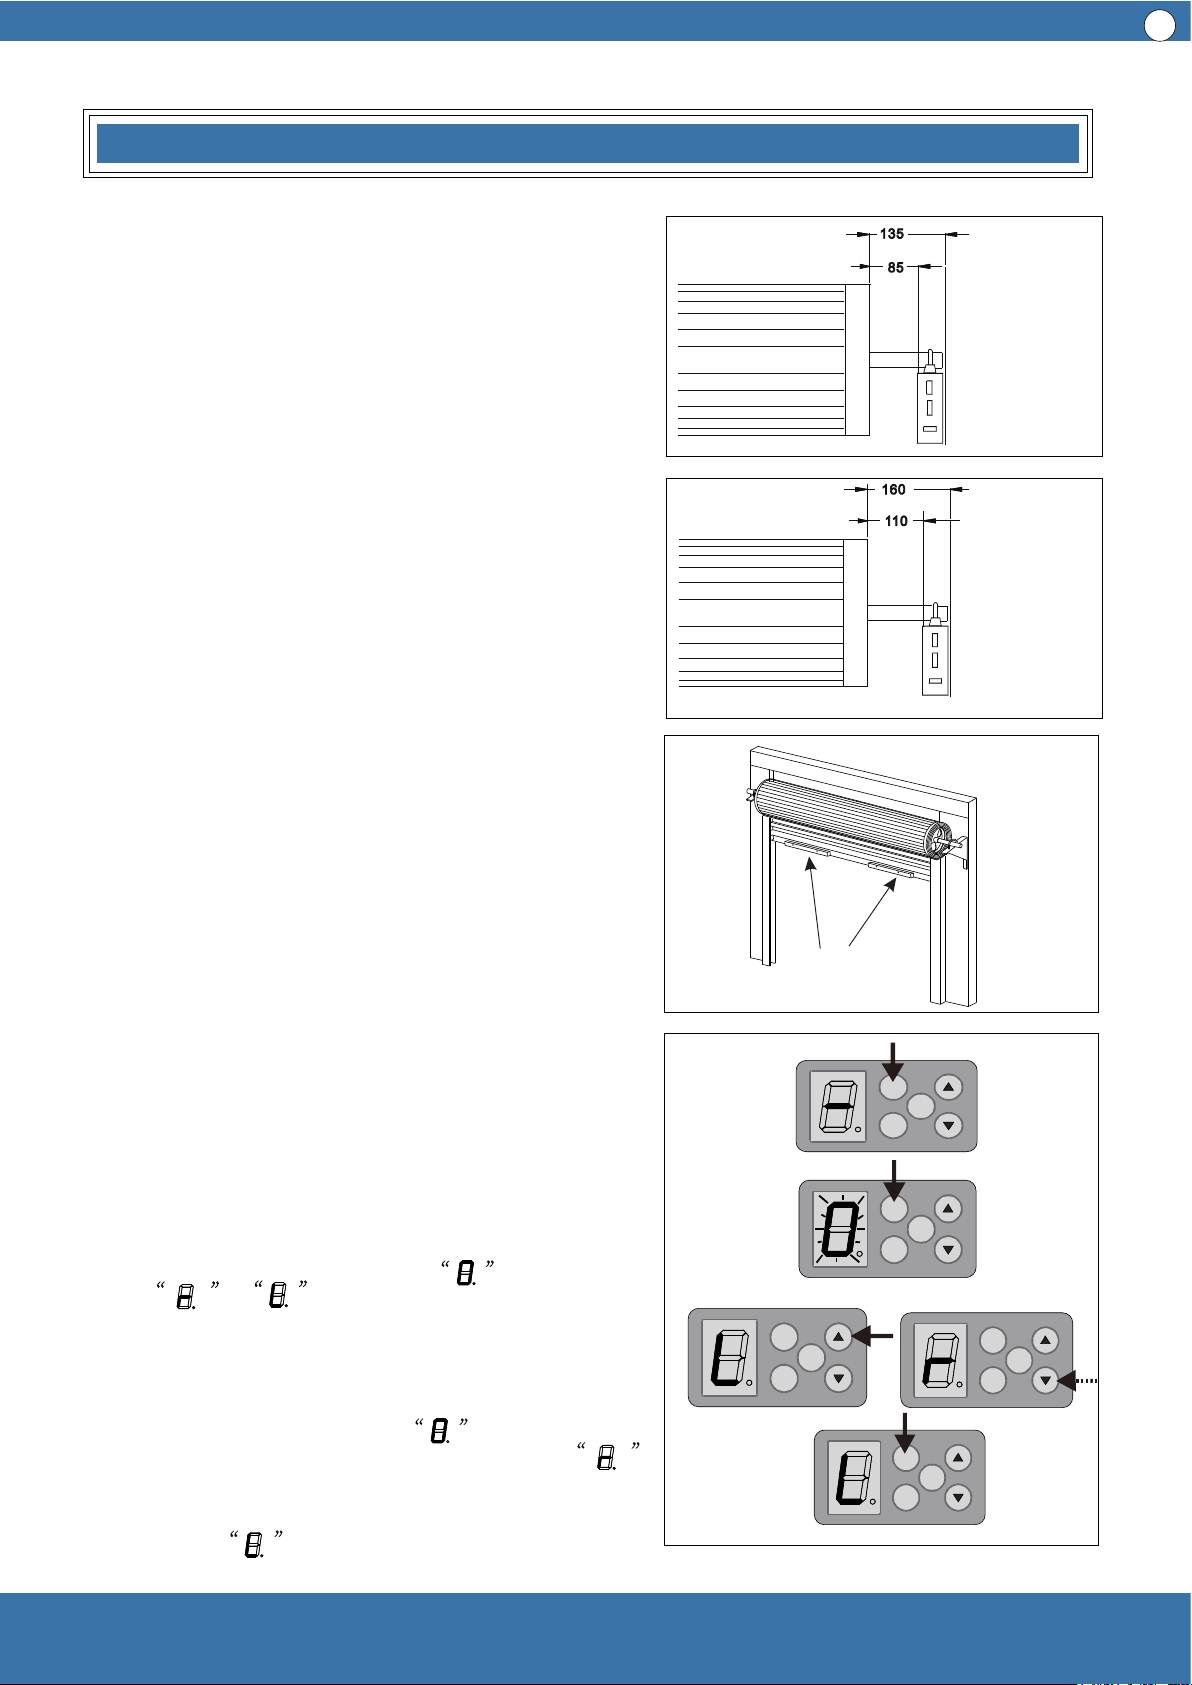
3 Door opener on the right or left
The ready opener is set to be install on the right
side, in the case of left side installation, please
reset the function setting button
from to
Operating as follows, see picture 4:
3.1 After the power is on, press the function setting
button (SET) for 4 seconds and then release, when
the digital display tube shows , press SET
button again, if the digital display tube shows ,
which indicates to right side installation, press UP
(▲) or DOWN (▼) button, when the digital display
tube shows , that means left side installation,
the press SET once more, then check and store.
Installation
Loading ...
Loading ...
Loading ...