Loading ...
Loading ...
Loading ...
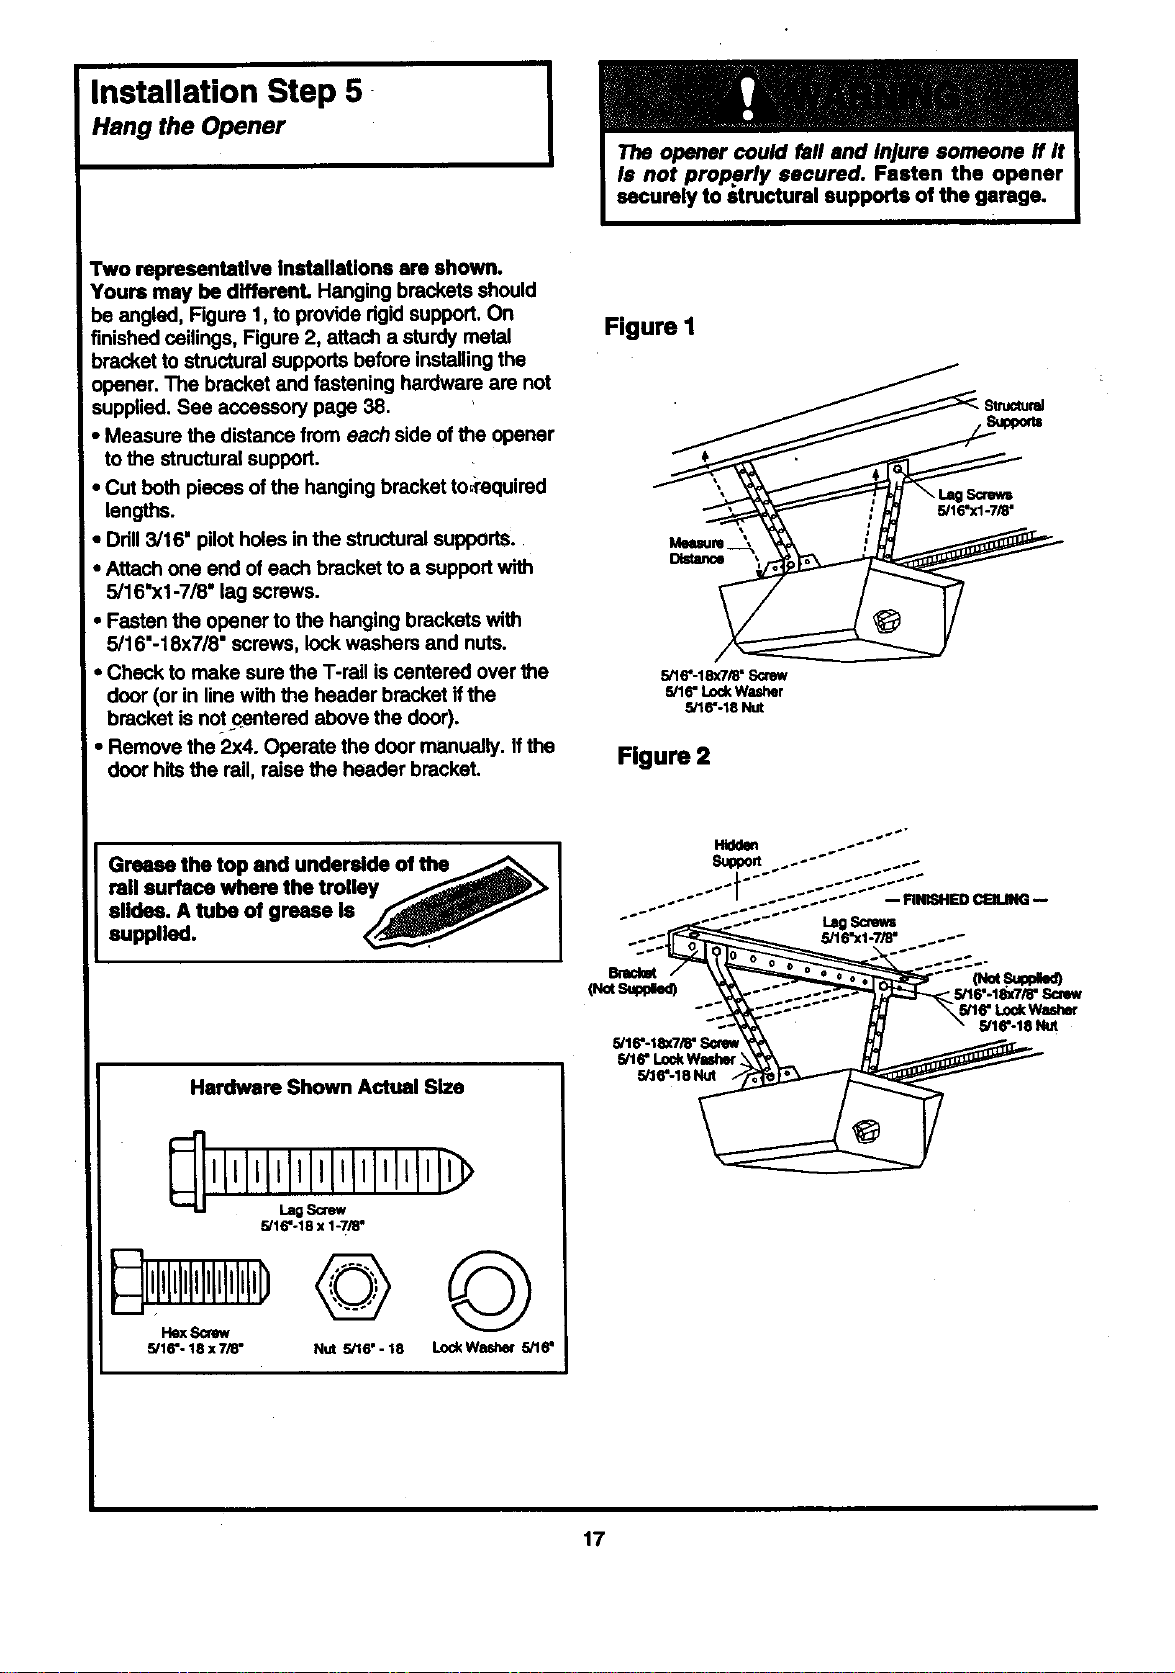
Installation Step 5
Hang the Opener
Two representatlve Installations are shown.
Yours may be dlfferent. Hanging brackets should
be angled, Figure 1, to provide rigidsupport. On
finished ceilings, Figure 2, attach a sturdy metal
bracket to structural supports before installingthe
opener. The bracket and fastening hardware are not
suppfied. See accessory page 38.
• Measure the distance from each side ofthe opener
to the structural support.
• Cut both pieces of the hanging bracket to,:required
lengths.
• Ddll 3/16" pilot holes in the structural supports.
• Attach one end of each bracket to a supportwith
5/16"xl-7/8" lag screws.
• Fasten the opener to the hanging brackets with
5/16"-18x7/8" screws, lock washers and nuts.
• Check to make sure the T-rail iscentered over the
door (or in linewith the header bracket ifthe
bracket is not centered above the door).
• Remove the 2x4. Operate the door manually. If the
door hitsthe rail, raise the header bracket.
Figure I
Structund
S_ev_
5/16_(1-7/8=
5/16"-181a/8"SGrew
5/16"LodeWMher
5/16"-18 Nut
Figure 2
Grease the top and underside of the_,,_ I
rail surface where the trolley __,_ I
slides. A tube of grease Is ___ I
supplied. _ I
Hardware Shown Actual Size
5/16"-18 x 1-7/8"
5/16"-18x7/8 ° Nut 5/16"- 18 LockWasher 5/16"
17
Loading ...
Loading ...
Loading ...