Loading ...
Loading ...
Loading ...
8 WWW.SENIXTOOLS.COM
OPERATION
Do not use any attachments or accessories not
recommended by the manufacturer of this product. The
use of attachments or accessories not recommended
can result in serious personal injury.
Operation of this equipment could create sparks that
can start res around dry vegetation. A spark arrestor
may be required. The operator should contact local
re agencies for laws or regulations relating to re
prevention requirements.
Gasoline and its vapors are highly ammable and
explosive. To prevent serious personal injury and
property damage, handle it with care. Keep away from
ignition sources and open ames, handle outdoors only,
do not smoke and wipe up spills immediately. Always
shut off engine before fueling. Never add fuel to a
machine with a running or hot engine. Move at least
30 ft. from refueling site before starting engine. Do not
smoke and stay away from open ames and sparks.
Never operate the unit without the fuel cap securely.
Failure to safely handle fuel could result in serious
personal injury.
Do not overll. Overlling the crankcase may cause
excessive smoke, oil loss, and engine damage.
Attempting to start the engine before it has been
properly lled with lubricant will result in equipment
failure not covered by the warranty.
WARNING:
WARNING:
WARNING:
CAUTION:
CAUTION:
Engine lubricant has a major inuence on engine
performance and service life. This unit is shipped
without engine lubricant.
Always use a 4-cycle engine lubricant that meets or
exceeds the requirements for API service classication
SJ. SAE 30, 10W30, or 10W40 are all acceptable
lubricants to use in this product. Non- detergent or
2-stroke engine lubricants will damage the engine and
should not be used. Check lubricant level before
each use.
ADDING/CHECKING ENGINE OIL
ADD ENGINE OIL: INITIAL USE
FUELING AND REFUELING
STARTING AND STOPPING
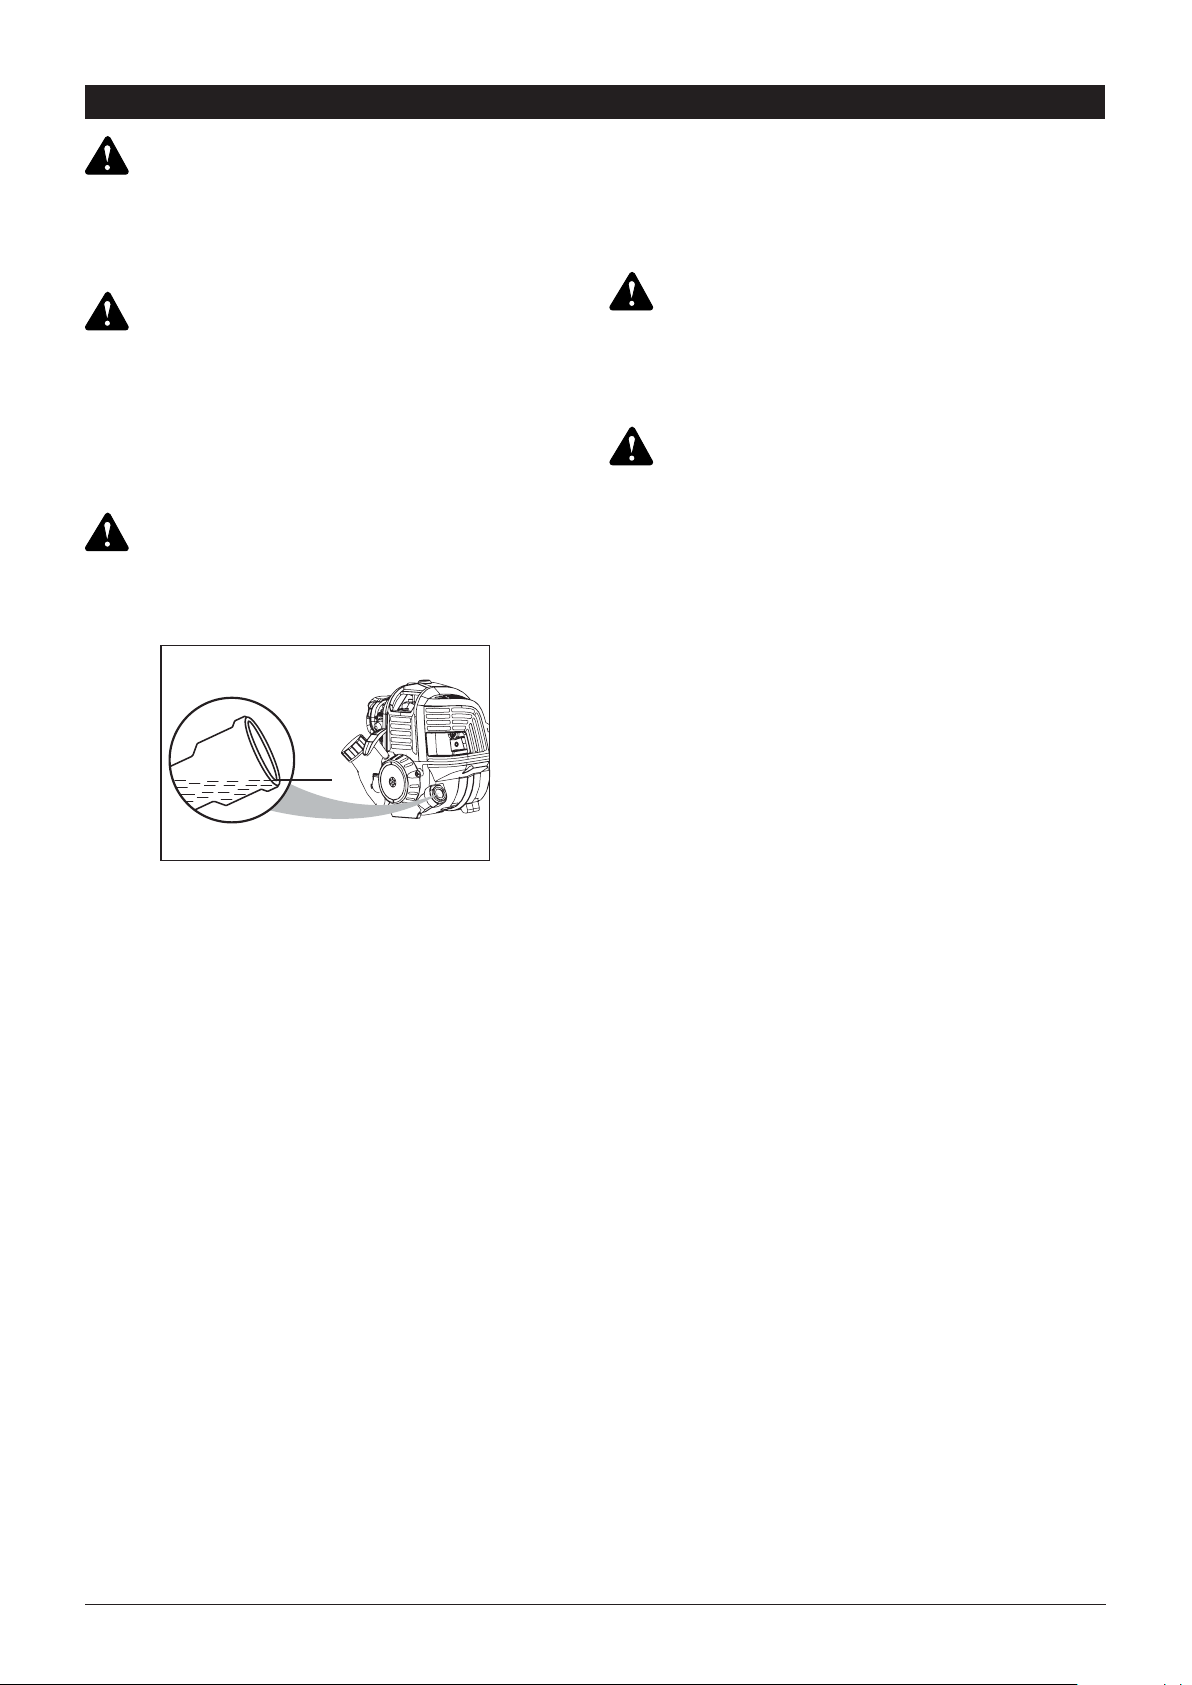
CHECK ENGINE OIL: BEFORE EACH
USE
MAX
1. Remove the cap from the empty lubricant bottle
provided.
2. Pour 60 ml of 4-cycle engine lubricant oil into
lubricant bottle with a funnel.
3. Unscrew the oil cap from the engine and remove.
4. Pour 60 ml of oil into the oil ll hole. Replace and
tighten the oil cap.
1. Remove the fuel tank cap by turning
counterclockwise. Rest the cap on a clean surface.
2. Carefully pour fuel into the tank. Avoid spillage.
3. Immediately replace fuel cap and hand tighten by
turning it clockwise. Wipe up any spilled fuel.
NOTE: Visually inspect to see if fuel level is low. If
fuel is low, rell with unleaded fuel carefully without
overlling and tighten the fuel tank cap immediately.
• This unit has a 4-cycle engine. Do not mix oil with
gasoline.
• The use of old fuel is the most common cause
of performance problems. Use only fresh, clean
unleaded gasoline (less than 30 days old). Dispose
of old fuel according to federal, state and local
regulations.
• Drain the tank and run the engine dry before storing
the unit.
• Do not use E15 or E85 fuel (or fuel containing greater
than 10% ethanol) in this product. It will damage the
unit and void the warranty.
To start a cold engine:
1. Slowly press the primer bulb 5-10 times.
NOTE: After the 7th press, fuel should be visible in the
primer bulb. If it is not, continue to press the primer until
you see fuel in the bulb.
2. Push the choke button in to set the choke to FULL
CHOKE position.
NOTE: Do not squeeze the throttle trigger because the
choke will be pop out automatically.
1. Separate the attachment from the power head.
2. Set power head on a at level surface with shaft
parallel to surface.
3. Unscrew the oil cap and remove.
4. Lubricant level should fall within the top of the oil ll
hole (the top of screw thread).
5. If level is low, add engine lubricant until the uid
level rises to the top of oil ll hole (the top of screw
thread).
NOTE: Do not overll.
6.Replace and tighten the oil cap.
Loading ...
Loading ...
Loading ...