Loading ...
Loading ...
Loading ...
15
16
OPERATING INSTRUCTIONSFEATURES
BEFORE FIRST USE
1. Ensure you have all parts and accessories before discarding packaging.
2. Remove all packaging materials, such as plastic bags.
3. Read stickers and then carefully remove.
4. Wipe exterior and interior of appliance with a soft, damp, lint-free cloth.
5. Wash measuring cup, rice spoon, ladle, steam rack, steam basket, glass lid, pressure cooker lid
and cooking pot with a soapy, non-abrasive sponge. All parts and accessories except pressure
cooker lid and appliance are top-rack dishwasher safe.
6. Dry thoroughly.
7. Wipe away condensation and food debris on exterior of cooking pot before placing in
appliance.
8. Always place cooking pot in appliance before cooking.
HOW TO PRESSURE COOK
1. Plug in appliance. Appliance defaults to Pressure Cook.
2. To open pressure cooker lid, grip lock handle, turn clockwise and lift.
3. Add ingredients to cooking pot. Do not fill above 3/5 line on inside of pot.
NOTE: Wipe external surface of cooking pot clean before placing in appliance.
4. To close lid, grip handle and turn counter-clockwise.
5. Turn pressure regulator knob on lid to Sealing position.
NOTE: At this point, red floating valve is level with lid surface. Once pressure is built valve will
rise.
6. Use dial to select Manual or to scroll through food presets. Push in dial to select.
NOTE 1: To unselect, Press Stop/Cancel. NOTE 2: Food presets are specific to each cooking
function.
7. Use dial to select number of hours and minutes. Push dial to set.
8. Turn dial to select high or low pressure. Push dial to set.
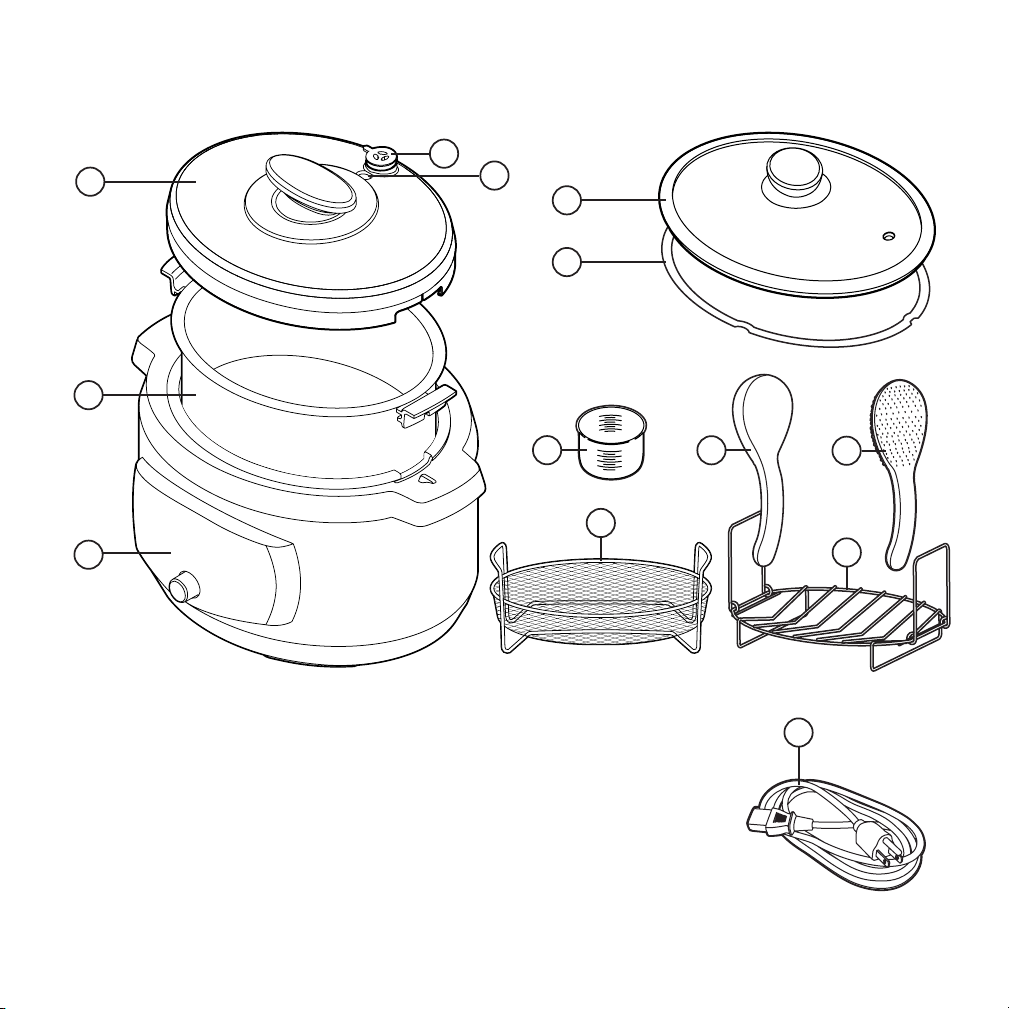
7. Rubber Gasket
8. Measuring Cup
9. Ladle
10. Rice Spoon
11. Steam Basket
12. Steam Rack
13. Power Cord
5
1
2
1. One Hand Twist-off Open and Lock
Pressure Cooker Lid
2. Removable Pressure Regulator Knob
3. Floating Valve
4. Removable Inner Cooking Pot with Handles
5. Control Panel
6. Glass Lid
6
7
3
8
4
9
10
13
11
12
Loading ...
Loading ...
Loading ...