Loading ...
Loading ...
Loading ...
SMART MULTI SENSOR COOKING BUTTONS
Smart Multi Sensor Cooking lets you cook your favorite foods automatically, with the press of a button. When you
activate Smart Multi Sensor Cooking, the microwave's Smart Multi Sensor detects the temperature of the food while it
cooks and automatically shuts the microwave off when it detects that the food has been cooked to the ideal temperature.
Do not use the Smart Multi Sensor Cooking buttons continuously. The oven must cool for 5 minutes between
....... uses or the food will overcook.
Smart Multi Sensor cooking utensils & covers
To obtain good cooking results using these functions, follow the directions for selecting appropriate containers and
covers in the Cookware Guide section on page 17-18.
Z_ Always use microwave-safe containers and abide by the cautions listed in the Safety Information section inthis
....... manual. When using plastic wrap, turn back one corner to allow steam to escape or pierce the plastic in several
/k
CAUTION
®
%
®
®
%
®
®
®
®
places.
Fill containers at least half full.
Do not use the Smart Multi Sensor cooking feature continuously. Wait 5 minutes before selecting another sensor
cooking operation.
For the best cooking results, do not use the Smart Multi Sensor when the ambient room temperature is too high or
too low.
Install the oven in a well ventilated location for proper cooling and airflow and to ensure the sensor will operate
accurately.
Always keep the inside of the oven clean. Wipe all spills with a damp cloth. This oven is designed for household use only.
For the best cooking results, food or cookware should be placed in the center of turntable.
For the best cooking results, food should weigh more than 1/2 pounds.
For the best cooking results, avoid microwaving long, thin foods and microwaving food in straight-sided containers
with narrow necks such as bottles and jars.
For the best cooking results, do not cover food with lids not recommended in this manual.
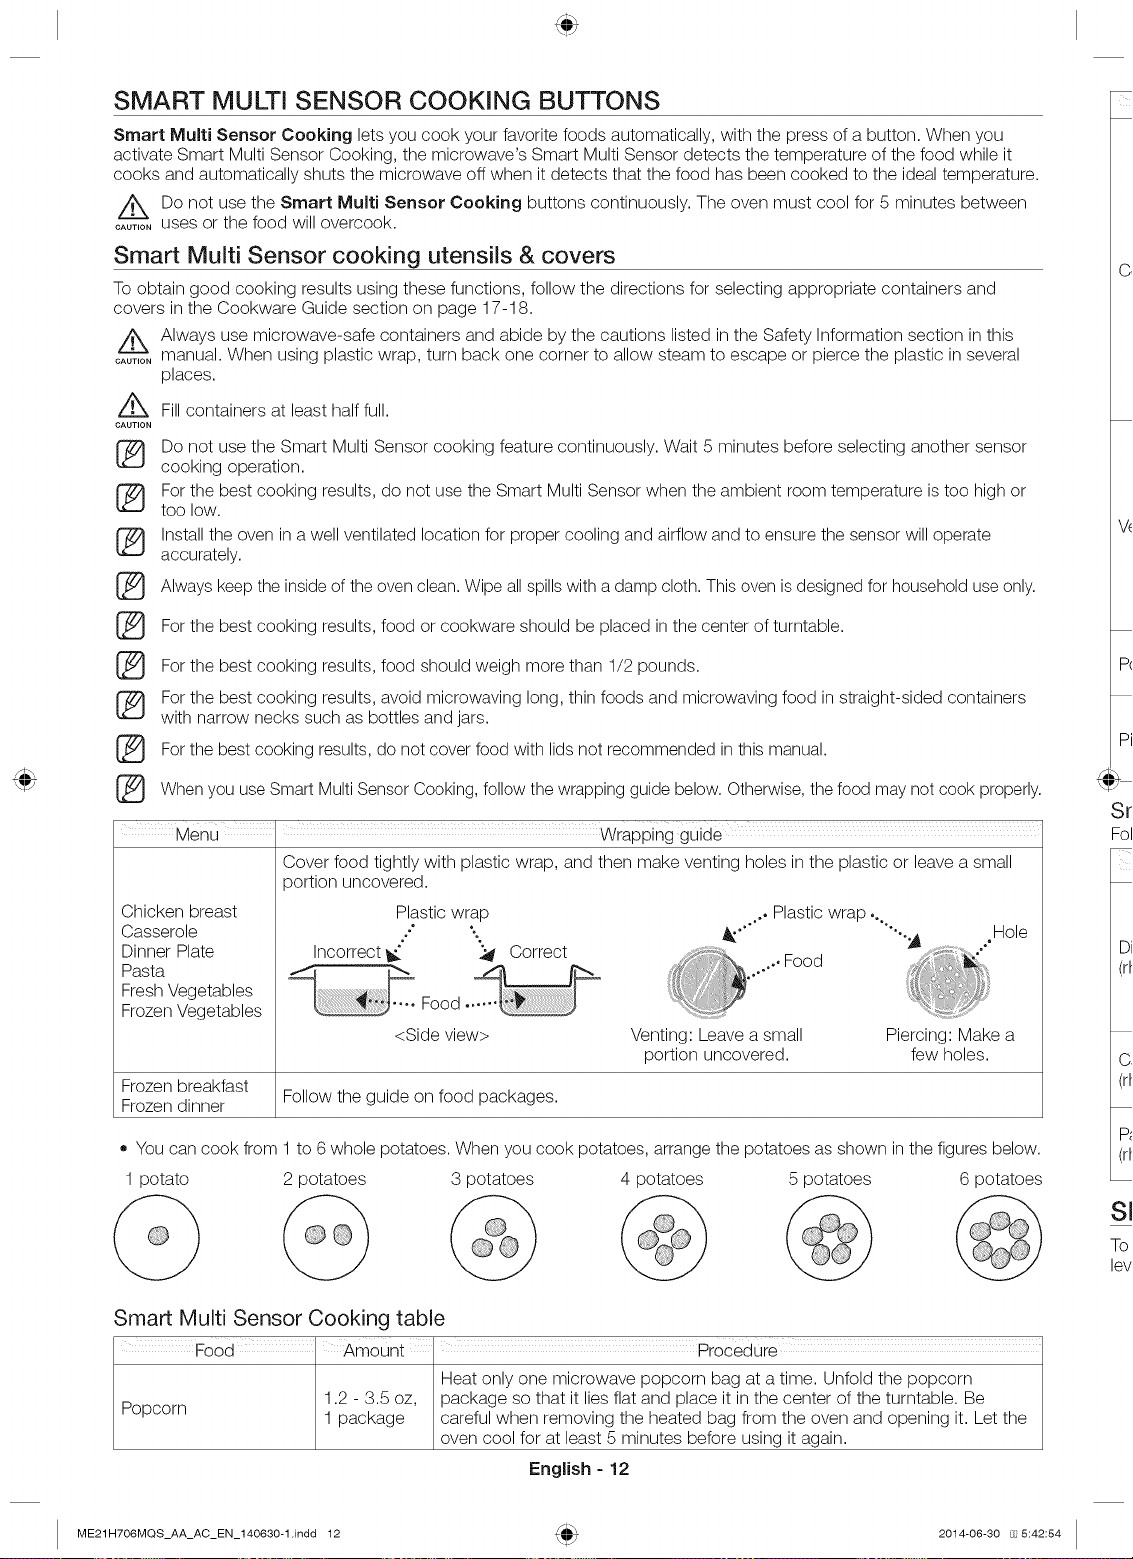
When you use Smart Multi Sensor Cooking, follow the wrapping guide below. Otherwise, the food may not cook properly.
Menu ' wrapping guide
Chicken breast
Casserole
Dinner Plate
Pasta
Fresh Vegetables
Frozen Vegetables
Cover food tightly with plastic wrap, and then make venting holes inthe plastic or leave a small
portion uncovered.
Plastic wrap .. Plastic wrap ,.
o" " _ .... "".._ _,_,...............Hole
Incorrect _" _ Correct _:_
Food • } i,>;.,.....
<Side view> Venting: Leave a small Piercing: Make a
portion uncovered, few holes.
Frozen breakfast
Follow the guide on food packages.
Frozen dinner
• You can cook from 1 to 6 whole potatoes. When you cook potatoes, arrange the potatoes as shown in the figures below.
1 potato 2 potatoes 3 potatoes 4 potatoes 5 potatoes 6 potatoes
Smart Multi Sensor Cooking table
Food AmOUnt, Procedure
Heat only one microwave popcorn bag at a time. Unfold the popcorn
Popcorn 1.2 - 3.5 oz, package so that it lies flat and place it in the center of the turntable. Be
1 package careful when removing the heated bag from the oven and opening it. Let the
oven cool for at least 5 minutes before using it again.
English - 12
ME21H706MQS_AA AC EN 140630-1.indd 12 2014-06-30 5:42:54
Loading ...
Loading ...
Loading ...