Loading ...
Loading ...
Loading ...
Thenozzleisstoredintheareabetweenthecordhooks(Fig.15).
Place brushes of nozzle on top of Tab (A) as shown. Gently
push the nozzle downward while pivoting it into tile riozzle
holder (B).
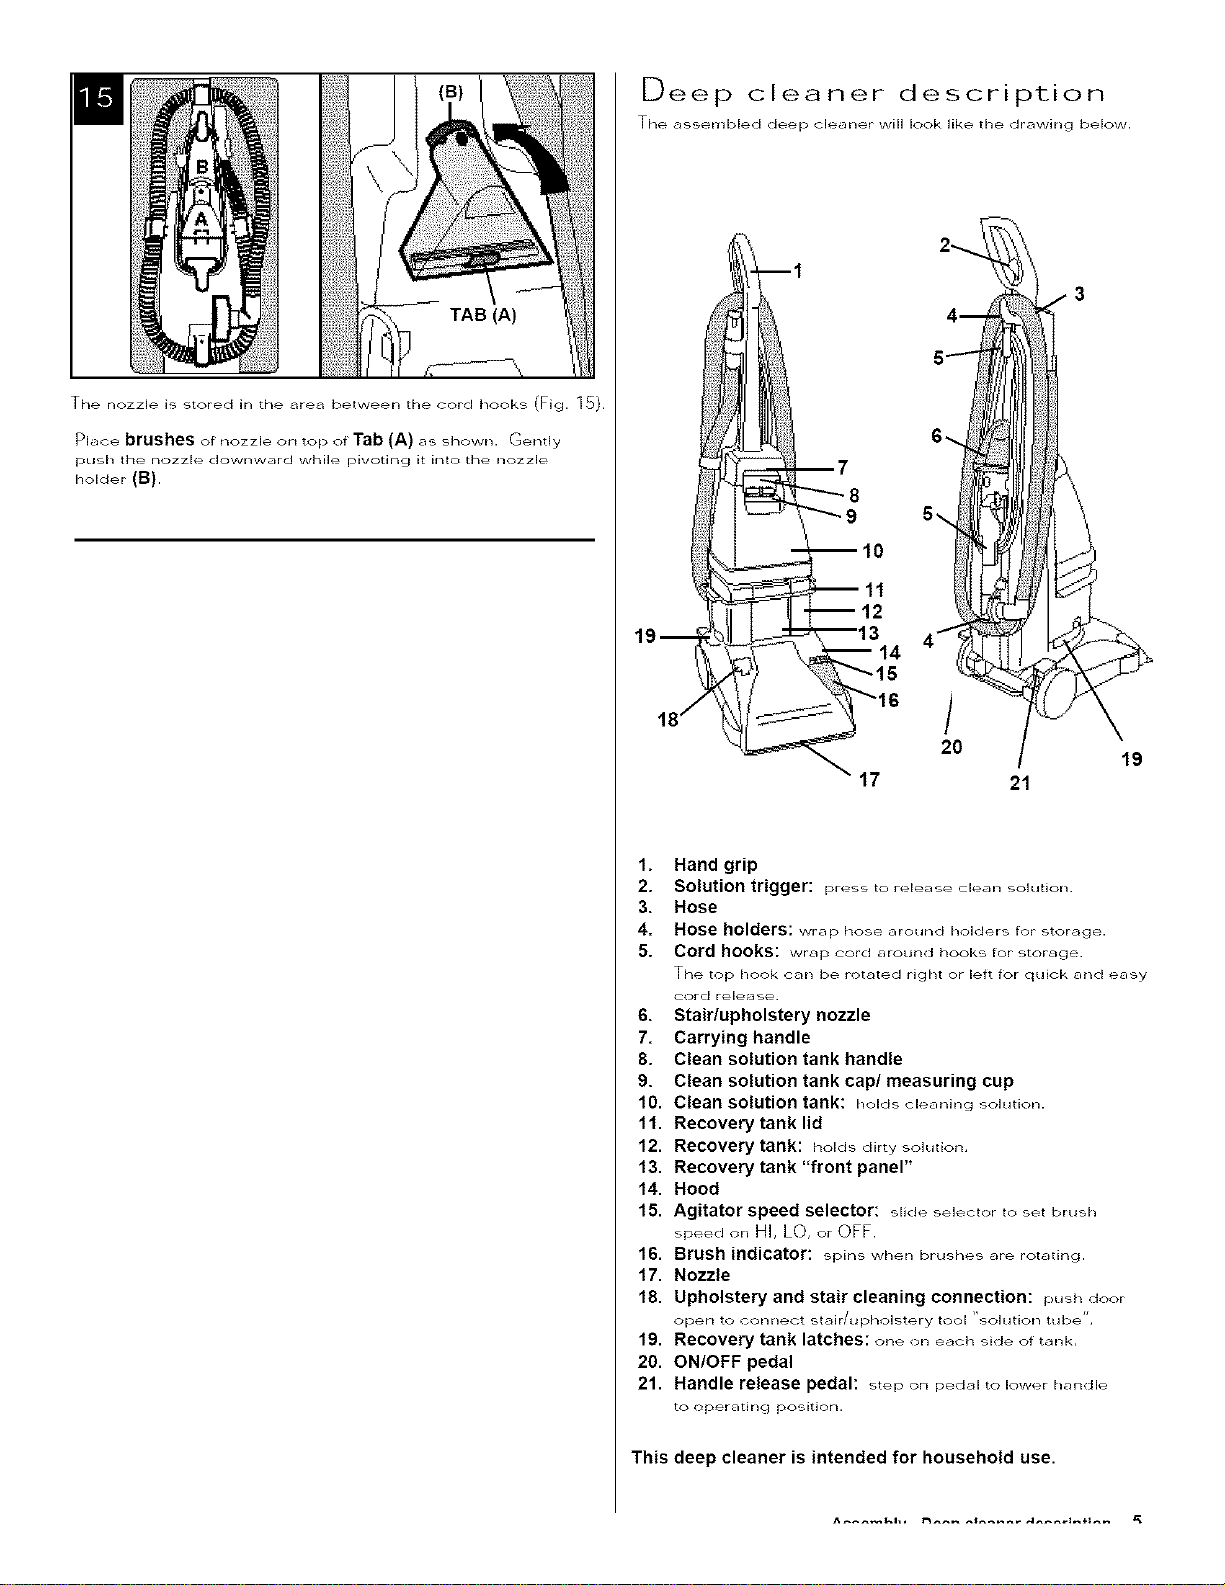
Deep cleaner description
The assembled deep cleaner will look like the drawing below.
11
t
20
19
17 21
1. Hand grip
2. Solution trigger: p_ess to tel÷as÷ clean sokmon.
3. Hose
4. Hose holders: wrap hose _,round hdd÷rs for storage.
5. Cord hooks: wF, p _ord around hooks for stoF, ge.
Tile top hook crln be rotclted riqht or left for quick Eind eEl,=y
(-ord rele_J se.
6. Stair/upholstery nozzle
7. Carrying handle
8. Clean solution tank handle
9. Clean solution tank cap/measuring cup
10. Clean solution tank: h_-,Idscle_lninq solution.
11. Recovery tank lid
12. Recovery tank: hoH.o di_ty sokmon.
13. Recovery tank "front panel"
14. Hood
15. Agitator speed selector: sUde selector to set brush
,,peed on HI, LO, or OFF.
16. Brush indicator: spins wher= brushes are rotating.
17. Nozzle
18. Upholstery and stair cleaning connection: pH_h door
operl to connect st_tir/upholstery tool "solution tribe',
19. Recovery tank latches: one on ÷ach _ide of t_nk.
20. ON/OFF pedal
21. Handle release pedal: _tep on ped_,l to lower handle
to operatirlg positiorl.
This deep cleaner is intended for household use.
Loading ...
Loading ...
Loading ...