Loading ...
Loading ...
Loading ...
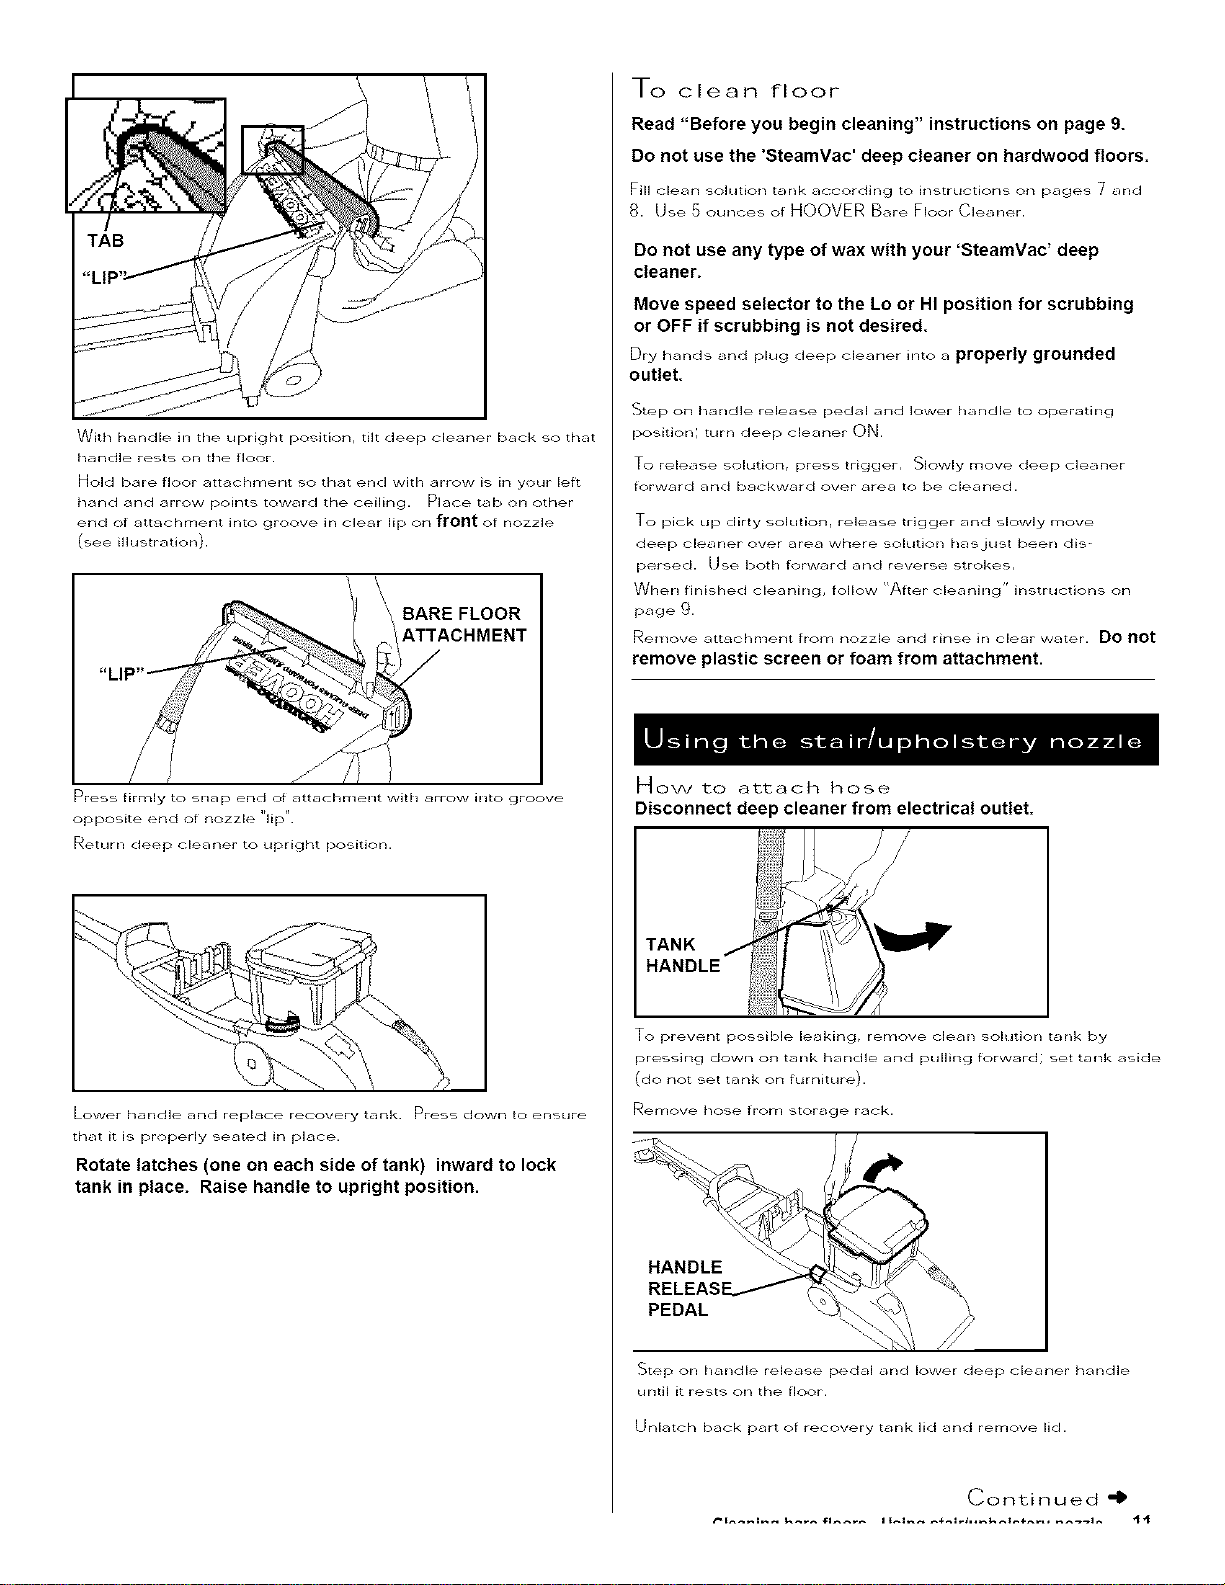
With handle in tile upright position, tilt deep cleaner back so that
handle rests on the floor.
Hold bare floor attachment so that enct with arrow is in your left
hand and arrow points toward the ceiling. Place tab on other
end of attachment into groove in clear lip on front of nozzle
(see illustration).
BARE FLOOR
ATTACHMENT
Press firmly to snap end of attachment with arrow into groove
opposite end of nozzle "lip".
Return deep cleaner to upright position.
Lower handle and rephce rec:overy tank. Press down to ensure
that it is properly seated in place,
Rotate latches (one on each side of tank) inward to lock
tank in place. Raise handle to upright position.
To clean floor
Read "Before you begin cleaning" instructions on page 9.
Do not use the 'SteamVac' deep cleaner on hardwood floors.
Fill _lean solution t_rlk according tc_ instructions oil pages 7 and
8. Use 5 ounces of HOOVER Bare Floor Cleaner.
Do not use any type of wax with your 'SteamVac' deep
cleaner.
Move speed selector to the Lo or HI position for scrubbing
or OFF if scrubbing is not desired.
Dry hands _,nd pk_g deep cleaner into a properly grounded
outlet.
Step on handle release pedal and lower handle to operating
position; turn deep cleaner ON.
To release solutionr press trigger, Slowly move deep cleaner
forward and backward over area to be cleaned.
To pick Lip dirty so]utionr release trigger and slowly move
deep cleaner over area where solution has just been dis _
persed. Use both forward and reverse strokes,
When finished cleaning, follow "After cleaning" instructions on
page 9.
Remove attachment from nozzle and rinse in clear water. Do not
remove plastic screen or foam from attachment.
How to attach hose
Disconnect deep cleaner from electrical outlet.
To prevent possible leaking, remove clear] solution tank by
pressing down on tank handle and pulling forward; set tank aside
(do not set tank on furniture).
Remove hose from ,.tora_ge rack.
HANDLE
PEDAL
Step on hnnctle release pectal and lower deep cleaner handle
until it re..t_, _I-I the floor,
Unlatch back part of recovery tank lid and relnove lid.
Continued _1,
Loading ...
Loading ...
Loading ...