Loading ...
Loading ...
Loading ...
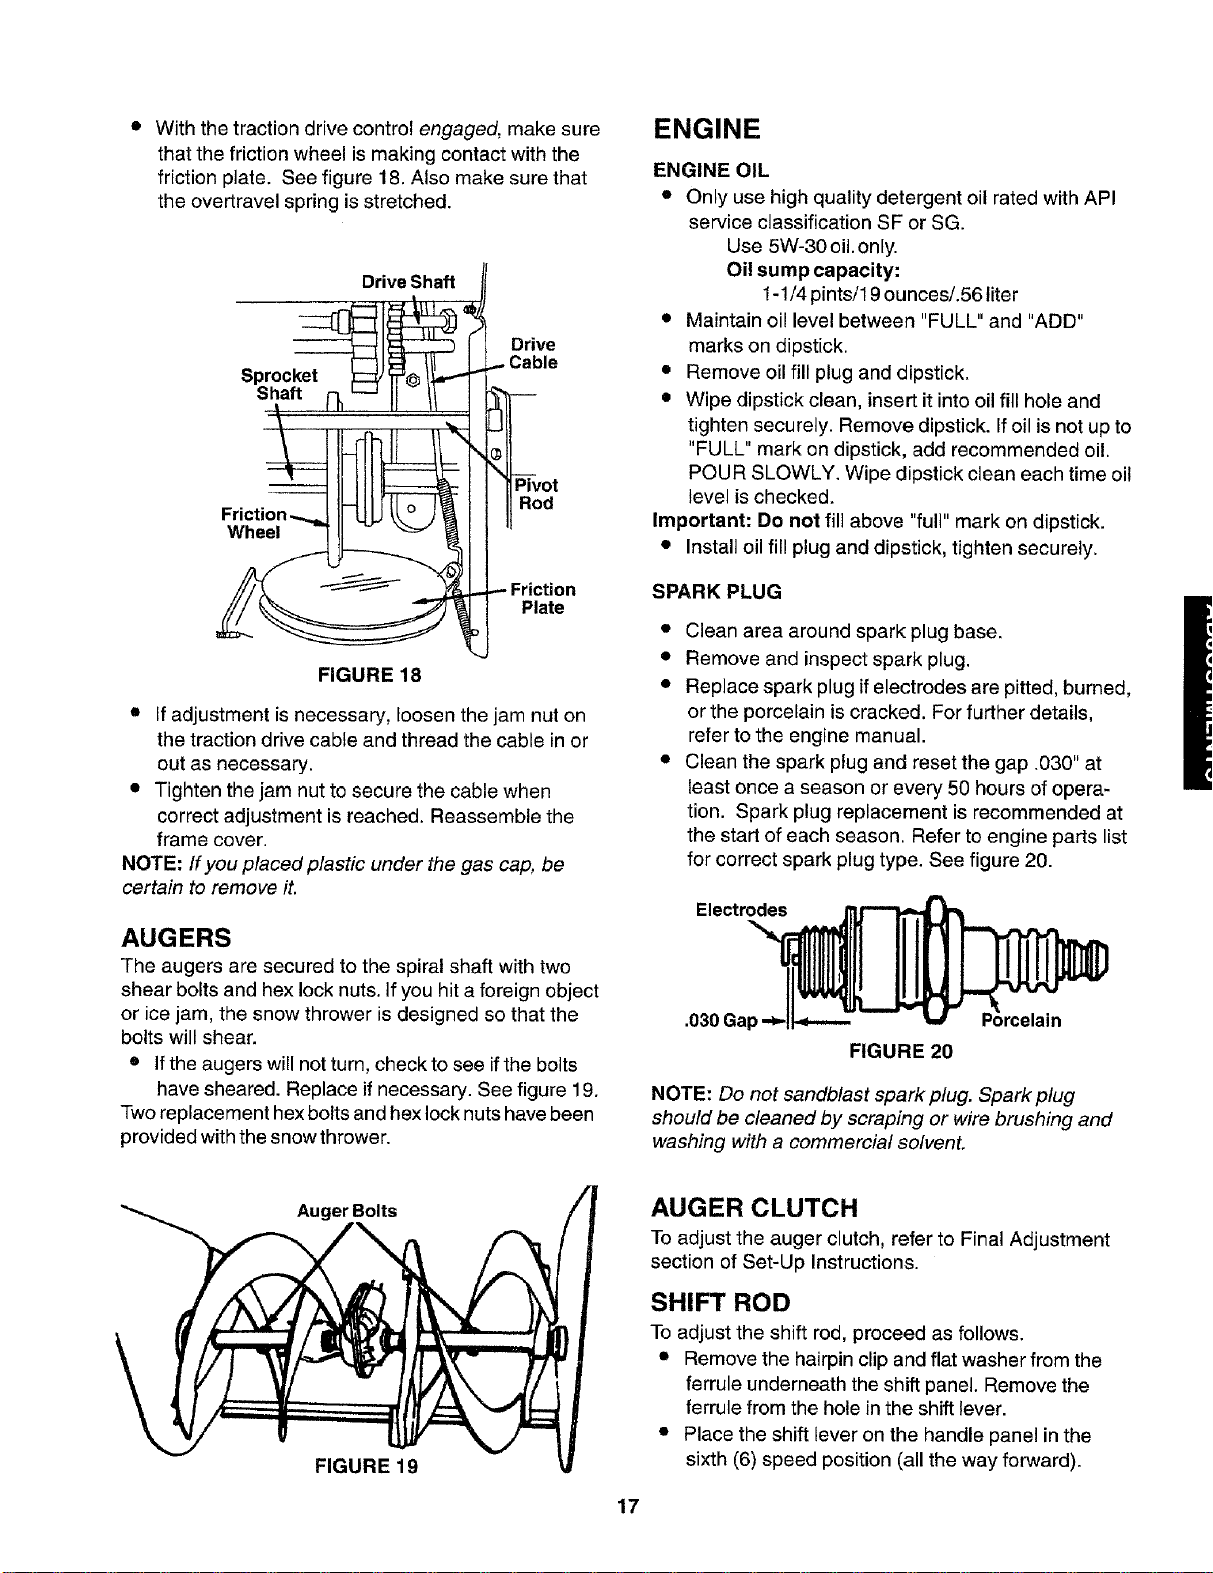
• With the traction drive control engaged, make sure
that the friction wheel is making contact with the
friction plate. See figure 18. Also make sure that
the overtravel spring is stretched.
Drive Shaft
Sprocket
Shaft
Drive
Wheel
Pivot
Rod
Friction
Plate
FIGURE 18
• if adjustment is necessary, loosen the jam nut on
the traction drive cable and thread the cable in or
out as necessary.
• Tighten the jam nut to secure the cable when
correct adjustment is reached. Reassemble the
frame cover.
NOTE: If you placed plastic under the gas cap, be
certain to remove it.
AUGERS
The augers are secured to the spiral shaft with two
shear bolts and hex lock nuts. If you hit a foreign object
or ice jam, the snow thrower is designed so that the
bolts will shear.
• If the augers will not turn, check to see ifthe bolts
have sheared. Replace if necessary. See figure 19.
Two replacement hex bolts and hex lock nuts have been
provided with the snow thrower.
ENGINE
ENGINE OIL
• Only use high quality detergent oil rated with API
service classification SF or SG.
Use 5W-30 oil.only.
Oil sump capacity:
1-1/4 pints/19 ounces/.56 liter
• Maintain oil level between "FULL" and "ADD"
marks on dipstick.
• Remove oil fill plug and dipstick.
• Wipe dipstick clean, insert it into oil fill hole and
tighten securely. Remove dipstick. If oil is not up to
"FULL" mark on dipstick, add recommended oil.
POUR SLOWLY. Wipe dipstick clean each time oil
level is checked,
Important: Do not fill above "full" mark on dipstick.
• Install oil fill plug and dipstick, tighten securely.
SPARK PLUG
• Clean area around spark plug base.
• Remove and inspect spark plug.
• Replace spark plug if electrodes are pitted, burned,
or the porcelain is cracked. For further details,
refer to the engine manual.
• Clean the spark plug and reset the gap .030" at
least once a season or every 50 hours of opera-
tion. Spark plug replacement is recommended at
the start of each season. Refer to engine parts list
for correct spark plug type. See figure 20.
Electrodes
.030 Gal
FIGURE 20
NOTE: Do not sandblast spark plug. Spark ptug
should be cleaned by scraping or wire brushing and
washing with a commercial solvent.
Auger Bolts
FIGURE 19
AUGER CLUTCH
To adjust the auger clutch, refer to Final Adjustment
section of Set-Up Instructions.
SHIFT ROD
To adjust the shift rod, proceed as follows.
• Remove the hairpin clip and flat washer from the
ferrule underneath the shift panel. Remove the
ferrule from the hole inthe shift lever.
• Place the shift lever on the handle panel in the
sixth (6) speed position (all the way forward).
17
Loading ...
Loading ...
Loading ...