Loading ...
Loading ...
Loading ...
Adiusting the Air Adjustment Shutter if
Necessary
To determine if the oven burner flames are burning
properly, first remove the oven bottom and the burner
baffle (on some models).
To remove the oven bottorn:
1, Remove the knurled screws holding down the rear
of the oven bottom.
2, Grasp the oven bottom at the finger slots on each
side.
3. Lift the rear of the oven bottom enough to clear the
lip of the range frame, then pull out.
Remove screw Burner baffle
With the baffle removed, properly adjusted flames
should have approximately 1" (2.5 cm) blue cones
and, if range is supplied with natural gas, should burn
with no yellow tipping. (With most LP gas, small yel-
low tips at the end of outer cones are normal,) Flames
should not lift off the burner parts. If lifting is observed,
gradually reduce air shutter opening until flames are
stabilized. With the baffle in place or with the oven
bottom in place (on models not equipped with a burn-
er baffle), the flames should burn steady and should
not extend past the edges of the burner baffle (or the
oven bottom if there is no baffle),
The shutter for the oven burner is near the back wall
of the oven and behind the broiler drawer. To remove
the broiler drawer:
1. Pull the drawer out until it stops, then push it back
in about 1" (2.5 cm).
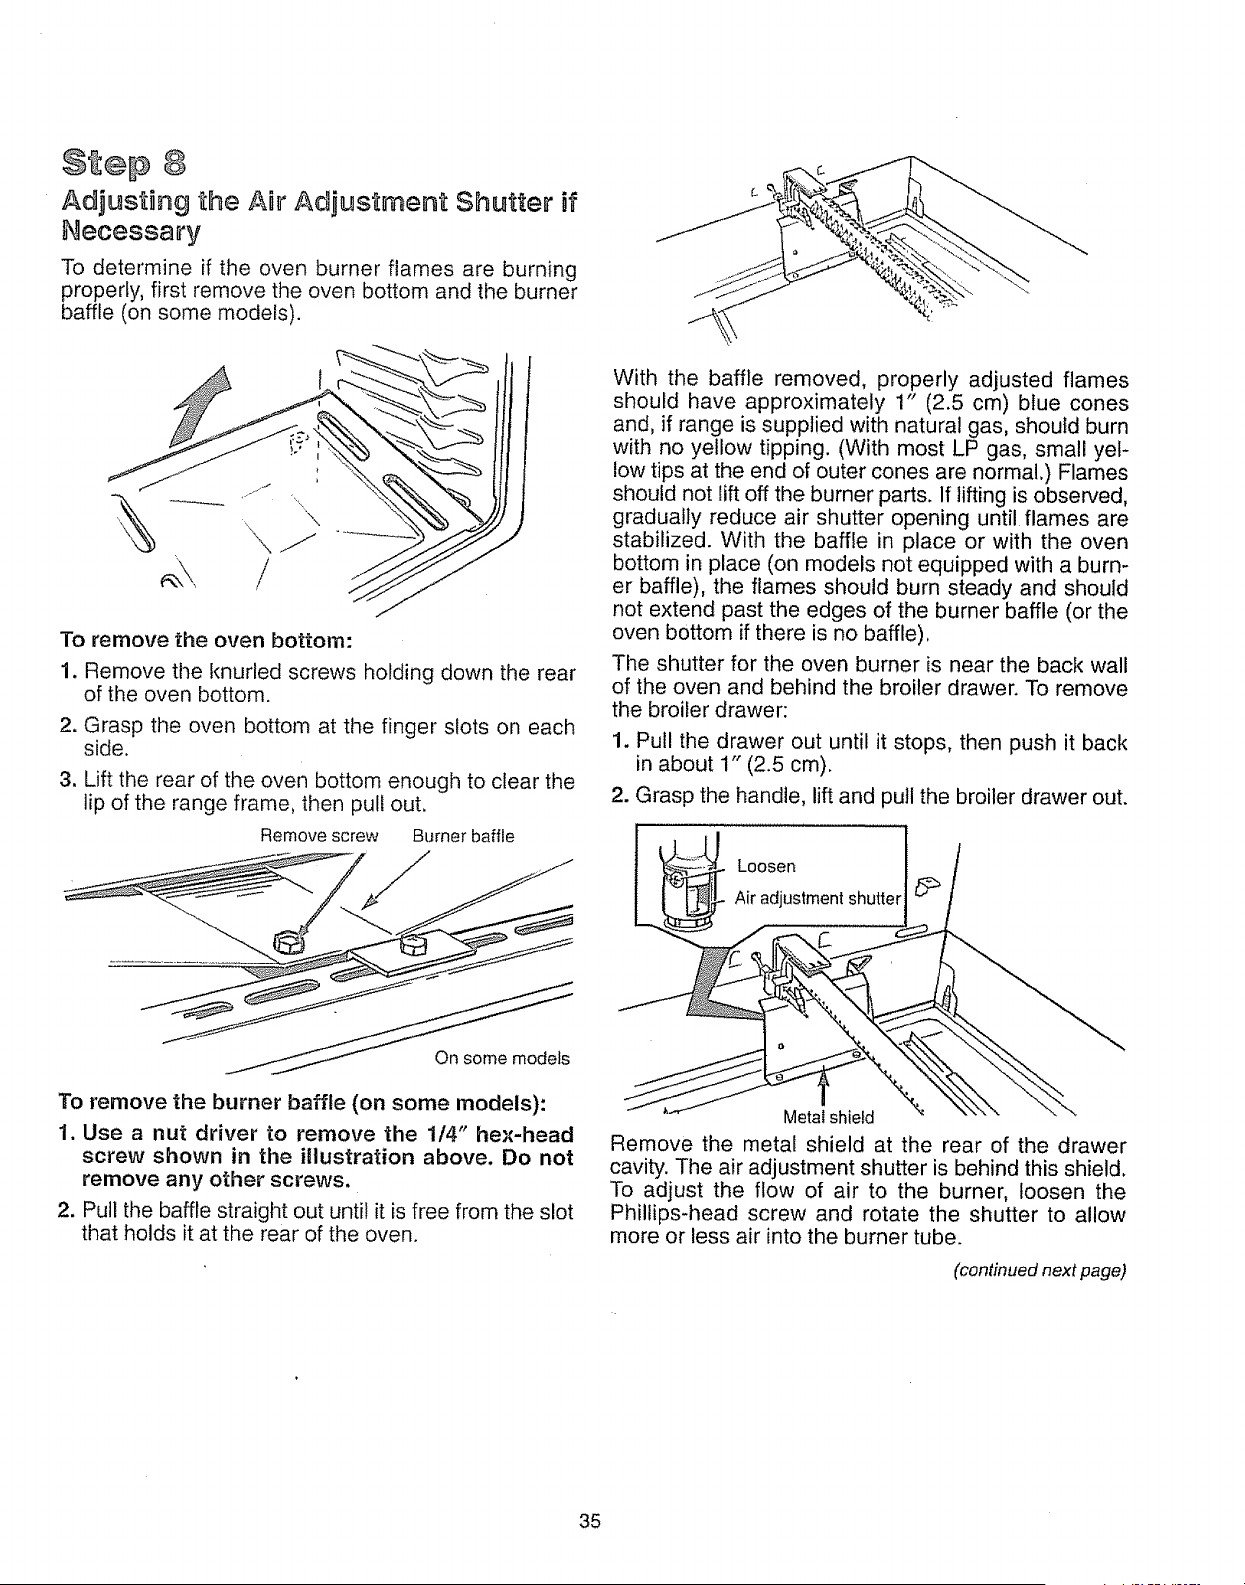
2. Grasp the handle, lift and pull the broiler drawer out.
Loosen
Air adjustment shutter
To remove the burner baffle (on some models):
1, Use a nut driver to remove the 114" hex-head
screw shown in the illustration above, Do not
remove any' other screws,
2, Pull the baffle straight out until it is free from the slot
that holds it at the rear of the oven.
Metal shield
Remove the metal shield at the rear of the drawer
cavity. The air adjustment shutter is behind this shield.
To adjust the flow of air to the burner, loosen the
Phillips-head screw and rotate the shutter to allow
more or less air into the burner tube.
(continued next page)
35
Loading ...
Loading ...
Loading ...