Loading ...
Loading ...
Loading ...
22
Part No. Description
10094 Hot air gun heating element
30106S Plastic handle of hot air gun
S009 Hot air gun complete handle
20962 Hot air gun metal pipe
B012 Soldering Iron complete handle
C006A Desoldering gun heating element
3072D Plastic handle of desoldering gun
B1003A Desoldering gun complete handle
Spare Parts Guide
Blower/Vacuum Air Terminal Filters
Filters should be cleaned and replaced regularly to avoid dirt which can clog the
air passage. More importantly, this will also effectively clean the toxic fumes
produced during soldering process.
Soldering Iron Tip
Always keep the solder-plated section of the tip/nozzle coated with a small
amount of solder. Oxide coating on the tip of the nozzle reduces its heat
conductivity. Coating the tip with a small amount of fresh solder ensures
maximum heat conductivity is obtained.
Replacing the Soldering Iron tip
1. Always turn OFF main power switch when removing or inserting a tip.
2. If the tip is hot, use the heat resistant pad to pull it out.
3. Insert the new tip fully into the handle. If the tip is not fully inserted (or if
the tip is damaged), the device will display “PLUG”. Indicating a problem
with the contacts of the soldering iron or the tip.
Replacing the heating element of the Hot Air Gun
The heating element is found in the middle part of the hot air gun. The
normal life of a heating element is 1 year under normal operating conditions.
Steps:
1. Loosen the 3 screws that secure the handle.
2. Slide off the plastic tube.
3. Disconnect the ground wire sleeve.
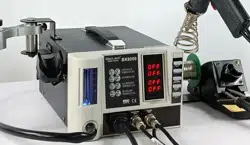
OPERATING GUIDELINES
7
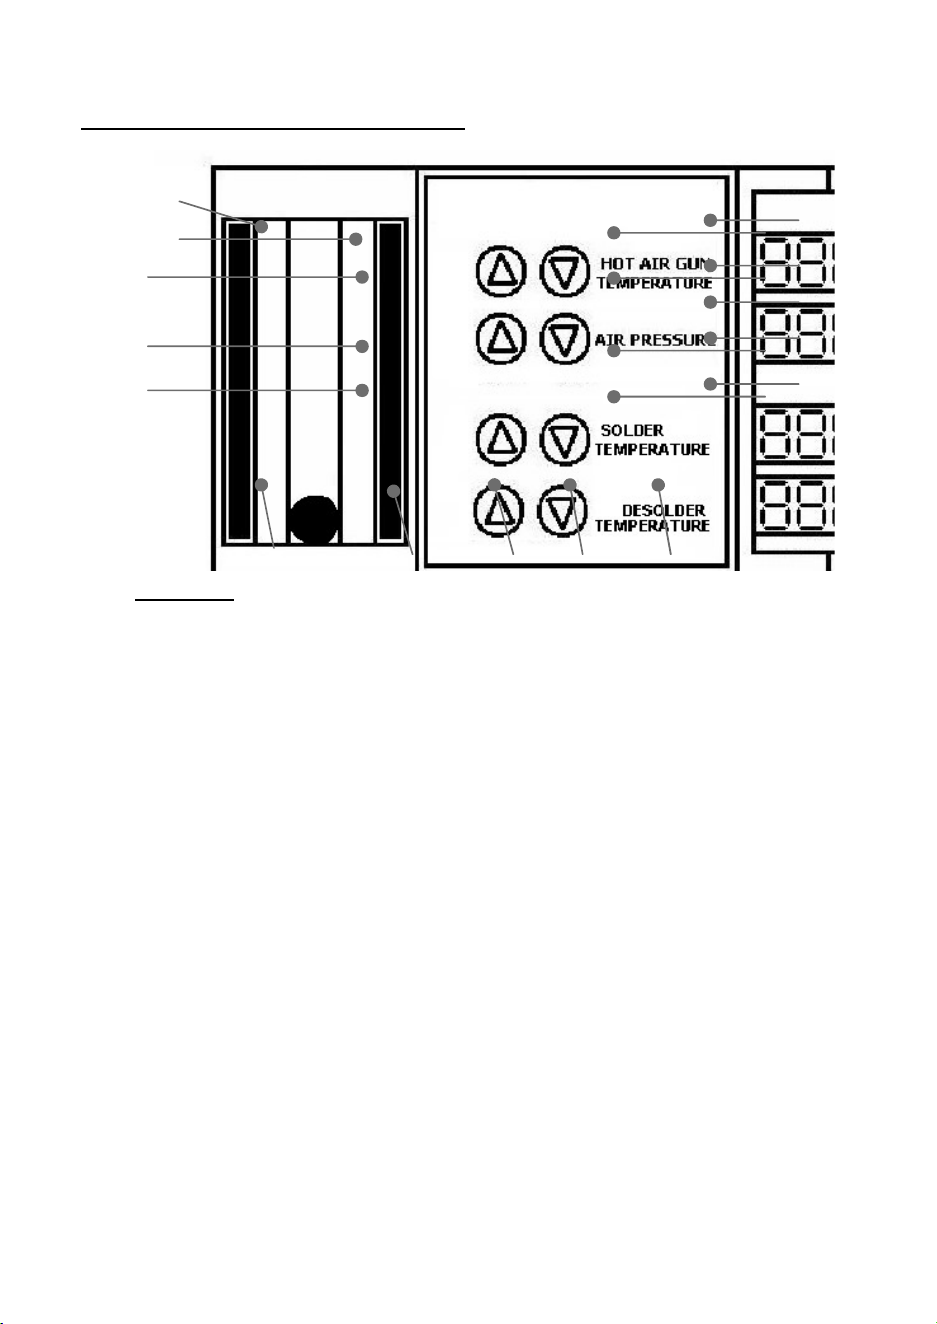
LEGEND:
1 — Airflow Gauge
2 — Hot Air Gun Temperature Adjustment Buttons
3 — Hot Air Gun Airflow Adjustment Buttons
4 — Soldering Iron Temperature Control Buttons
5 — Desoldering Gun Temperature Control Buttons
6 — Hot Air Gun Output Terminal
7 — Smoke Absorber Terminal or Vacuum Cap
8 — Desoldering Gun Receptacle
9 — Soldering Iron Receptacle
10 — Main Power Switch
11 — Desoldering Gun Temperature Display
12 — Desoldering Gun Function Activation Switch
13 — Soldering Iron Temperature Display
14 — Soldering Iron Function Switch
15 — Smoke Absorber Function Switch
16 — Hot Air Gun Air flow Display / Automate Display
17 — Hot Air Gun Automate Function Selector
18 — Hot Air Gun Temperature Display /Automate Display
19 — Hot Air Gun Function Switch
1
2
3
4
6
7
8
9
10
16
5
14
17
18
19
13
15
12
11
CONTROL PANEL GUIDE
Loading ...
Loading ...
Loading ...