Loading ...
Loading ...
Loading ...

8
IMPORTANT REMINDERS:
1. Make sure the equipment is placed on a flat stable surface
and all the heat-generating components placed on their
respective holders or stands.
2. Ensure all function switches are OFF prior to reworking.
3. Ensure all terminal connections are properly secured.
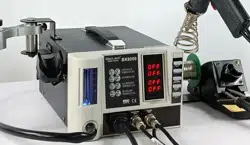
IMPORTANT: Please refer to the CONTROL PANEL GUIDE page
for buttons and display panel directory.
A. INITIAL PROCEDURES
1. Plug the device to the main power source using the power cord
provided in the package.
2. With all function switches deactivated and all terminal connections
properly secured, switch ON the device by activating the main
power switch (“10” from the control panel).
3. The display panels, will temporarily show the product name “ESD
SAFE” and then display “OFF”. The system will remain at this state
until the user activates a function.
B. HOT AIR GUN
1. Follow the initial procedures above, “A. INITIAL PROCEDURES”.
2. Activate “Hot Air Gun” switch (“19” from the control panel).
3. The system will immediately start to blow air at an airflow rate of
50 while rapidly and safely increasing the air temperature to 100°
C (default system operating parameters). These values will be
reflected from the Hot Air Gun Air Temperature and Air Pressure
display panels, “18” and “16” from the control panel, respectively.
The metal ball inside the air gauge (“1” from the control panel) will
also settle somewhere in the middle of the visible area indicating
that the system is blowing air at an average or normal rate.
OPERATING GUIDELINES
21
Solder Iron Digital Temperature Calibration Example
● The external temperature sensor displays 250 degrees.
● The set temperature and displayed actual temperature of the
soldering iron is 300 degrees.
● 300 — 250 = 50. An additional adjustment of 50 degrees is
required. Upon entering calibration mode, the display shows “010”,
indicating a calibration number of 10 is already present.
● Therefore 10+50= 60.
● We adjust from “010” to “060” by pressing the up button of the
Soldering Iron Temperature Adjustment button (“4” from the
control panel)
● Save and exit calibration mode.
● The external temperature sensor would now display 298 to 302.
Desoldering Gun Digital Temperature Calibration Example
● The external temperature sensor displays 300 degrees.
● The set temperature and displayed actual temperature of the
soldering iron is 350 degrees.
● 300 — 350 = -50. An additional adjustment of –50 degrees is
required. Upon entering calibration mode, the display shows “010”,
indicating a calibration number of 10 is already present.
● Therefore 10-50= -50.
● We adjust from “010” to “050-” by pressing the down button of the
Desoldering Gun Temperature Adjustment button (“5” from the
control panel)
● Save and exit calibration mode.
● The external temperature sensor would now display 298 to 302.
NOTES:
● Calibration will only make the newly calibrated point the most
accurate. Other temperature points may be a little off.
OPERATING GUIDELINES
Loading ...
Loading ...
Loading ...