Loading ...
Loading ...
Loading ...
15
English
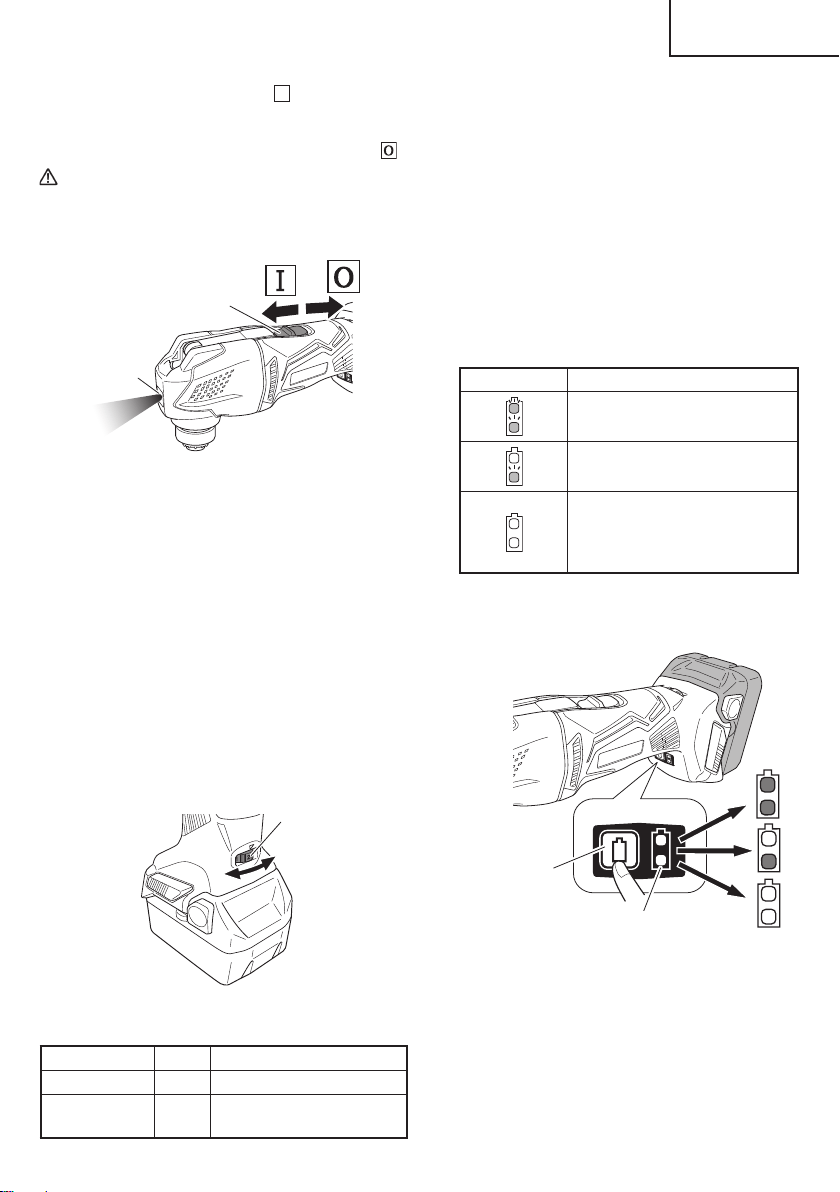
6. Sliding the switch towards
Ϩ
will switch on,
simultaneously activating the LED light which will light
the application tool. (Fig. 8)
To turn the main unit off , slide the switch towards
.
CAUTION
Do not look directly into the light from the LED
lamp. Continuous and direct exposure to the
light from the LED lamp can injure your eyes.
Switch
LED light
Fig. 8
7. Adjusting operating speed (Fig. 9)
The tool is equipped with two modes: “Standard
Mode” and “AUTO Mode”.
(1) Standard Mode
You can change the vibration frequency between
6,000 to 20,000 /min by adjusting the dial from “1” to
“5”.
(2)
AUTO Mode
Depending on the workload, AUTO Mode “A” will
automatically change the vibration frequency to
15,000 /min or 20,000 /min. This has the eff ect of
lowering vibration and noise prior to and during
operation.
Adjust the dial for the mode and speed that best suits your
task conditions and materials.
Dial
Fig. 9
Table 6 Operating speed
Mode Dial Vibration frequency
Standard Mode 1–5 6,000–20,000 /min
AUTO Mode A
No load: 15,000 /min
With load: 20,000 /min
With AUTO Mode, the vibration frequency may not
reach 20,000 /min or return to 15,000 /min depending on
variables such as the type of work or the attachment in
use.
8. About remaining battery indicator
When pressing the remaining battery indicator switch,
the remaining battery indicator lamp lights and the
battery remaining power can be checked. (Fig. 10)
When releasing your fi nger from the remaining battery
indicator switch, the remaining battery indicator lamp
goes off . The Table 7 shows the state of remaining
battery indicator lamp and the battery remaining
power.
Table 7
State of lamp Battery Remaining Power
The battery remaining power is
enough.
The battery remaining power is
a half.
The battery remaining power is
nearly empty.
Re-charge the battery soonest
possible.
As the remaining battery indicator shows somewhat
diff erently depending on ambient temperature and
battery characteristics, read it as a reference.
Remaining battery
indicator switch
Remaining battery
indicator lamp
Fig. 10
NOTE
○
Do not give a strong shock to the switch panel or
break it. It may lead to a trouble.
○
To save the battery power consumption, the
remaining battery indicator lamp lights while pressing
the remaining battery indicator switch.
000BookCV18DBLUSmetabo.indb15000BookCV18DBLUSmetabo.indb152021/03/3014:46:492021/03/3014:46:49
Loading ...
Loading ...
Loading ...