Loading ...
Loading ...
Loading ...
18
2.4 MultiClient Integrated KVM
1
What is it?
With the Multiclient Integrated
Keyboard Video Mouse (KVM) switch
feature, it is possible to control two
separate PCs with a one monitor/
keyboard/mouse setup.
2
How to Enable Multiclient Integrated
KVM
With the built-in Multiclient Integrated
KVM feature, it’s easy to switch
between each connected device via the
On-Screen Display (OSD) menu setting.
For the use of USB-C, HDMI and/or DP
as input, use the
USB-C1/USB-B cable in
the direction of USB Upstream.
Then, connect the upstream cables from
your PC to the
USB-C1 and USB up ports
located on the monitor. This process for
each PC can be done simultaneously.
Please refer to the table and graphic
below for more information.
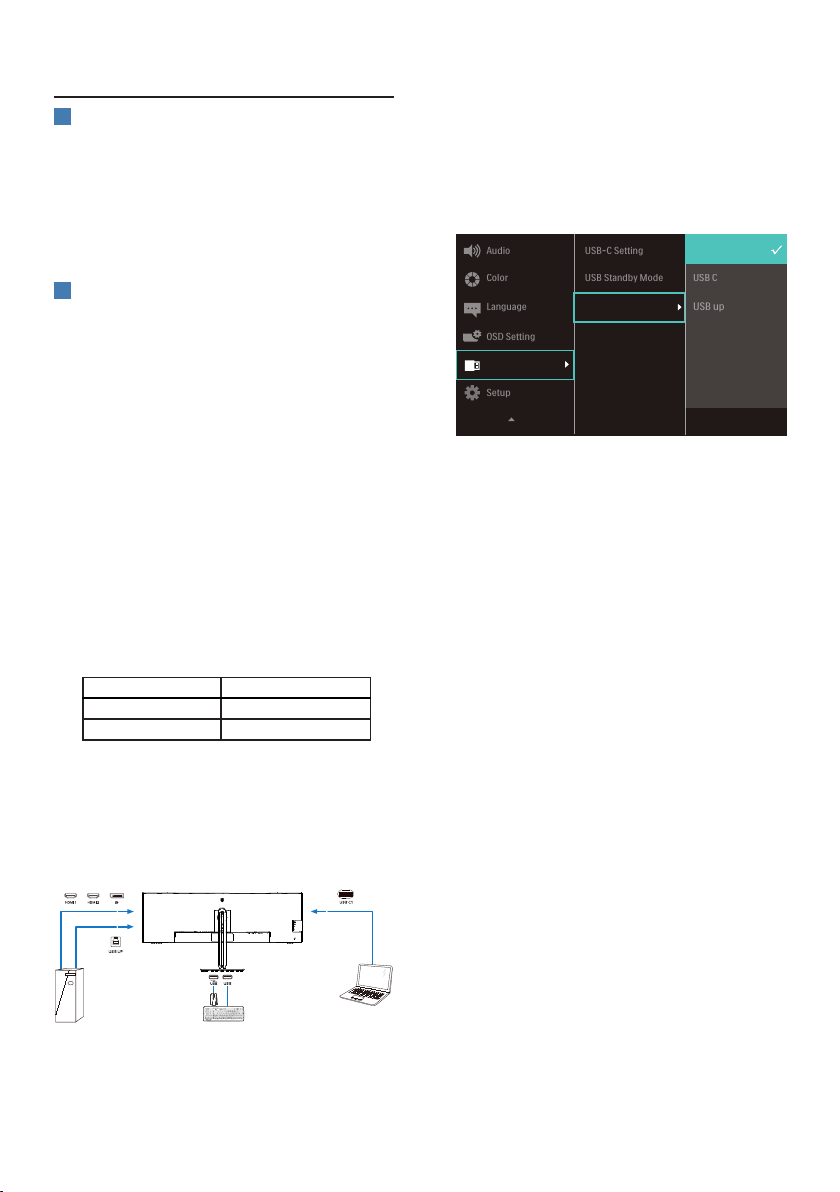
This table explains each source to its
corresponding ports on the monitor.
Source USB Upstream
HDMI or DP USB UP
USB C1 USB C1
A Step-by-Step procedure:
1. Connect each cord from the
corresponding ports on the monitor,
as mentioned in the table above,
downstream to each PC.
PC1 PC2
OR OR
USB A-B Cable
USB C-C Cable
2. Enter the On-Screen Display (OSD)
menu. Go to the KVM tab and
select “Auto”, “USB C”, or “USB up”
to switch the monitor view from
one device to another. To switch to
another monitor view, simply repeat
this step.
3. Go to the KVM tab and select “Auto”,
the KVM Smart function can be
used.
Users are now able to switch between
sources more easily with the latest Smart
KVM feature. To move sources, simply
click the “ctrl” three times. It would be
also available for swapping the Main
Picture and the Sub Picture on PIP with
Smart KVM.
If you would like to use a DP and/or
HDMI cord to input into your device,
use the USB-C1 and USB-B ports with
the USB cord being in direction USB
upstream.
Please check out the following steps
for adjusting the settings for HDMI/DP
usage:
1. Connect the USB cable upstream
from the PC(s) to the “
USB C1” and
“
USB up” ports of this monitor. This
procedure can be done at the same
time, if desired.
Loading ...
Loading ...
Loading ...