
Loading ...
Loading ...
Loading ...
22 23
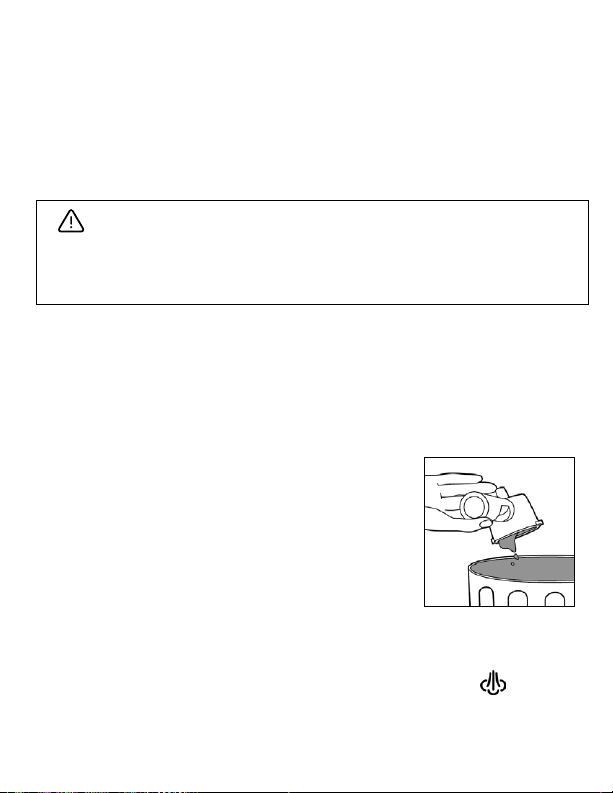
2. Place your stainless steel frothing
pitcher so that the frothing wand
is submerged into the milk. About
1/2 -1” into the milk (Figure 13).
3. Turn the knob to steam . This
will take a few seconds to heat up
before bubbling. You should hear
the steam coming out. If it is silent,
it may mean you are out of water
and no steam is coming out.
4. When you hear steam coming
out, follow position in gure 13
and allow the steam to move the
milk in a circular motion. It takes about 2½ minutes to froth
4 oz. of whole/ 2%/ skim milk to 150 F heat. You can use
a thermometer for precise results (See Frothing Tips on
page 20).
5. Before removing the stainless steel frothing pitcher from
underneath the frothing wand, turn the knob to the
“OFF” position.
NOTE: It is extremely important to clean the frothing wand
after every use. Refer to page 25 for cleaning instructions.
Figure 13
Insert arm into spout at
12 o’clock and place tip at
3 o’clock. Keep arm and
edge of spout at nger
width distance apart
Keep your Mr. Coffee® Steam Espresso, Cappuccino and Latte
Maker running smoothly by taking care of it after every use.
Follow these easy steps to clean your machine:
CAUTION: Do not remove water reservoir cap or portalter
until you release the pressure in the unit. Follow directions on
page 8 before proceeding.
1. Remove portalter to discard coffee grounds. Lift lter
retainer clip so that it’s placed over the lter edge and hold
in place as you discard coffee grounds (Figure 14). This
helps keep lter secured in place.
NOTE: Leaving the portalter in the
machine after brewing can cause an
improper lock which could result in
leaking and damage to the seal.
2. Rinse portalter with fresh water.
Please note that the portalter is NOT
dishwasher safe. Handwash only!
NOTE: If you did not froth milk, skip steps 3-8.
3. Fill water measuring pitcher to the steam mark
(Figure 15 on next page) with water and pour into the
water reservoir.
Cleaning Your Machine After Each Use
Figure 14
Loading ...
Loading ...
Loading ...