Loading ...
Loading ...
Loading ...

Page 26
9PX 1-3 KVA US_EN
3. Installation
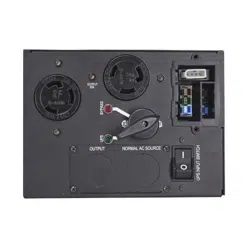
3.9 Connection with a HotSwap MBP module (optional accessory)
The HotSwap MBP module makes it possible to service or even replace the UPS without affecting the connected
loads.
9PX 2000RT
MBP-120
LOAD
15
28
1 82 43
5 6
9 1011
7
29
33 34 35 36
9PX 3000RT
MBP-130
LOAD
15
28
1 82 43
5 6
9 1011
7
29
33 34 35 36
1. Connect the input
36
on the
HotSwap MBP module to the
AC-power source.
2. Connect the UPS input cable
1
to
the “UPS Input socket”
35
on the
HotSwap MBP module.
3. Connect the UPS outlet
5
to the
“UPS Output”
34
on the HotSwap
MBP module (using the cable
28
supplied for G models).
These cables and the connectors
are marked in red.
4. Connect the equipment to the
outlets
29
on the HotSwap MBP
module. These outlets differ,
depending on the version of the
HotSwap MBP module.
Caution: when using HotSwap
MBP, do not use UPS outlets to
directly power equipment. As
operating the bypass switch
33
will cut supply voltage to the
equipment.
* 9PX 700RT/ 9PX 1000RT / 9PX
1500RT: To connect to MBP-115,
follow the same procedure as for the
9PX 2000RT / 9PX 3000RT.
Loading ...
Loading ...
Loading ...
