Loading ...
Loading ...
Loading ...
EZ-300 Owner’s Manual
43
Reference
Playing Chords along with Chord Progressions of a Song
Song numbers 163 to 202 in the “Chord Progression” category are constructed from typi-
cal chord progressions. You can listen to and get a feel for the chord progressions by
playing back the Song and playing the lighting keyboard. The number of keys that are
indicated for you to play progress in sequence—from a single root note, to two notes,
then three and four—getting you to gradually and naturally memorize the chords. Also,
you can change the key of the Song, allowing you to practice the progressions in all keys
for full mastery of the chords.
1
Select a Song from Song numbers 163 to
202 in the “Chord Progression” category
by executing Step 1 in “Selecting and
Playing Back a Song” on page 32.
2
Press the [PHRASE REPEAT] button.
After “CHORD PROGRESSION” scrolls across the
display, the tonic pitch of the selected Song and
the number of the keys to be pressed are shown.
3
Press the [+/YES]/[-/NO] buttons to select
the number of the keys to be played.
Each time the [+/YES] button is pressed, the
number of the keys to press is increased from just
one root note (1Note) to two notes (2Notes),
three notes (3Notes) and four notes (All).
4
Press the [START/STOP] button to play
back the selected Song.
5
Play the lighting keyboard.
6
Press the [PHRASE REPEAT] button again
to turn the Chord Progression function off.
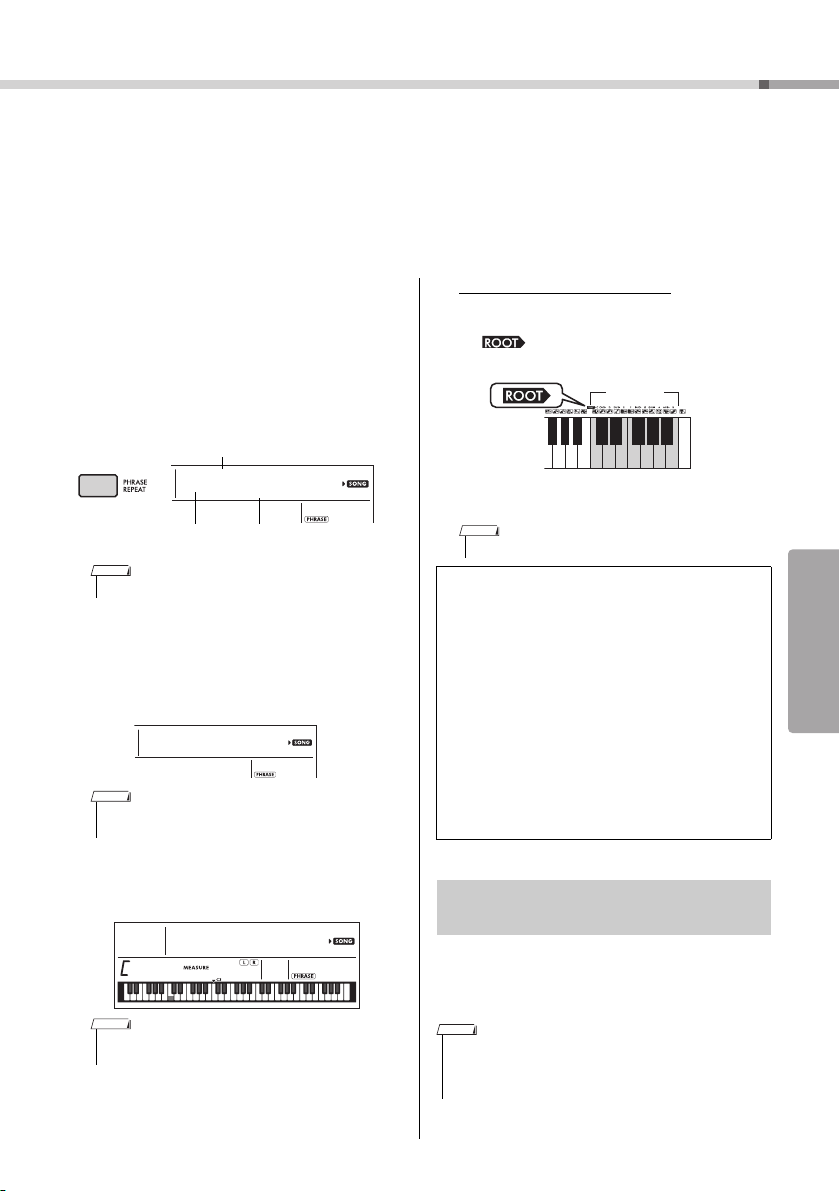
To change the key of a Song:
When Chord Progression is on, press one of the
keys in the top octave (C5–B5; indicated to the right
of “ ” on the panel, just above the keys) to
change the tonic pitch of the Song.
For example, if you press the key D5 in the Song
of C major, the key changes to D major.
You can practice the playing the chords in combina-
tion with “Waiting” (page 39) of the Lesson function
by simply pressing the [1 LISTENING 2 TIMING
3 WAITING] button once.
• The initial key setting is C major or A minor.
• The number of the keys to press can also be set by using
the number buttons [1]–[4].
• When you play the keyboard within the range of C5–B5,
the notes will not sound.
C 1Note
CP9
The tonic pitch of the selected Song: C
The number of the keys
to press: 1
Appears when Chord
Progression is on.
NOTE
C 2Notes
CP9
NOTE
001
C 1Note
CP9
NOTE
• The key of a Song cannot be changed during playback.
The number of the keys to be played
Only one root note (1Note)
Press only the root note of the chord.
Two notes (2Notes)
Press the 3
rd
interval of a chord along with the root
note, and understand the difference between major
chords and minor chords.
Three notes (3Notes)
Press the 5
th
interval of a chord along with the root
note and the 3
rd
.
Four notes (All)
Press all the notes that make up the chord. Very
often, chords are played with just three notes; how-
ever, another interval (such as a 7th) is sometimes
added. Keep in mind that depending on the chord,
there may be no 4
th
note.
Play the chords in combination with
“Waiting” of the Lesson function
• Even if you play notes in octaves outside of the notes of the light-
ing keyboard (excluding the range of C5
–
B5, which are used to
change the key of a Song), as well as different inversions of the
chords, the playback will progress.
C
D
b
E
b
F
#
A
b
B
b
DEFGAB
Root range
NOTE
NOTE
Loading ...
Loading ...
Loading ...