Loading ...
Loading ...
Loading ...

17
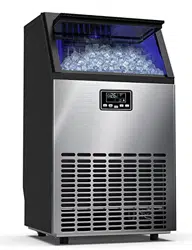
water tank indicating “H” in above illustration, then plug on the unit, let the unit run at
ice-making program or self-cleaning program, the water will flow into the water tank, again
through the silicone pipe flow into the ice bin, at last can be drained out the unit through
the water drain port at unit back.
Normal Sounds
Your new ice maker may make sounds that are not familiar to you. Most of the new
sounds are normal. Hard surfaces like the floor, walls and cabinets can make the sounds
seem louder than they actually are. The following describes the kinds of sounds that might
be new to you and what may be making them.
You will hear a swooshing sound when the control valve opens to let water flow into the
water tank for each ice-making cycle.
Rattling noises may come from the flow of the refrigerant or the water line. Items
stored on top of the ice maker can also make noises.
The high-efficiency compressor may make a pulsating or high-pitched sound.
Water running from the water tank to the evaporator plate may make a splashing
sound.
Water running from the evaporator to the water tank may make a splashing sound.
As each cycle ends, you may hear a gurgling sound due to the refrigerant flowing in
your ice maker.
You may hear air being forced over the condenser by the condenser fan. During the
harvest cycle, you may hear the sound of ice cubes falling into the ice storage bin.
When you first start the ice maker, you may hear water running continuously. The ice
maker is programmed to run a rinse cycle before it begins to make ice.
Preparing the Ice Maker for Long Storage
If the ice maker will not be used for a long time, or is to be moved to another place, it will
be necessary to drain out all of the water in the system.
1. Allow all of the ice cubes have been ejected from the evaporator of ice maker.
2. Turn off the unit, and unplug the power cord.
3. Drain out all of the water inside the unit according to section “Water Drainage”. When
all of the water has been drained out, to install back the water drain pipe of the water
tank..
4. Disconnect the water drainage pipe to the main drain pipeline or floor drain, plug on
the drain cap again.
5. Drop the door open to allow for circulation and prevent from molding and mildewing.
6. Leave the power cord disconnected until ready to reuse.
7. Dry the interior & wipe the outside of the unit.
8. Put a plastic bag on the unit to resist out dust & dirty.
Loading ...
Loading ...
Loading ...