Loading ...
Loading ...
Loading ...
54
A
B
(40 N.m)
26. Reinstall the Fan Adjustment Plate Covers.
27. Reinstall the Shrouds. Refer to the “Replace the Shrouds” procedure
in this manual.
NOTICE: Be sure the tabs in the Top Shroud snap into the Main
Assembly.
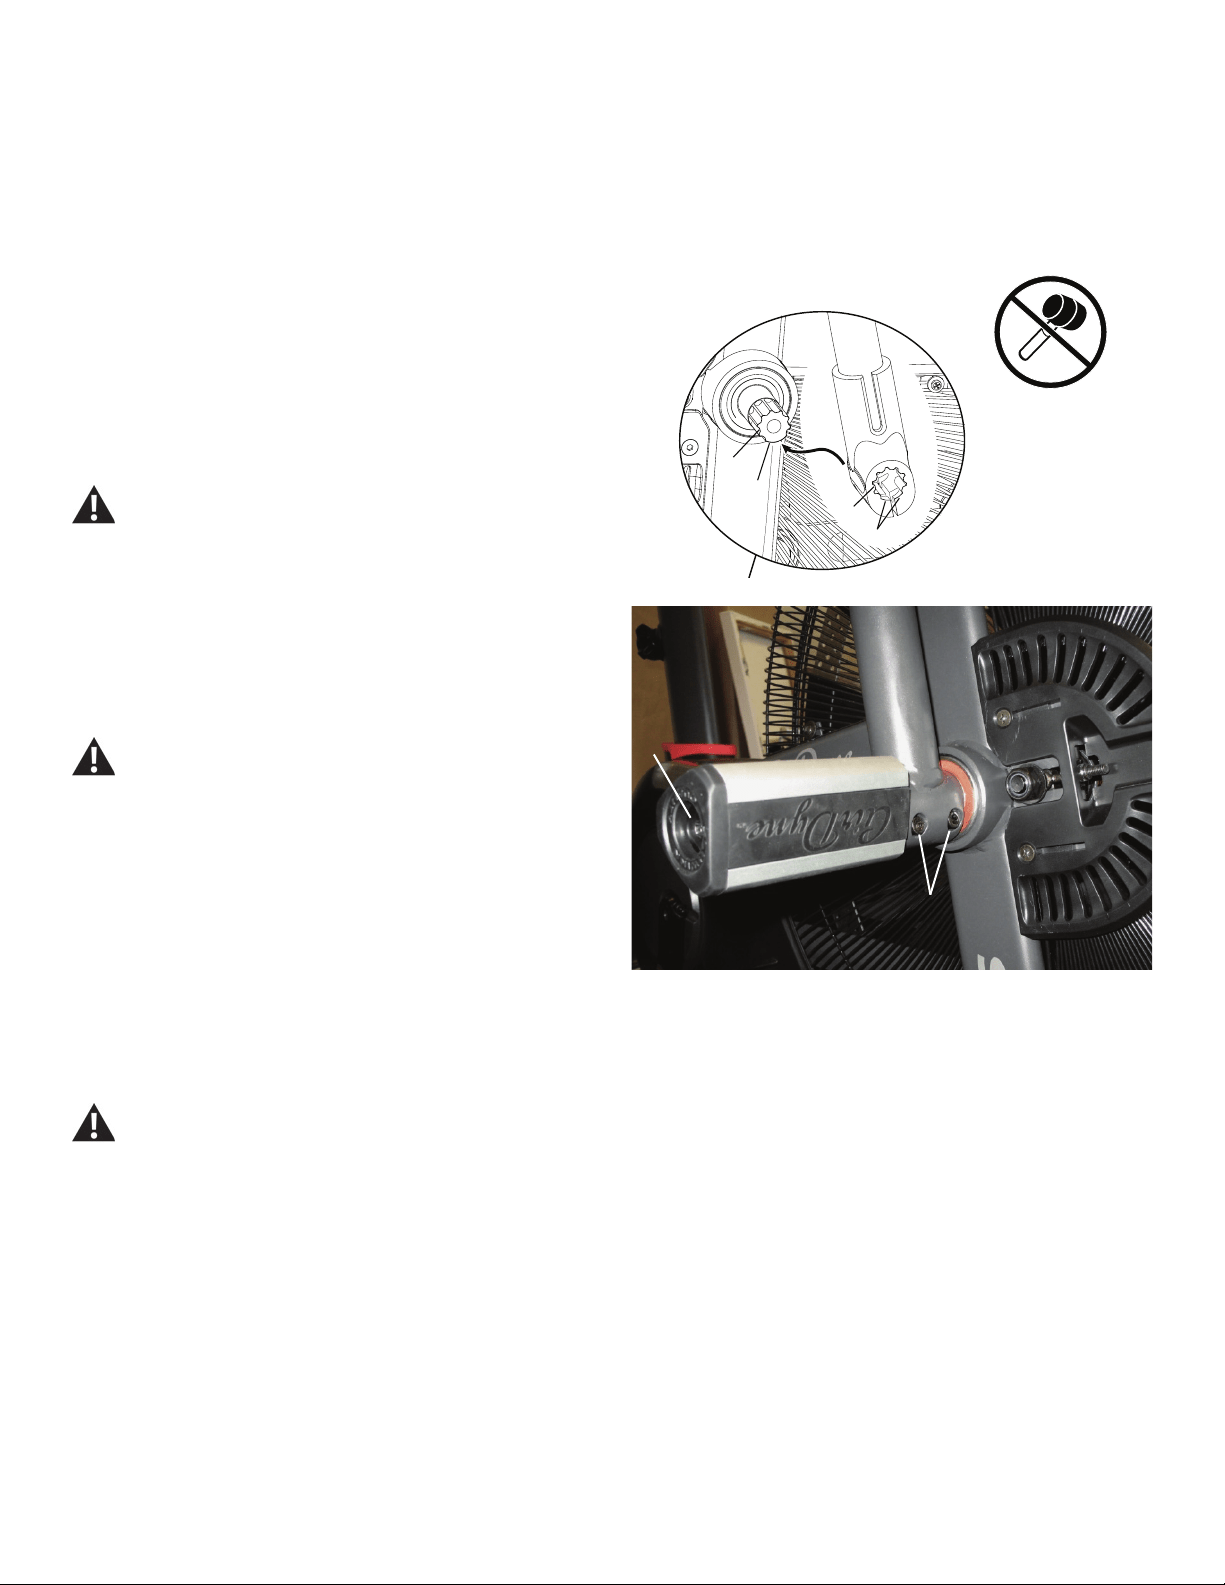
28. Reinstall the Right Handlebar Arm and Right Foot Peg.
NOTICE: Align the open curve (a) on the handlebar with the smooth
curve (1a) on the pivot shaft and make sure the indents (b)
are exactly aligned. Carefully push the handlebar onto the
shaft. Do not force or hammer into position. Gently rock
the handlebar forward and backward to make sure it is fully
seated on the shaft.
Fully tighten the Cap Screws (B) on the Handlebar Arm or
torque to 40 N.m.
NOTICE: Push the Shoulder Bolt (A) completely through the Foot
Peg, and press the plastic washer tightly onto the end of
the Foot Peg. Be sure the washer does not touch the bolt
threads. Do not let the washer fall off the Foot Peg during
installation.
Fully tighten hardware. Make sure the Handlebar Arms are
secure before you exercise.
29. Final Inspection
Inspect your machine to ensure that all hardware is tight and components
are properly assembled.
Do not use until the machine has been fully assembled and
inspected for correct performance in accordance with the
Owner’s Manual.
1a
b
a
b
Loading ...
Loading ...
Loading ...