Loading ...
Loading ...
Loading ...
14
7. Loosen and remove the indicated screws that attach the Fan
Adjustment Plate Covers (*) and Front Fan Cage to the frame. Carefully
remove the front Fan Cage sections and Fan Adjustment Plate Covers.
Set them safely aside for reassembly.
NOTICE: Hold each section of the Fan Cage as you loosen the
screws so that it does not fall. If necessary, loosen and
remove the screws that attach the sections of the Fan
Cage to each other.
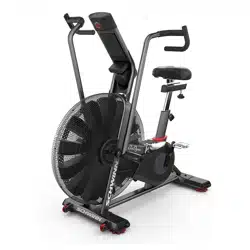
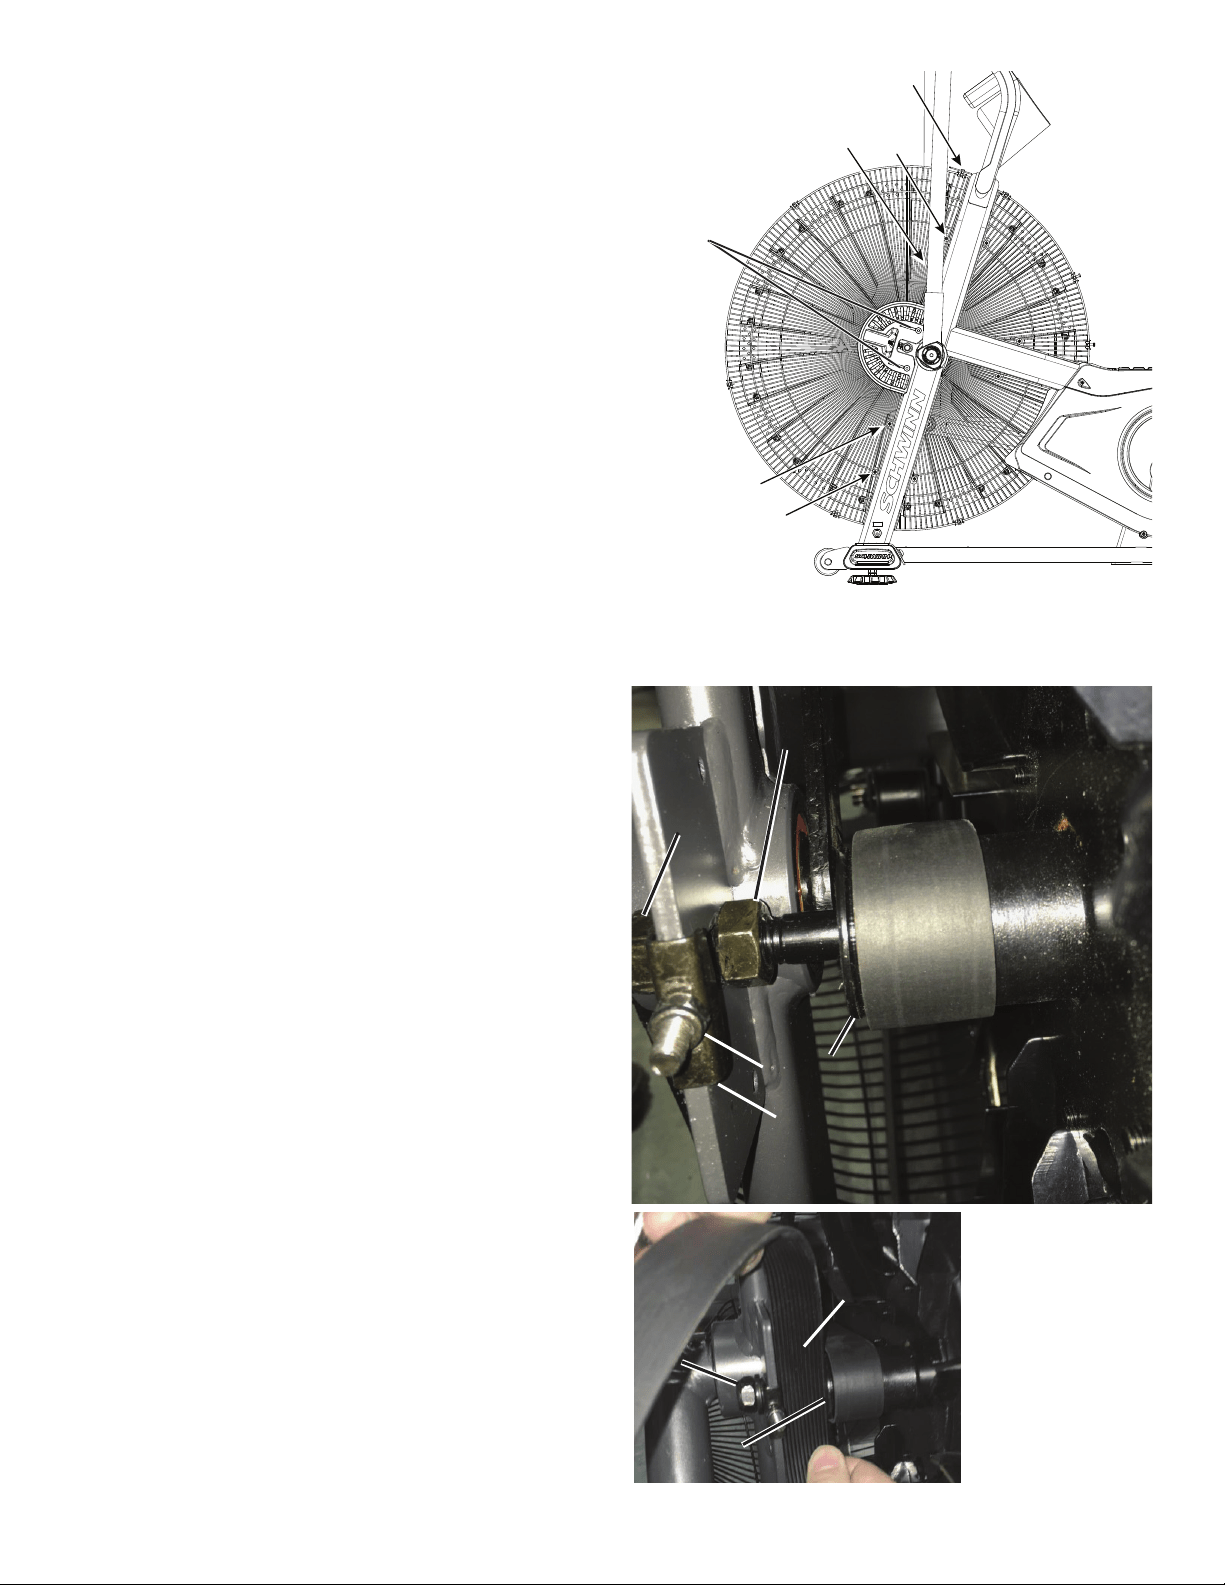
8. Make sure the Drive Belt is centered on the Fan hub (E) and the
Drive Pulley. The Fan hub should have at least 1 groove visible to the left
of the belt, and not extend over the right side of the hub.
9. Check the side-to-side position of the Fan. The outer face of the Fan
hub (E) should be 28mm from the frame bracket. (28mm = width of Drive
Belt.)
Hand tighten the Fan spindle jam nuts (D) to secure the side-to-side
position of the Fan hub and lock nuts (A) as necessary to align the Fan
Pulley.
10. Loosen the Tension Adjustment Nuts (B) on each side of the Fan
shaft until the Spindle Clips (G) are loose.
11. Tighten the Tension Adjustment Nuts (B) until the Spindle Clips
(G) are not loose when moving them by hand. Tighten the right and left
Adjustment Nuts 2 full turns.
Right side – Fan hub alignment (front top view)
*
BB
DD
GG
EE
AA
28mm28mm
AA
EE
Loading ...
Loading ...
Loading ...