Loading ...
Loading ...
Loading ...
52
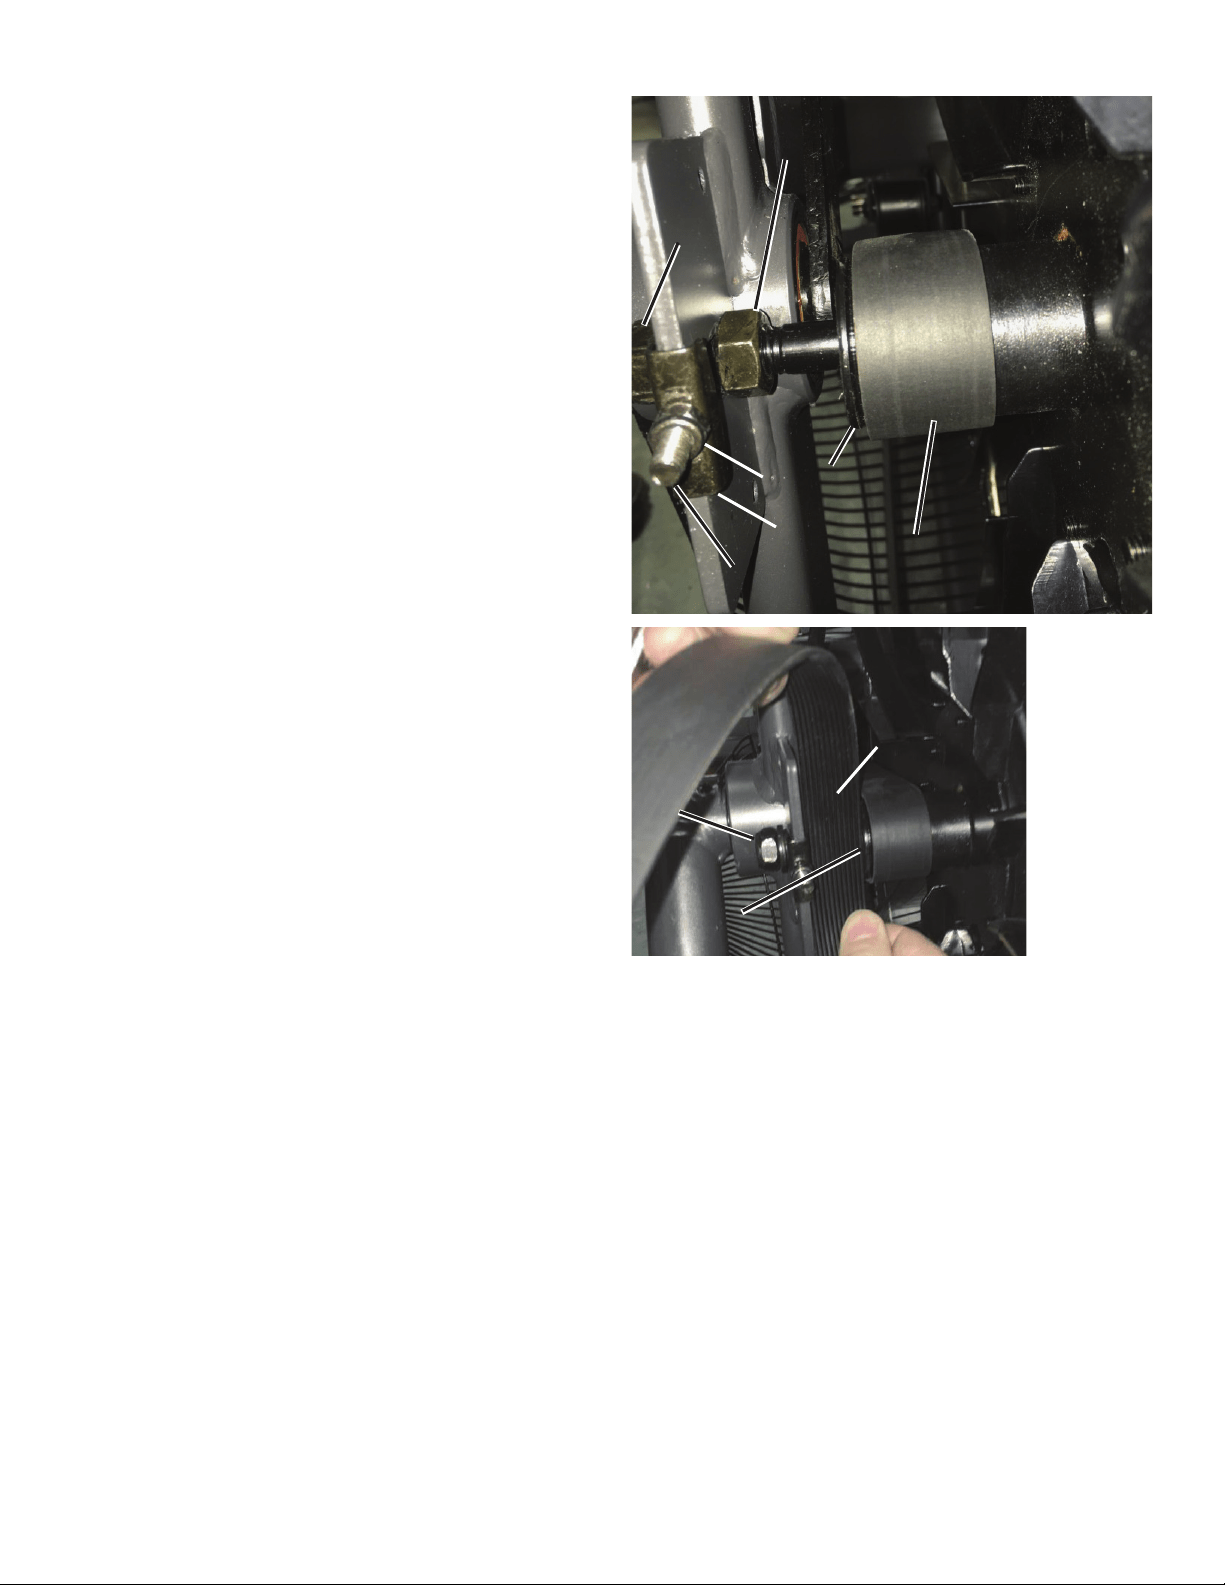
16. Move the Fan spindle backward in the frame brackets to the end of
the slots. Reinstall the Adjustment Nuts (C) and Spindle Clips (F) on the
Threaded Tensioners (D) on both sides of the machine so the the Spindle
Clips just touch the frame brackets and the Adjustment Nuts just touch the
Spindle Clips. Tighten the Adjustment Nuts 9 turns.
Note: This step may require two people. If using a tension
measuring tool, adjust the Drive Belt to 891 N +/- 67 N.
17. Make sure the Drive Belt (M) is centered on the Fan hub (P) and the
Drive Pulley (L). The Fan hub should have 1 groove visible to the left of
the belt, and not extend over the right side of the hub.
18. Check the side-to-side position of the Fan. With the Fan spindle lock
nuts (E) loosened, adjust the Fan spindle jam nuts (K) to allow a gap of
28mm between the outer face of the Fan hub (P) and the frame bracket
steel plate. (28mm = width of old Drive Belt.)
19. Using the 19 mm open end wrench, tighten the Fan spindle lock
nuts (E) on each end of the Fan shaft (J). If a torque wrench is available,
tighten nuts to 10 N.m.
Note: If necessary, hold the Fan spindle jam nuts (K) so that they do
not spin.
Right side – Fan hub alignment (front top view)
CC
KK
FF
PP
EE
MM
DD
28mm28mm
EE
PP
Loading ...
Loading ...
Loading ...