Loading ...
Loading ...
Loading ...
7
En
Part names and functions
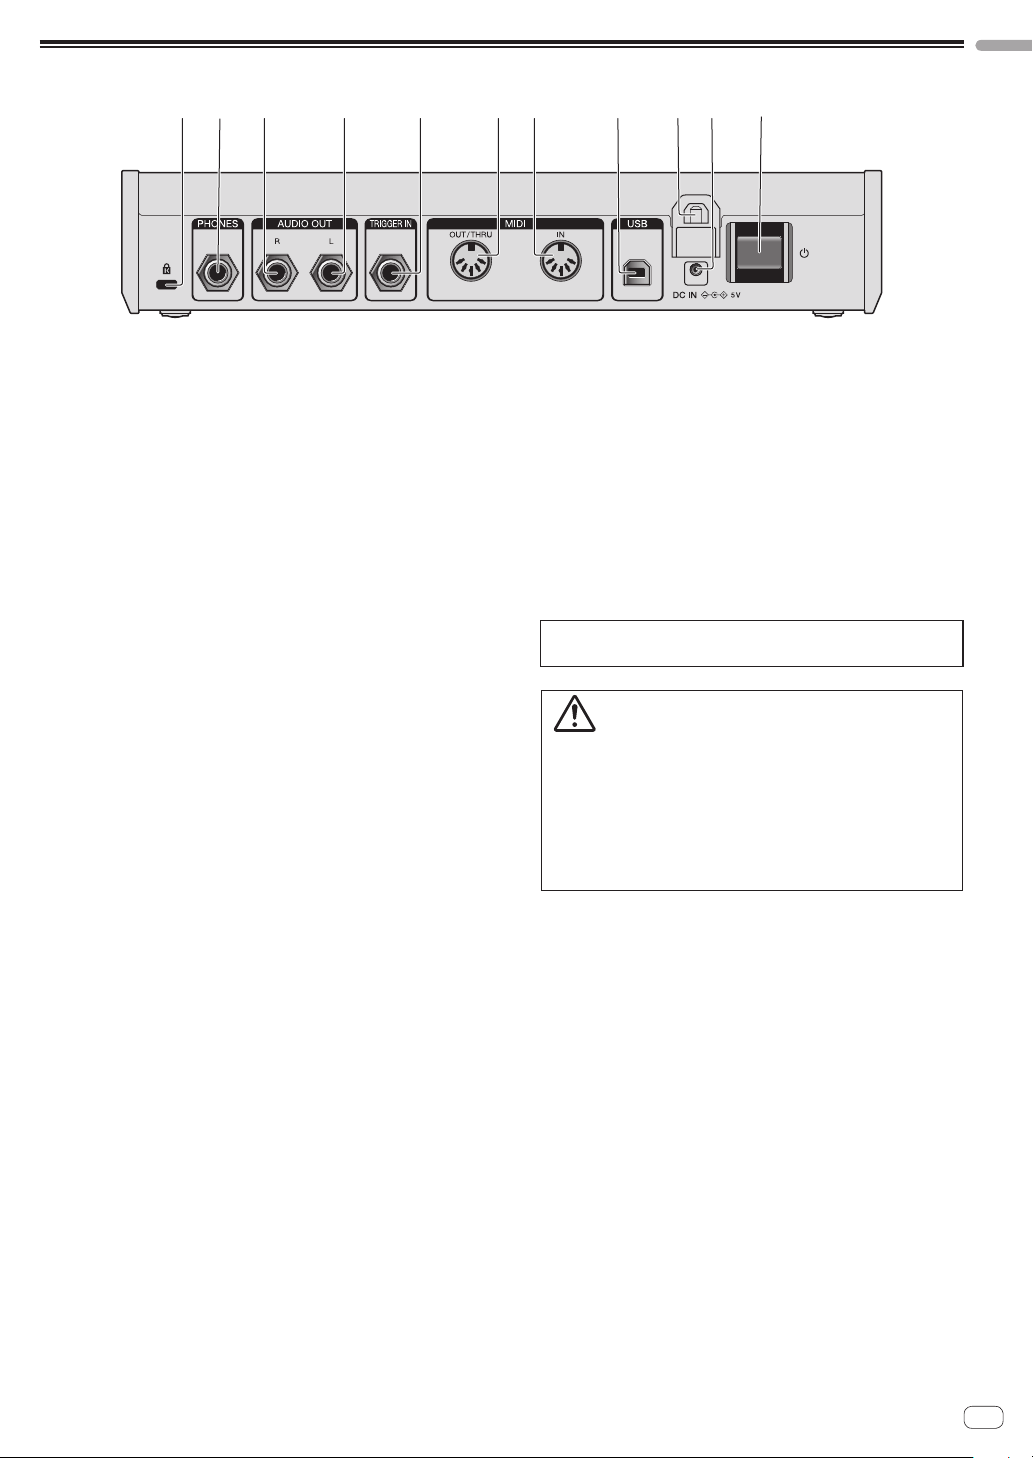
Rear Panel
21 3 4 5
8
b6 7
9
a
1 Kensington lock slot
2 PHONES output
Connect headphones.
3 AUDIO OUT R
Connect to an analog input terminal (right) of a power amplifier,
mixer, etc.
4 AUDIO OUT L
Connect to an analog input terminal (left) of a power amplifier, mixer,
etc.
5 TRIGGER IN
Connect a foot switch or a device that sends an audio signal to be a
trigger signal.
For detailed operational specifications of this terminal, see
“Changing the unit settings ([GLOBAL SETTING])” (page 21).
6 MIDI OUT/THRU
Connect to a device that receives MIDI signals from this unit.
7 MIDI IN
Connect to a device that sends MIDI signals to this unit.
8 USB-B terminal
Connect to your computer.
! USB hubs cannot be used.
! To optimize performance, connect this unit and computer directly
with a USB 2.0 compliant USB cable.
9 Cable hook
Connect the AC adapter cable here to prevent accidental
disconnection. See “How to use the cable hook” (page 8).
a DC IN terminal
Connect the AC adapter cable here.
b u button
Turns the power of this unit On/Off.
This switch is between off and on for this product.
Caution
Even if you turn off the unit by operating the switch/button of the unit or
remote control (if supplied) and the display goes out and the unit looks
like the same way as the unit being unplugged from the power, the power
is still supplied to the unit according to this product specifications. To
completely shut down the power supply, disconnect the plug (shut-off
device) of the power cord. In order to easily do so, set up the unit near the
power outlet so that you can access the power cord plug (shut-off device)
without difficulty. Keeping the unit plugged in the power outlet for an
extended period of time may cause a fire.
Loading ...
Loading ...
Loading ...