Loading ...
Loading ...
Loading ...
10
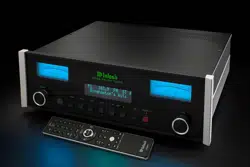
How to Connect the MR89
The MR89 has the ability to be remotely switched On/
O from a McIntosh Preamplier or A/V Control Center
via the Power Control connection. When powered,
this same connection allows remote control of MR89
meter lighting. The MR89 Data Port Connection allows
for the remote operation of basic functions using the
Preamplier or A/V Control Center Remote Control.
With an appropriate IR Sensor connected to the MR89,
remote control operation is possible from another room
and/or when the MR89 is located in a cabinet with the
doors closed.
These connection instructions, together with the
MR89 Connection Diagram below, is an example of
a typical audio or audio/video system. Your system
may vary from this, however the actual components
would be connected in a similar manner. For additional
information refer to “Connector and Cable Information”
on page 3.
Power Control Connections:
1. Connect a Control Cable from the Preamplier
or A/V Control Center appropriate Jack (Tuner/
Trigger 4, Power Control or Trigger) to the POWER
CONTROL IN Jack on the McIntosh MR89 Tuner.
2. Connect a Control Cable from the MR89 Tuner
POWER CONTROL OUT jack to the next McIntosh
Source Component Power Control In Jack.
Data Control Connections:
3.
Connect a Control Cable from the Preamplier or
A/V Control Center to the appropriate Data Port Out
Jack (Tuner/ 4) to the McIntosh MR89 Tuner DATA IN
Jack.
Sensor Connections:
4. Optionally, connect an appropriate IR Sensor to
the McIntosh MR89 Tuner IR IN Jack.
Digital Audio Connections:
5. Optionally, connect a Cable from the McIntosh
MR89 Tuner OPTICAL or COAXIAL to the
appropriate Optical or Coaxial Input (Tuner/ 9) on the
Preamplier or A/V Control Center.
6. Optionally, connect a Cable from the McIntosh
MR89 Tuner remaining DIGITAL Output to the
appropriate Optical or Coaxial Input on another
Preamplier or A/V Control Center.
Analog Audio Connections:
7. Connect Balanced Cables from the McIntosh
MR89 Tuner BALANCED OUTPUT Connectors
to the appropriate (Tuner/Balanced Audio In 2)
Preamplier or A/V Control Center Balanced Input
Connectors.
8. Optionally, connect an Audio Cable from the
MR89 Tuner UNBALanced OUTPUT Jacks to the
appropriate (Tuner/Stereo Audio In 4) Preamplier or
A/V Control Center Balanced Input Jacks.
Note: Preamplifiers require either a Balanced or
Unbalanced audio connection. A/V Control Centers
usually require unbalanced connections for proper
operation of Zone B and the record output, with
Balanced connections as optional.
AC Power Cords Connections:
9. Connect the McIntosh MR89 Tuner AC Power Cord to
a live AC outlet.
How to use the Remote Control
The Remote Control is capable of performing basic
Operating Functions for the MR89 AM/FM Tuner.
Note: Refer to the “Navigating the Remote Control”
Section of this manual for additional information
using this Remote Control, on page 11.
Manual Tuning
Use the BAND Push-button to select AM or
FM. Press the DIRECTIONAL Up or Down
Push-button on the inner ring to move from station to
station (AM or FM).
Automatic Tuning
Use the BAND Push-button to select AM or FM. Press
the SEEK 7 down or 8 up to move to the next station
(AM or FM).
Pre set Tun i ng
Use the BAND Push-button to select AM or FM.
Press the PRESET 9 down or : up Push-button
and the MR89 will stop on the next Station in Preset
Memor y.
Note: For information on entering a Station into memory,
refer to page 19.
Direct Preset Access
To access the desired Station previously assigned to a
Preset stored in memory, perform the following:
1. Press the BAND Push-button to select AM or FM
desired Preset.
2. Press the PRESET Push-button.
3. Using the 0 through 9 numeric Push-buttons enter the
Preset Number.
Note: When selecting a Preset 1 through 9 and there are
more than ten Presets entered into memory for the
given Band (AM or FM) there is a slight delay before
the MR89 will go to the single digit Preset.
Direct Station Access
To access a desired Station perform the following:
1. Press the BAND Push-button to select AM or FM
desired Preset.
2. Using the 0 through 9 numeric Push-buttons enter the
Frequency Number of the Station (for AM or FM).
Note: When in FM, enter 1057 for 105.7 FM, when in AM,
enter 1050 for 1050kHz AM.
Loading ...
Loading ...
Loading ...