Loading ...
Loading ...
Loading ...

SERVICE AND INSTALLATION MANUAL
www.maxxfoodservice.com
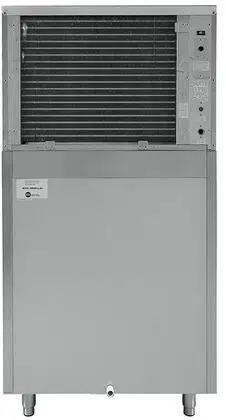
Control Panel (at the left side of the machine)
DESCRIPTIONS OF LEDS AND BUTTONS:
1. Red LED: Power indicator
2. WHITE LED: Ice Full indicator light.
When this LED is lit, the ice storage bin is full of ice or something is holding the water curtain open.
The unit will stop working when this light is lit. When ice cubes are taken out of the ice storage
bin, releasing the water curtain, the red LED will ash for 3 minutes. The unit will then restart and
returns to the ice making mode.
3. Green LED: Ice Making indicator light.
When this LED is lit, the unit is working in the Ice Making mode controlled by a temperature probe on
the evaporator. When the green LED is ashing, the unit is working in the Ice Making mode controlled
by a xed timer.
4. Yellow LED: Ice Harvest indicator light.
When this LED is lit, the unit is working in the Ice Harvest mode controlled by a temperature probe on
the evaporator. When the yellow LED is ashing, the unit is working in the Ice Harvest mode controlled
by a xed timer
5. Clean button:
When this button is pressed, the unit enters the Cleaning mode. The green and yellow LEDs ash
together. To stop the Cleaning mode, just press the button again.
6. Mode button:
Recommended for service technician only. When this button is pressed, unit can change from Ice
Making mode to Ice Harvest mode or from Ice Harvest mode to Ice Making mode. You can judge
the mode from the status of the green and yellow LEDs.
ICE BRIDGE SIZE ADJUSTMENT GUIDE:
1. Press and hold the “Clean” button and the “Mode” button together for at least 3 seconds. The unit
will enter the Ice Size Adjustment mode. The “ICE” LED (green) will be blinking continuously during the
ice size adjustment.
2. While in the Ice Size Adjustment mode, press the “Clean” button or the “Mode” button for the desired
ice size.
SMALLER ICE SETTING:
By pressing the “Clean” button, you can decrease the size of the ice bridge. The “FULL” LED (red) will
ash as you lower the ice size and will nally be blinking at the setting of smallest ice size.
LARGER ICE SETTING:
By pressing the “Mode” button, you can increase the size of the ice bridge. The “HARVEST” LED (yellow)
will ash as the larger size is set and will blink when the setting of largest ice size has been reached.
After 10 seconds without any operation, the unit will automatically memorize the current state and
return to the previous mode.
NOTE:
• If during the ice size adjustment mode the “BIN FULL”, “ICE MAKING” and “HARVEST” LEDS blink all at
once, this indicates that the unit is in the regular (middle) setting of the ice size.
• When the machine is in the cleaning stage or ice full stage, the ice size adjustment mode cannot be
accessed.
IMPORTANT:
• The ice bridge adjustment has been set at the factory for optimum performance and it is not
recommended for a user to make this adjustment. This ice adjustment procedure should therefore be
made only by an authorized service technician.
Troubleshooting
BEFORE CALLING FOR SERVICE
If the unit appears to be malfunctioning, read through the OPERATION section of this manual rst.
If the problem persists, check the Troubleshooting Guide on the following page. The problem may be
something very simple that can be solved without a service call.
16
Loading ...
Loading ...
Loading ...