Loading ...
Loading ...
Loading ...

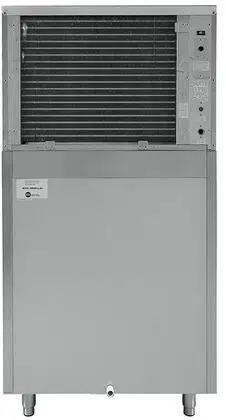
Access Cover
Grounding Screw
Stain Relief Bracket
9
Ice Maker Installation
ELECTRICAL REQUIREMENTS
Plug into a grounded 3-prong outlet.
Never remove the grounding prong from the plug.
Never use an adapter.
Never use an extension cord.
Failure to follow these instructions can result in re,
electrical shock or death.
Before you move your ice maker into its nal location, be sure you have the proper electrical
connection. Refer to the nameplate rating at the left of the ice machine to make sure proper voltage,
properly grounded in accordance with National Electrical Code and local codes and ordinances,
is required. The ice maker should always be plugged into its own individual electrical outlet. It is
recommended that a separate circuit, serving only your ice maker, be provided. Use receptacles that
cannot be turned off by a switch or pull chain. The fuse (or circuit breaker) size should be 20 amperes.
Recommended grounding method
For your personal safety, this appliance must be grounded. The power supply cord (not included) must
have a 3-prong grounding plug. To minimize possible shock hazard, the cord must be plugged into a
mating 3-pronged and grounding-type wall receptacle, grounded in accordance with the National
Electrical Code and local codes and ordinances. If a mating wall receptacle is not available, it is
the personal responsibility of the customer to have a properly grounded, 3-prong wall receptacle
installed by a qualied electrician.
CONNECTING THE POWER SUPPLY LINE
1. Unscrew the two screws holding the access cover and remove the cover. You will nd two leads
(black and white). See drawing below
2. Feed a power supply cord (not included) through the access cover and connect it with the two
leads. The ground line should be connected to the grounding screw. The two connectors must be
insulated. Put the access cover back in place.
3. You will nd a strain relief bracket in the accessory package. Fix the power supply cord below the
bracket, as shown in the previous illustration.
4. The other end of the power supply cord should be connected to an outlet that is in accordance
with the local electrical code.
Note: This machine is stackable on any of the machines in this manual. If the machine is to be stacked
on top of another machine, a stacking kit will need to be installed. Refer to the installation instructions
included with the stacking kit.
DANGER
WARNING
CAUTION
Loading ...
Loading ...
Loading ...