Loading ...
Loading ...
Loading ...
en Installation instructions
24
2.
Ensure that there is unhindered access to this valve.
Checking the leak-tightness and burner behaviour
1.
After connecting the gas pipe, use soapy water to
check the connections for leak-tightness.
2.
Switch on the appliance in accordance with the user
manual.
3.
Ignite all burners and check whether the flames re-
main stable for both high and low settings.
17.10 Installing the appliance
1.
Slide the appliance and centre it.
Do not kink the connection cable.
2.
Open the oven door completely.
3.
Remove the cover.
4.
Screw the appliance tightly onto the unit.
5.
Put the protective cover on.
Note:Never close the gap between the worktop and
the appliance using additional battens.
17.11 Changing the gas type
If the appliance has not already been set up for the ex-
isting gas type, the appliance must be converted. Only
a licensed professional may connect the appliance to
another gas type in accordance with the applicable
regulations.
The gas type and gas pressure that are preset at the
factory are specified on the rating plate.
→"Product number (E-Nr.) and production number
(FD)", Page17
To convert the appliance to another gas type, replace
the nozzles and set the minimum gas flow.
Replacing the oven burner nozzles
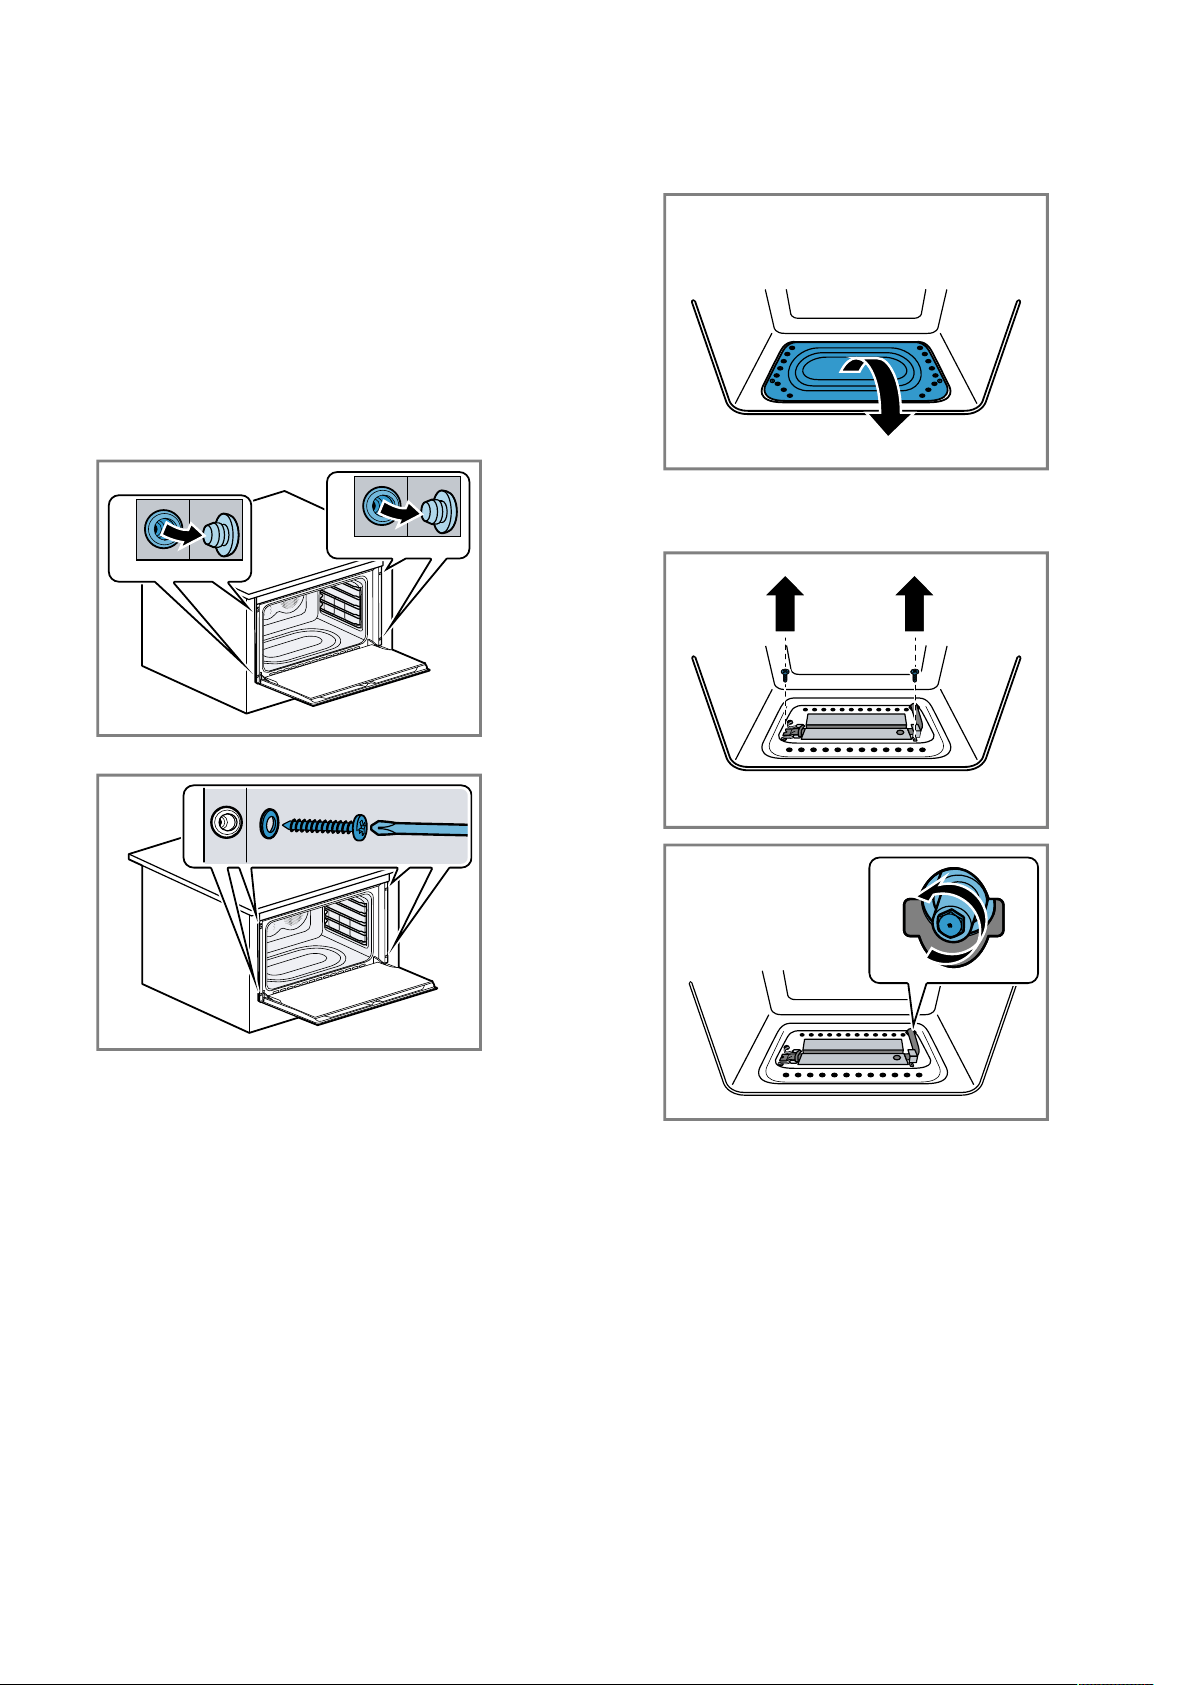
1.
Slightly raise the base plate forwards and then pull
this out towards the front.
2.
Unscrew the nozzle and replace it with a nozzle that
is suitable for the new gas type.
→"General nozzle table", Page25
3.
Replace the gas label with the new label that is in-
cludes with the nozzle set.
4.
To assemble the oven burner and the base plate,
proceed in reverse order.
Setting the minimum gas flow
1.
Open the appliance door.
2.
Press and hold the control knob for the oven and
turn the control knob to the maximum position.
a The gas burner ignites.
3.
Press and hold the knob for 15seconds.
4.
Close the appliance door.
5.
Remove the control knob.
Loading ...
Loading ...
Loading ...