Loading ...
Loading ...
Loading ...
OVENCO KiNG
Control Panel
A B C
UPPER OVEN
CANCEL Convect Bake
, i I I
Oven More
Light Options Clean Broil
Oven
Options Clean Broil
LOWER OVEN
-O
-©
D
©
©
©
EF G kl
m I
! 2 3
ABC DEE
4 5 6
GH_ JKL MNO
setup- 7 8 9
PQRS IUV WXYZ
I_JENN-AIR
Back 0 Enter
l ..... J
rock
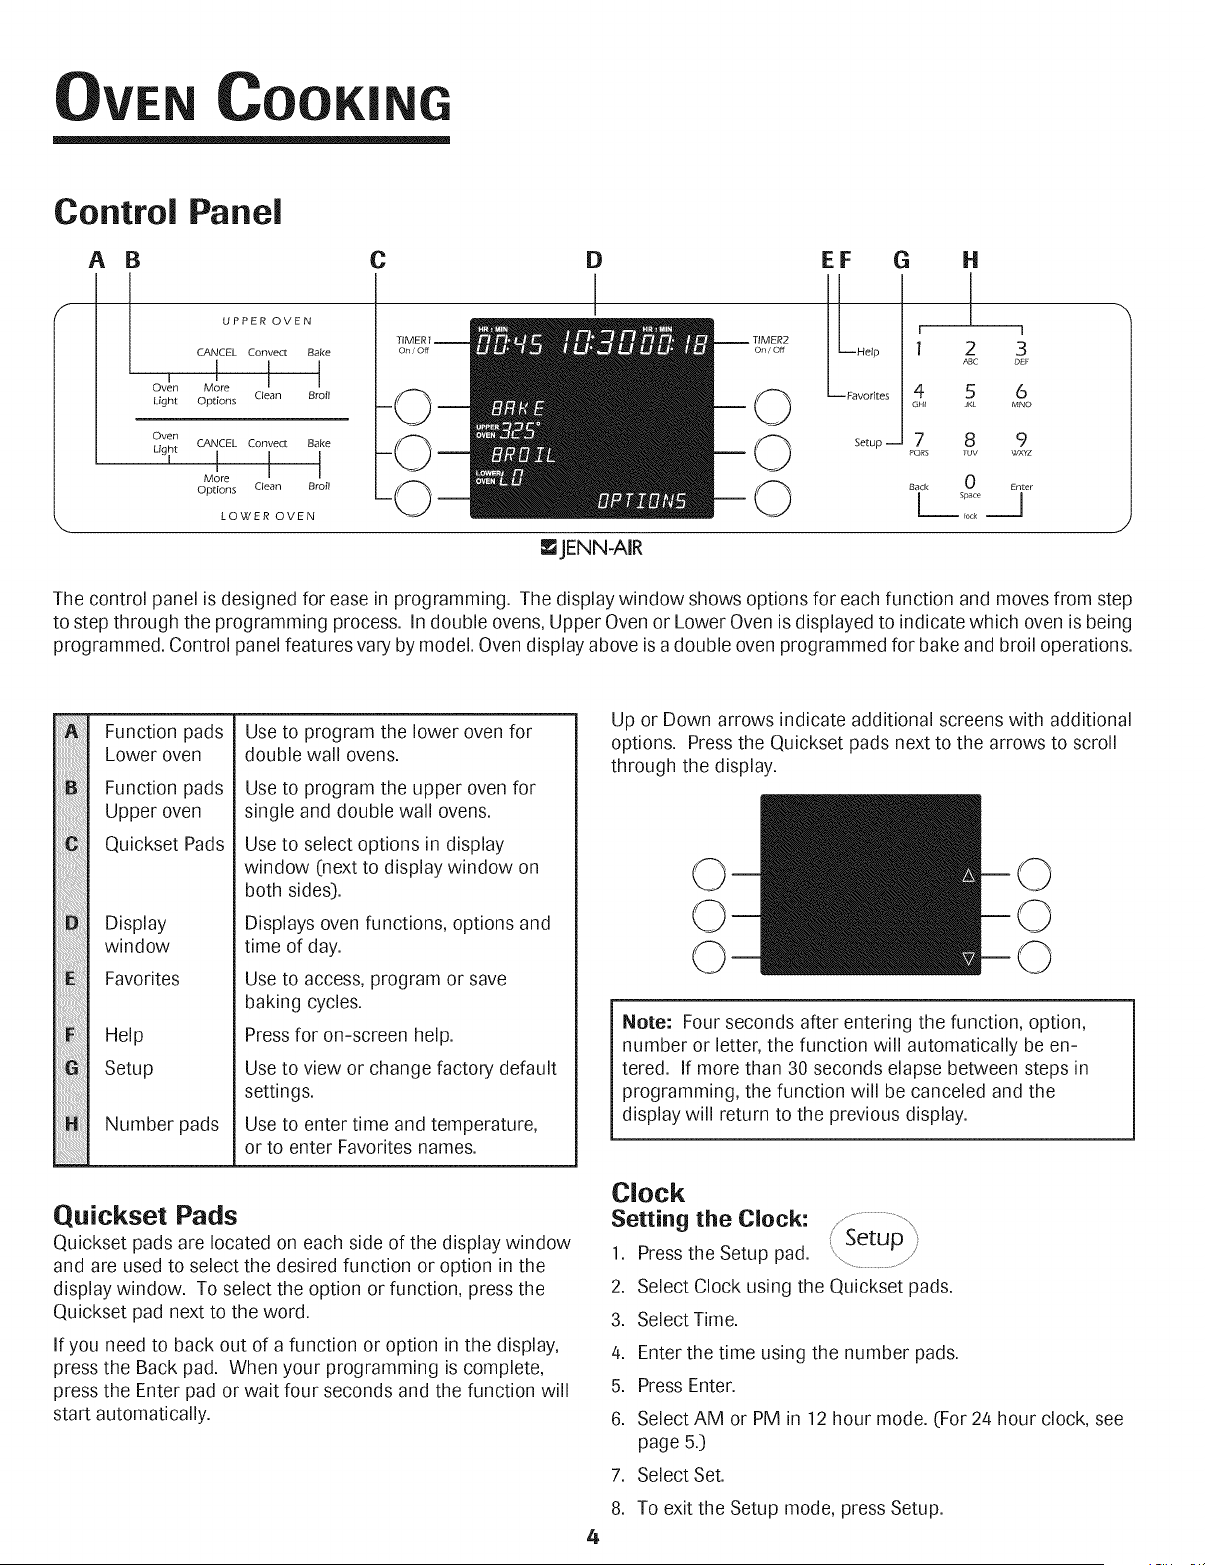
The control panel isdesigned for ease in programming. The display window shows options for each function and moves from step
to step through the programming process. In double ovens, Upper Oven or Lower Oven is displayed to indicatewhich oven is being
programmed. Control panel features vary by model. Oven display above isa double oven programmed for bake and broil operations.
i:i_i!i!iiE
Function pads
Lower oven
Function pads
Upper oven
Quickset Pads
Display
window
Favorites
Help
Setup
Number pads
Use to program the lower oven for
double wall ovens.
Use to program the upper oven for
single and double wall ovens.
Use to select options in display
window (next to display window on
both sides).
Displays oven functions, options and
time of day.
Use to access, program or save
baking cycles.
Press for on-screen help.
Use to view or change factory default
settings.
Use to enter time and temperature,
or to enter Favorites names.
Quickset Pads
Quickset pads are located on each side of the display window
and are used to select the desired function or option in the
display window. To select the option or function, press the
Quickset pad next to the word.
If you need to back out of a function or option in the display,
press the Back pad. When your programming is complete,
press the Enter pad or wait four seconds and the function will
start automatically.
4
Up or Down arrows indicate additional screens with additional
options. Press the Quickset pads next to the arrows to scroll
through the display.
0
©
Note: Four seconds after entering the function, option,
number or letter, the function will automatically be en-
tered. If more than 30 seconds elapse between steps in
programming, the function will be canceled and the
display will return to the previous display.
Clock
Setting the Clock:
1.
2.
3.
4.
5.
6.
7.
8.
Press the Setup pad. Setup ii
Select Clock using the Quickset pads.
Select Time.
Enter the time using the number pads.
Press Enter.
Select AM or PM in 12 hour mode. (For 24 hour clock, see
page 5.)
Select Set.
To exit the Setup mode, press Setup.
Loading ...
Loading ...
Loading ...