Loading ...
Loading ...
Loading ...
NOTICE
Blocked IceMaker and water outlet.
Risk of damage to the IceMaker and the drawer outlet.
u
Put containers with a maximum height of 12 cm in the
drawer under the IceMaker.
Ensure that the IceMaker drawer is empty.
u
Put containers with a max. height of 12 cm in the drawer
under the IceMaker.
u
Press Menu.
u
Press the navigation arrows until the IceMaker is
displayed.
u
Press the IceMaker symbol.
u
Press the navigation arrows until flushing is
displayed.
u
Press ON.
w
Water pipes are rinsed and at the same time
the ice cube tray ice cube tray is turned back
to the cleaning position.
u
Do not operate the screen during this procedure.
Flushing function terminated: The symbol appears.
u
Press OK.
u
Remove the drawer and the container.
u
Clean the drawer and, if necessary, remove excess water
from the drawer.
IceMaker holiday function
The IceMaker holiday function is suitable for short phases
when no ice cubes are to be made, for example, when you are
on holiday.
Switching the IceMaker holiday function on.
The IceMaker drawer must be emptied and pushed in.
u
Press menu.
u
Press the navigation arrows until the IceMaker is
displayed.
u
Press the IceMaker symbol.
u
Press the navigation arrows until the IceMaker
holiday function is displayed.
u
Press ON.
w
The ice cube tray moves to the cleaning position.
The IceMaker switches to holiday function.
w
The IceMaker holiday function symbol appears in
the menu area.
u
Remove the drawer.
u
Clean the ice cube tray and drawer with a soft cleaning cloth
and warm water. If necessary use a mild detergent. Then
rinse out.
u
Push the drawer in.
Switching the IceMaker holiday function off
NOTICE
Sickness caused by dirty ice compartment.
u
After the IceMaker has been switched off for a long time,
clean the ice cube tray.
NOTICE
Rinse agent residue in the ice compartment and drawer.
Nausea or irritation of the mucous membrane.
u
Remove rinse agent residue: Discard the first three batches
of ice cubes.
u
Remove the drawer.
u
Clean the ice cube tray and drawer with a soft cleaning cloth
and warm water. If necessary use a mild detergent. Then
rinse out.
u
Push the drawer in.
u
Press Menu.
u
Press the navigation arrows until the IceMaker is
displayed.
u
Press the IceMaker symbol.
u
Press OFF.
w
The ice cube tray moves to the operating position. The
IceMaker switches on.
w
The IceMaker symbol appears in the menu field instead of
the IceMaker holiday function symbol.
Switching off the IceMaker
If no ice cubes are required, the IceMaker can be switched off
independently of the freezer compartment.
When the IceMaker is switched off, the drawer of the IceMaker
can also be used for freezing and storing food.
u
Cleaning the IceMaker (see 6.5) .
u
Press Menu.
u
Press the navigation arrows until the IceMaker is
displayed.
u
Press the IceMaker symbol.
u
Press OFF.
w
The IceMaker is switched off.
u
If necessary, food can now be frozen in the drawer up to a
maximum height of 12 cm.
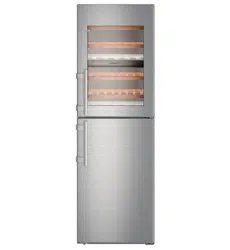
5.5 Wine zone
You can bring your wines to the ideal drinking temperature
slowly and gradually in the wine zone.
5.5.1 Storing wine bottles
48 Bordeaux bottles (0,75 l) can be stored in the wine zone.
u
Store white wine only in one compartment and red wine only
in the other, since both compartments can be set to inde-
pendent temperatures.
u
If possible, lay bottles of the same type of wine side by side
on the same grid shelf.
u
Rearrange bottles as seldom as possible.
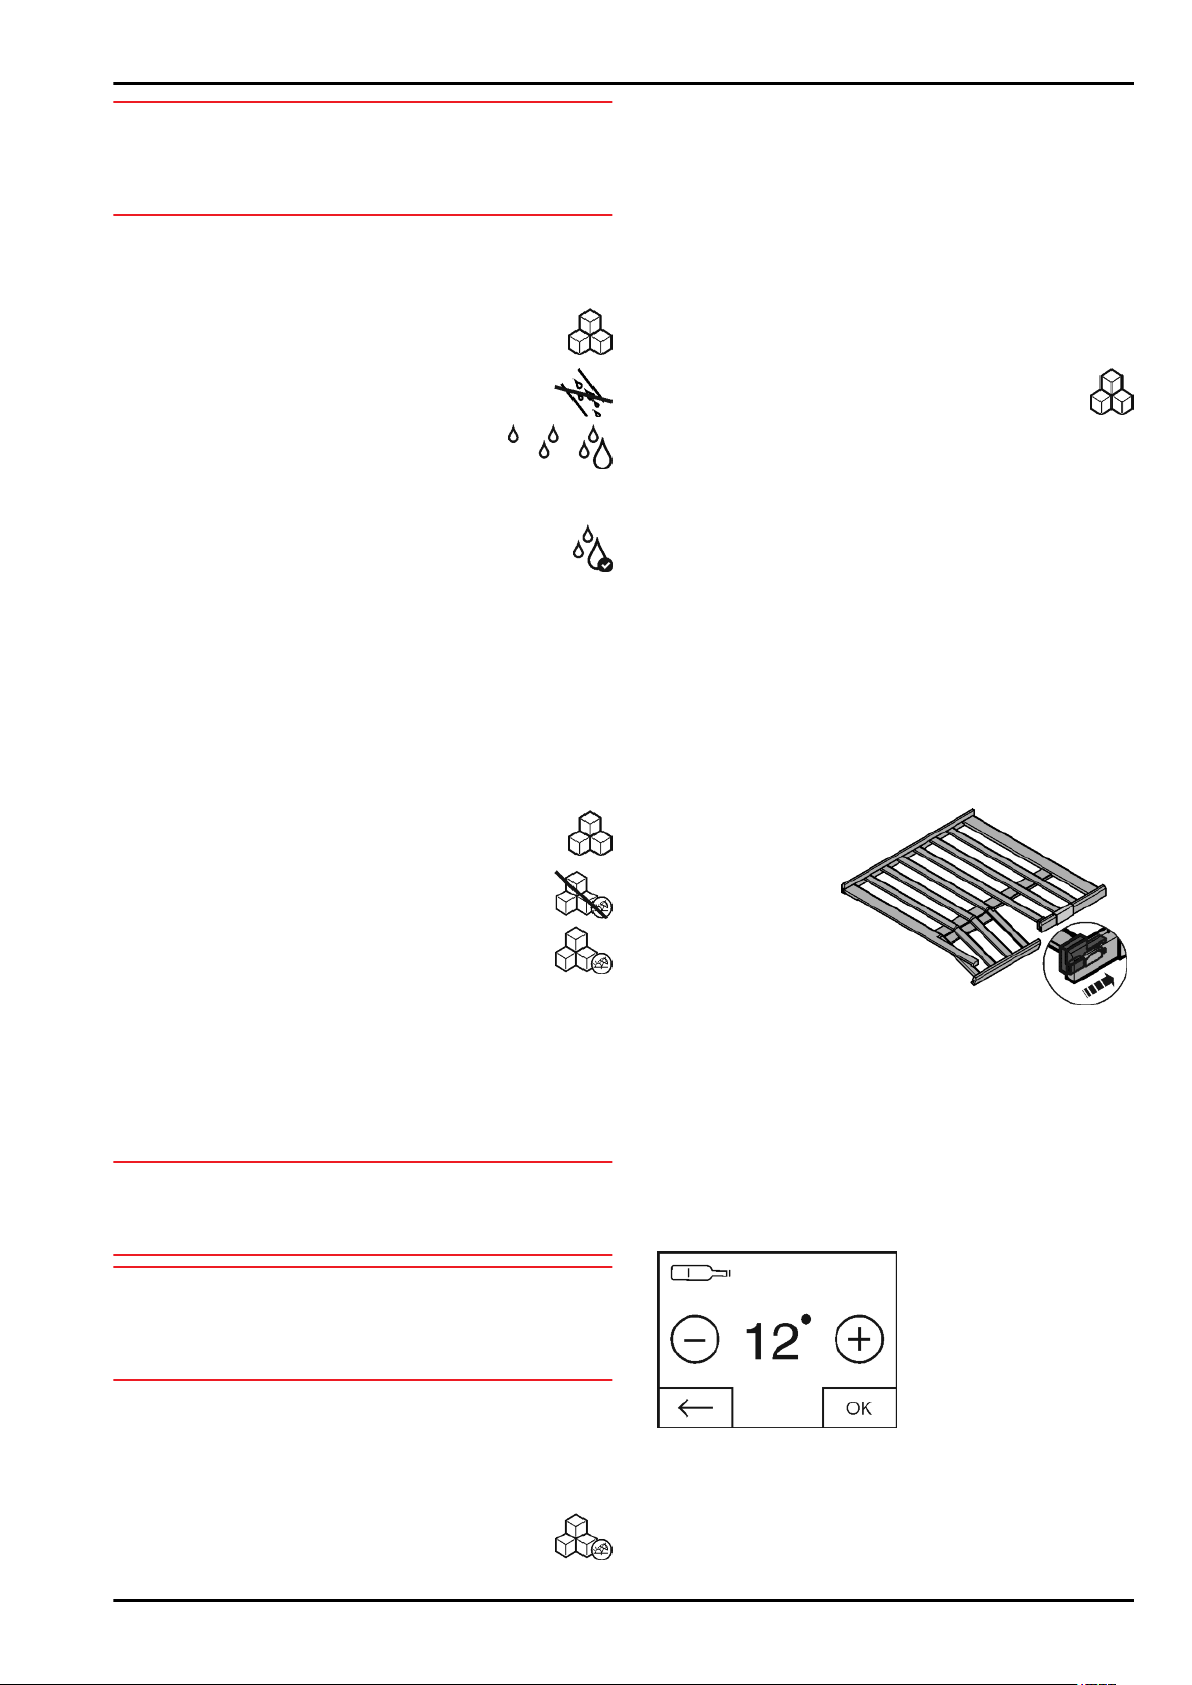
u
Stored open bottles
on the folded down
wooden grid shelf.*
u
To fold down the
wooden grid shelf:
press the lock under
the trim sideways.*
w
The wooden grid
shelf folds down.*
*
5.5.2 Setting the temperature of the wine
cooler
The appliance is set up for regular use by default. You can set
the temperature from 20 °C to 5 °C, we recommend 8 °C to
12 °C.
The wine cooler is divided into two compartments which you
can set at different temperatures.
u
Press the wine cooler field.
w
The following screen is displayed:
Fig. 49
Setting a higher temperature:
u
Press plus.
Setting a lower temperature:
u
Press minus.
The minus symbol is greyed out when the coldest temperature
is selected.
Control
22 * Depending on model and options
Loading ...
Loading ...
Loading ...