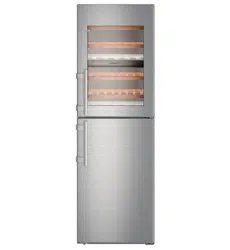
Loading ...
Loading ...
Loading ...
Switching off SuperFrost
u
Press menu.
u
Press the navigation arrow until SuperFrost is
displayed.
u
Press OFF.
w
SuperFrost is switched off.
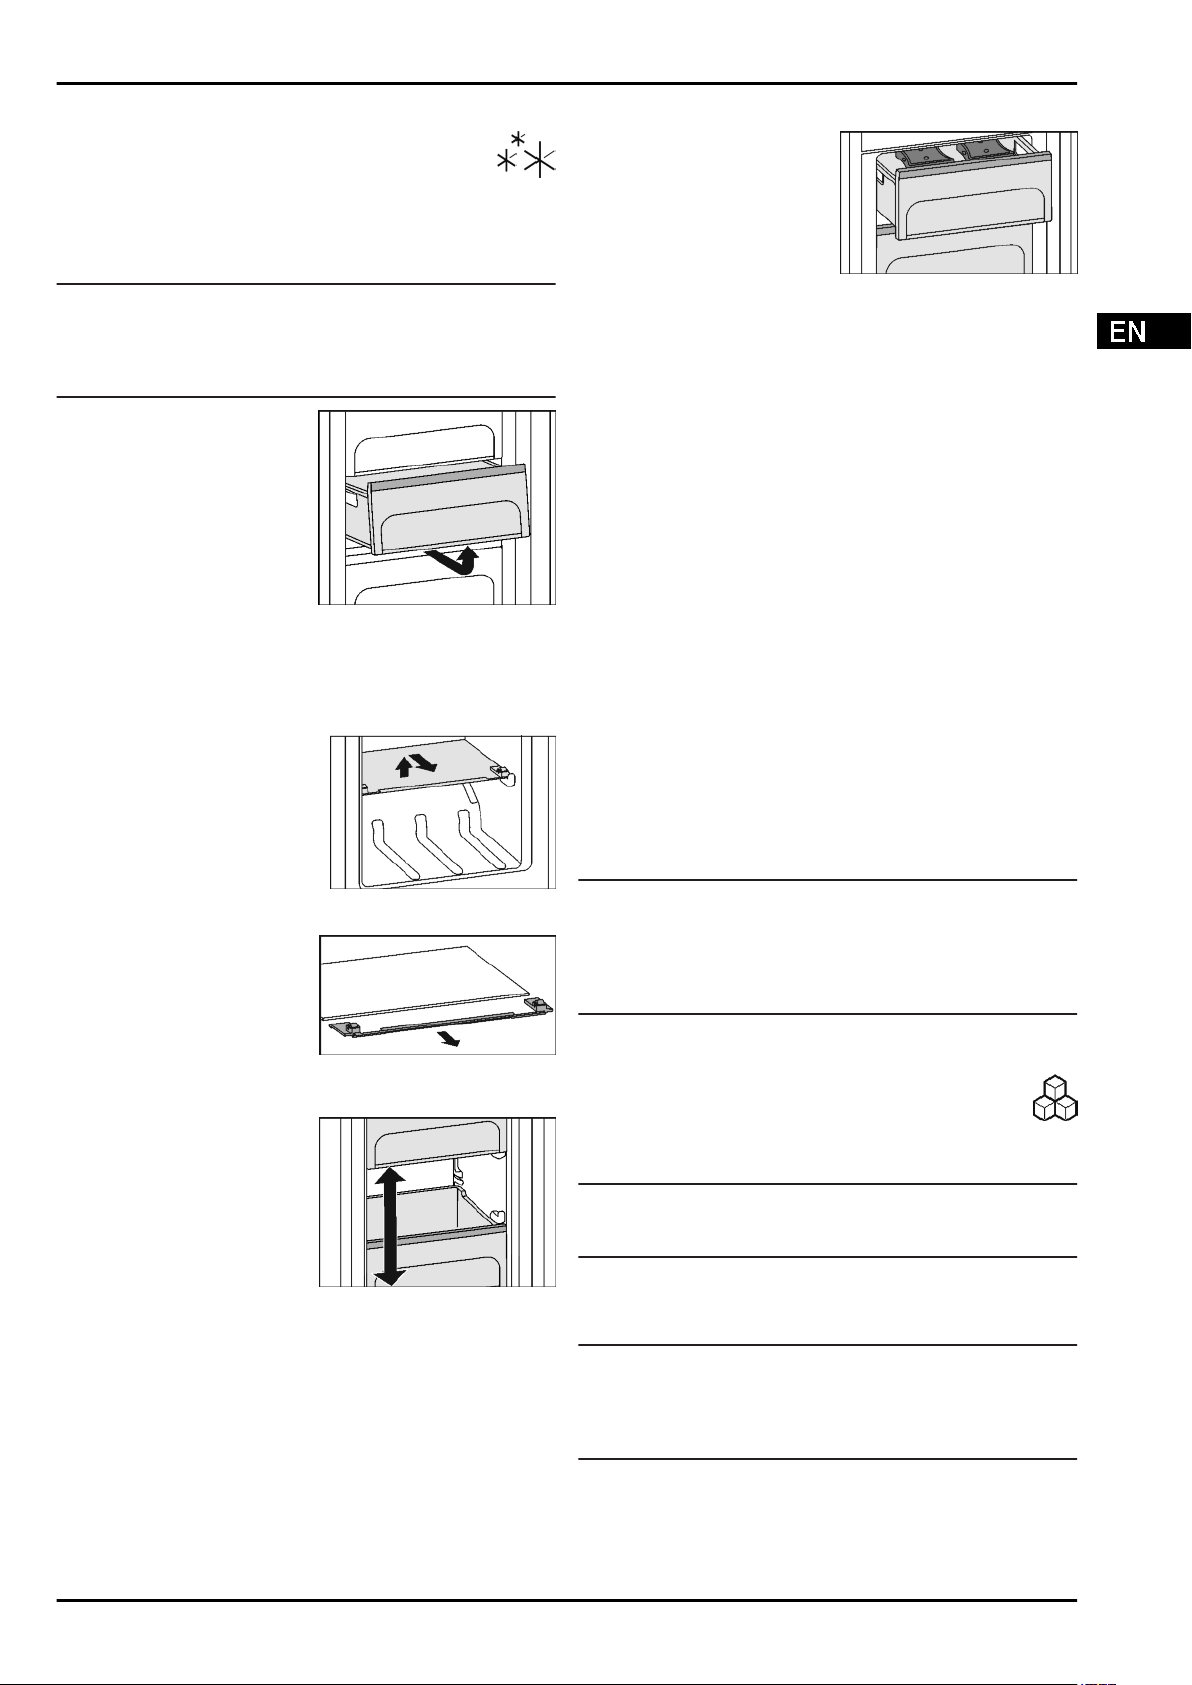
5.4.6 Drawers
Note
The energy consumption increases and the cooling perform-
ance reduces if the air ventilation is insufficient.
u
Ensure that the air slits of the fan on the rear wall are always
kept free!
u
To store frozen food directly on the shelves pull the drawer
forward and lift it out.
5.4.7 Shelves
Moving shelves
u
To remove the shelf: lift up at
the front and pull out.
u
To put the shelf back: simply
push in as far as it will go.
Removing shelves
u
The shelves may be
removed for cleaning.
5.4.8 VarioSpace
You can remove the shelves
and drawers. This leaves more
room for larger food items such
as poultry, meat, large game
and tall baked goods, which
can be frozen whole before
further preparation.
u
Each drawer can hold max. 25 kg of frozen food.
u
The shelves can each be loaded with 35 kg of frozen food.
5.4.9 Cold storage accumulators
The cold storage accumulators prevent the temperature from
rising too fast in the event of power failure.
Using cold storage accumulators
u
Place the frozen cold
storage accumulators on the
frozen food in the upper front
area of the freezer compart-
ment.
5.4.10 IceMaker
The IceMaker is located in the top drawer of the freezer on the
left-hand side.
Make certain that the following conditions are met:
-
The appliance is level.
-
The appliance is connected.
-
The freezer compartment is switched on.
-
The IceMaker is connected to the water supply.
Producing ice cubes
The production capacity depends on the freezer temperature.
The lower the temperature, the more ice cubes can be
produced in a specific period.
The ice cubes drop from the IceMaker into the drawer. When a
certain filling level has been reached, no further ice cubes are
produced. The IceMaker does not fill the drawer right up to the
brim.
Distribute the ice cubes evenly in the drawer to increase the
capacity.
If large quantities of ice cubes are needed, the complete
IceMaker drawer can be exchanged for the adjacent drawer.
When the drawer is closed, the IceMaker automatically re-
commences production.
Once the IceMaker has been switched on for the first time, it
may take up to 24 hours until the first ice cubes are produced.
Note
When the appliance is used for the first time and if it has been
out of use for a long time, particles may collect in the IceMaker
and/or water conduit.
u
Do not use or consume ice cubes that have been made 24
hours after the first ice cubes are made.
Switch the IceMaker on.
u
Press Menu.
u
Press the navigation arrows until the IceMaker is
displayed.
u
Press the IceMaker symbol.
u
Press ON.
w
The IceMaker is switched on.
Note
u
The IceMaker only makes ice cubes when the drawer is
completely closed.
Flushing
Flushing function to rinse out the water pipe when used for the
first time.
Note
The water pipe can only be rinsed out if the temperature is
more than 0 °C.
u
Only use the flushing option if the temperatures in the appli-
ance are higher than 0 °C.
Control
* Depending on model and options 21
Loading ...
Loading ...
Loading ...