Loading ...
Loading ...
Loading ...
24
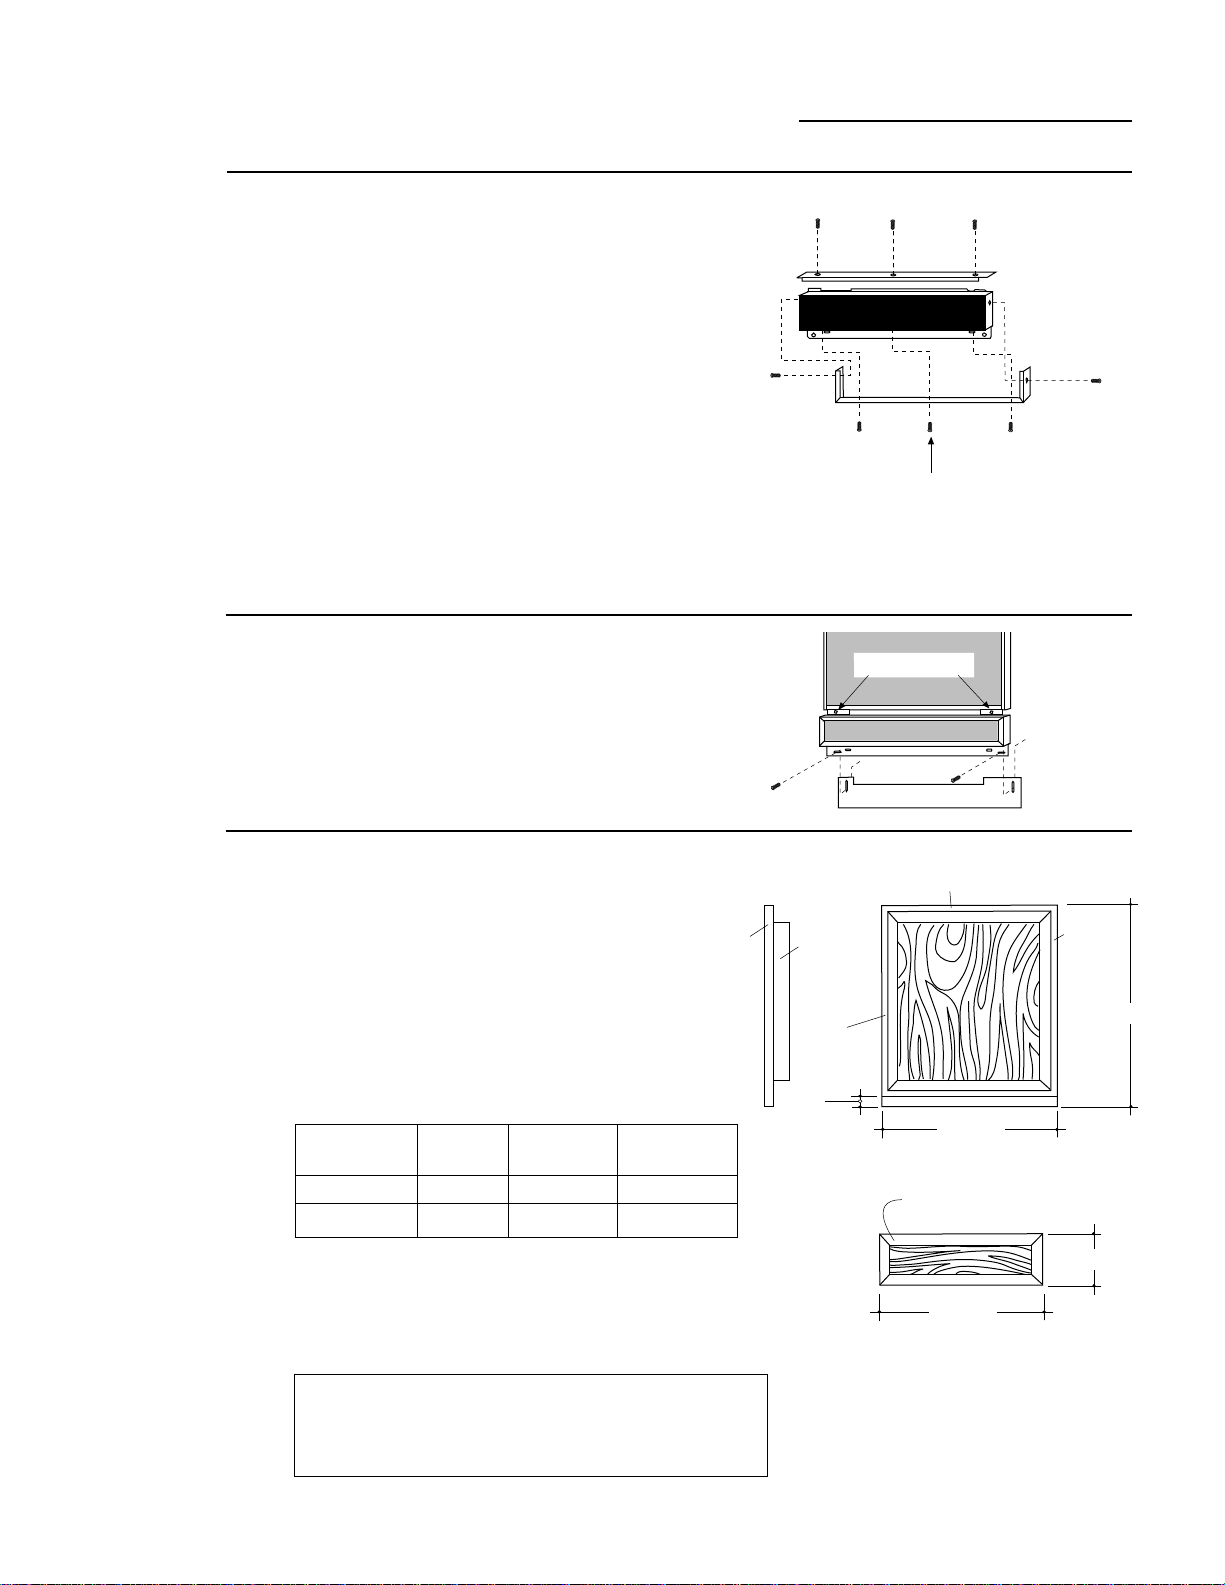
GPF425 Series Trim Kit
1/4" Custom Panels
•Place bottom trim against the bottom of the
access panel.
•Install color matched screw in the center,
then left and right screws.
•Gently, bend both ends of the bottom trim
upwards to form a “U” shape.
•Slide the 1/4" custom panel down into “U”
shaped trim.
•Place top trim over the panel. Use masking
tape to hold in place.
•Drill 3 holes into the top of the trim and
into the assembly. Install 3 color matched
screws provided.
•Drill holes through the side trim holes and
into the access panel. Secure each side of
the trim with one screw. Remove tape.
•Place the toekick against the bottom of the
dishwasher.
•Place the access panel assembly against the
dishwasher and tighten the attached screws.
•Re-install two original bottom screws loosely.
Adjust the toekick up or down and tighten
screws.
This trim kit is designed to accommodate
1/4" thick panels. A raised panel screwed or
glued to 1/4" thick backing can be used. The
raised portion of the panel must be fabricated
to permit clearances for the trim on all sides.
•“X” Clearance shown at the bottom of the
raised panel must be maintained to prevent
the door from striking the access panel when
opened.
Appearance Total “X”
Panel Backing Thickness Clearance
3/4" 1/4" 1" 2"
1/2" 1/4" 3/4" 1-7/8"
IMPORTANT!
GPF100 Dishwasher Door Spring Kit MUST BE installed
when custom door panels weigh 4 pounds or more.
A 3/4" thick custom panel may be installed by
routing the top and sides to 1/4" thickness.
The bottom edge, Dimension “X”, should be
and 1-1/2" high and 1/4" thick.
Install Center
Screw First
Tighten 2 Screws
19-3/4"
1/4" Min. Clearance
23-9/16"
Appearance
Panel
1/4"
Thick
Panel
1/8" Min.
Clearance
1/8" Min.
Clearance
X
Clearance
3-11/16"
1/4" Min. Clearance
All Sides
23-9/16"
Access Panel
Step 4:
Install Custom
Access Panel
Step 5:
Install Access
Panel Assembly
And Toekick
Installation
Options
Loading ...
Loading ...
Loading ...