
Loading ...
Loading ...
Loading ...
THE SELF.CLEAN CYCLE (3 HOURS - NORMAL CLEAN TIME)
BEFORE A CLEAN CYCLE
1. Remove the broiler pen end grid, oven racks, all
utensils end any foil that may he In the oven. Do not
try to clean utensils or any other objects In the oven
during a self-clean cycle. If oven racks ere left In
the range durlng • clean cycle, they willdarken,
lose their luster and become herd to slide. If
you choose to leave the racks In the oven, you
can polish the edges of the racks with steel
wool end •pply • small •mount of vegetable oil
to the rack edges after the self.clean cycle.
This will make the racks e•sier to slide.
2. Soil on the oven front frame, under the front edge of
the cooktop, the door finer outside the door gasket
and the front edge of the oven cavity (about 1" into the
oven) will not be cleaned during • clean cycle (see
Illuetrstlon below). Clean these areas by hand before
starting a clean cycle.
Use hot water with a soap-filled steel wool pad. We
recommend • cleanser such as 'Soft Scrub®' brand
or • similar cleaning product to keep white surfaces
looking clean and new. After cleaning, rlnas well to
help prevent • brown realdue from forming when the
oven Is heated. Buff these areas dry with e dry cloth.
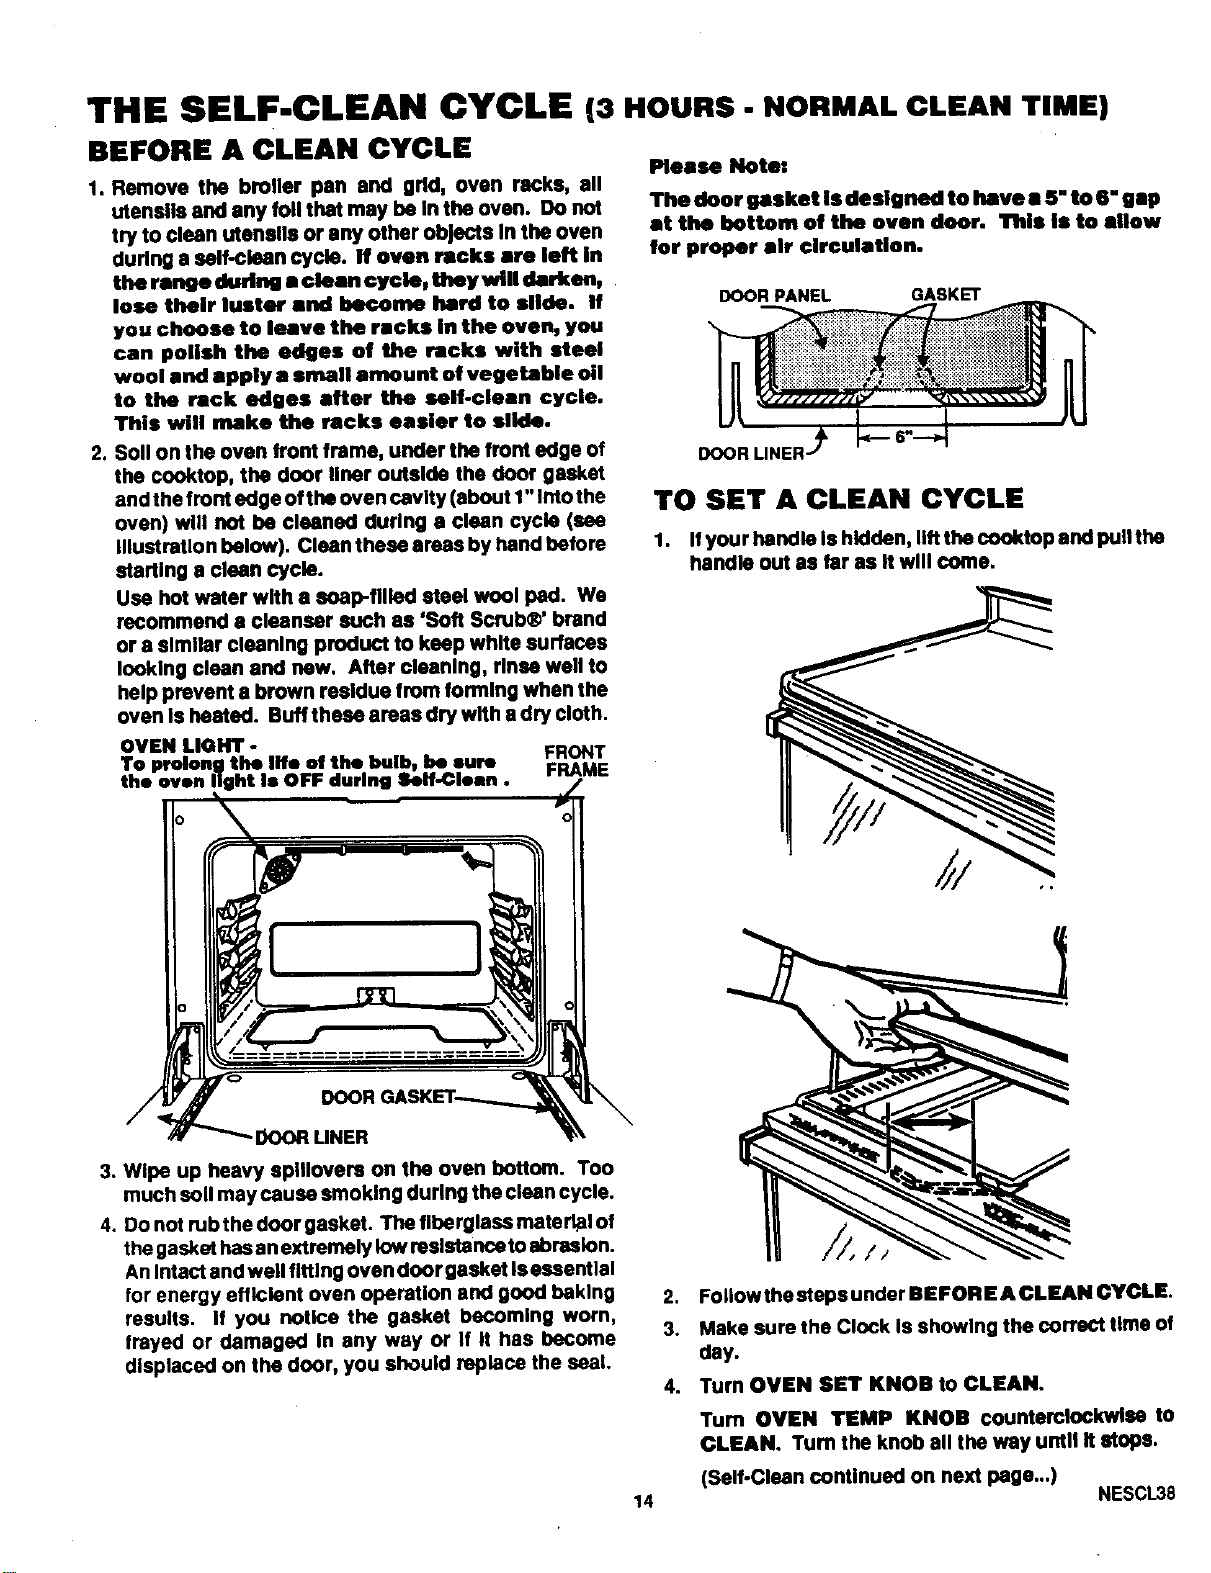
Please Note,
The door gasket is designed to have • 5" to 6" gap
at the bottom of the oven door. This is to allow
for proper air circulation.
DOOR PANEL GASKET
TO SET A CLEAN CYCLE
1. If your handle Is hidden, lift the cooktop and pull the
handle out as far as it will come.
OVEN LIGHT.
To prolong the lifo of the bulbw be sure
the oven light Is OFF during Self-Clean.
/,
FRONT
FRAME
O _ v -
3. Wipe up heavy splllovera on the oven bottom. Too
much soil may cause smoking during the clean cycle.
4. Donot mbthedoorgasket. Thefiherglassmatert_lof
the gasket has anextremely low resistance to abrasion.
An Intact and well fitting oven door gasket Iseasentlal
for energy efficient oven operation and good baking
results. If you notice the gasket becoming worn,
frayed or damaged In any way or If It has become
displaced on the door, you should replace the seat.
2. Follow the steps under BEFORE A CLEAN CYCLE.
3. Make sure the Clock is showing the correct time of
day.
4. Turn OVEN SET KNOB to CLEAN.
Tum OVEN TEMP KNOB counterclockwise to
CLEAN. Turn the knob all the way until it stops.
(Self-Clean continued on next page...)
14 NESCL38
Loading ...
Loading ...
Loading ...