s,,,,, I Kenmore
,9.0.0......,..,*.*..... ...................................... ... ........ 1"5
USE AND CARE
Removal of Packaging Tape ........... :.......................... 5
Your Renge and Its Features ..................................... 6
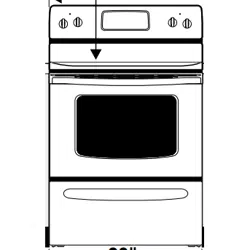
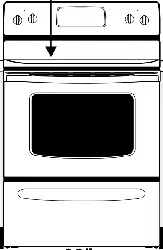
Oven Vent .................................................................... 7
Cooktop Controls ................................................... 7, 8
Clock and Timer ........................................ 9, 11, 12, t5
Oven Cooking Tips ....................... ........................ 9, 10
Baking .................................................................. 11, 12
Rcestlng .................................................................... 12
Broiling ...................................................................... 13
The Self-Clean Cycle .......................................... 14, 15
CLEANING ,,. ..............
Cleaning TIps ............................................................ 16
Removable Parts ................................................. ! 7, 18
BEFORE CALLING FOR SERVICE
What to Do Before Calling for Service 19, 20
"Do It Yourself Temperature Adjustments ........... 20
WARRANTY
MODELS 64241, 93241,
93245, 93251
USE • CARE •SAFETY
R_d_paper
MANUAL
229C4020P002-3 SR1019g

I LWARNING
• ALL RANGES CAN TIP
• INJURY TO PERSONS
COULD RESULT
• INSTALL ANTI.TIP
DEVICE PACKED
WITH RANGE
• SEE INSTALLATION
INSTRUCTIONS
STABILITY DEVICE INSTALLATION INSTRUCTIONS
FOR BRACKET KIT NO. 342473
TOOLS NEEDED:
Phlitips head screwdriver
1 3/8" open end or adjustable wrench
Bracket attaches to floor or wall to hold either right or left
rear leg leveler. If fastening to floor, be sure that screws
do not penetrate electrical wiring or plumbing. If this
cannot be determined, use shorter screws that will not
penetrate through flooring.
if the bracket came with your range, it Is shipped In the
prepack located Inside the oven. Remove the bracket
1tom the prepack and follow the instructions below.
1. Decide whether the bracket will be Installed on the
right or left side of range location.
2. If the bracket side of the range Is adjacent to a
cabinet, place the bracket against back wall and
cabinet as shown In Figure 1.
If there Is no adjacent cabinet, determine where the
location of the range side (painted outside panel) will
be. Place the bracket with Its outside edge at this
location and against back wall. See Figure 1.
,
.
5,
Determine whether you will anchor the bracket tothe
floor or wall. Fasten the bracket securely with the
screws provided. Screws are self-drilling In wood,
plywood, particle and chip board, and most metal
framing, Ifattachlngtomasonry, youcanbuysultable
screws and anchors at hardware stores. Use a
masonry drill to drill the required holes.
Using the wrench, back out the four leg levelers at
least two turns. See your Installation guide for more
leveling Information before positioning range.
Slide the range into place. Be sure rear leg leveler
fully engages slot In bracket. If range cannot be
moved back tar enough for rear leg leveler to enter
bracket, move bracket forward as required and attach
to floor In new location.
ADJACENT CABINET OR F|NAL i
LOCATION OF RANGE S_DE
PANEL
OUTSIDE EDGE OF
FLUSH WITH LEFT OR
RIGHT SIDE OF RANGE
\
WALL BEHIND
BRACKET
SCREW MUST ENTER_
WOOD OR METAL |
/
WALL
PLATE
ATTACHMENTTO WALL
Fig. 1
Fig. 2
I NCINS01-3
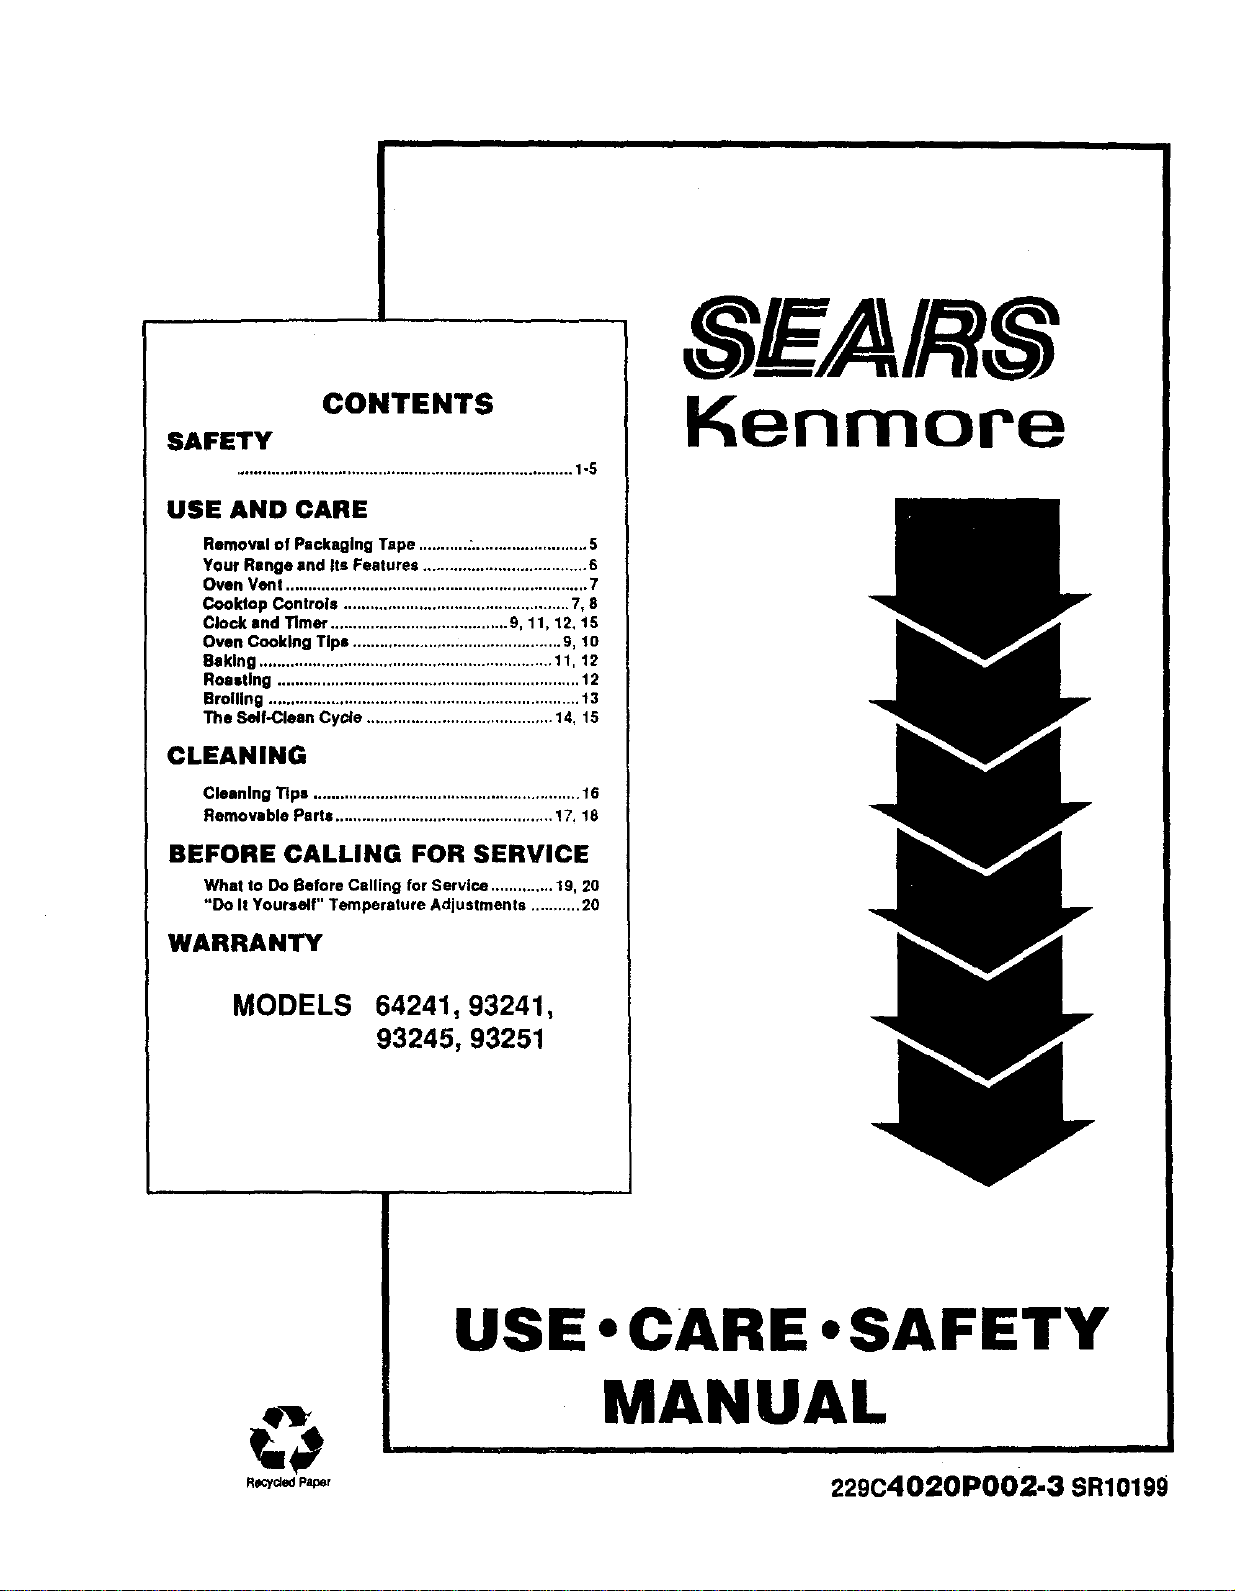
IMPORTANT INSTRUCTIONS
FOR YOUR SAFETY
SAVE THESE INSTRUCTIONS
Read aid instructions before using this appliance. When using electrical
appliances, basic safety precautions should be followed, including the following:
Teach children not to play with range
knobs or any other part of the range.
Never leave children alone or unat-
tended where a range Is In use.
CAUTION:
Items of interest to children
should not be stored in cabinets
above the range or on the
backsplash of the range. Chil-
dren climbing on the range to
reach items could be seriously
injured.
Never let anyone climb, sit or stand
on the open door or any other part of
the range. Their weight may make
the range tip over.
Never leave the oven door open when
you are not watching the range.
2 NESAF08-5
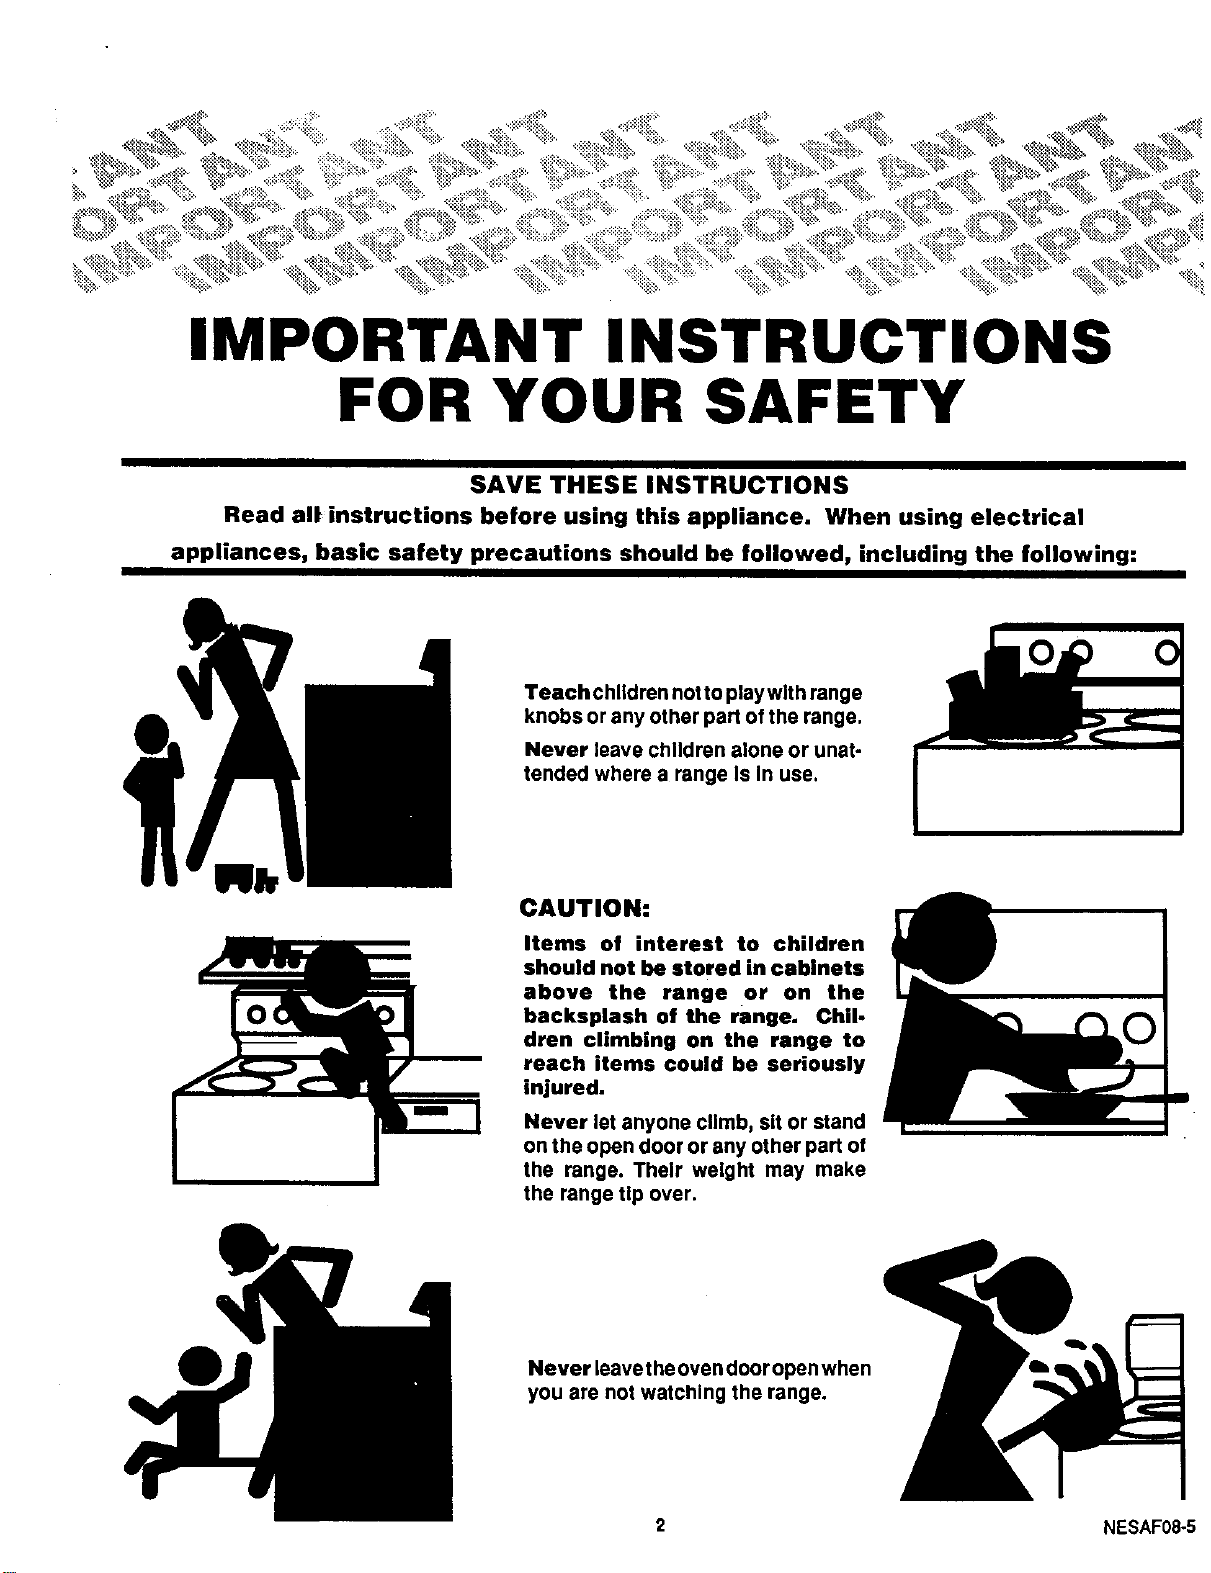
Always keep the range area clear
and free from things that will burn.
CAUTION:
Never store things In an
oven or near cooktop elements/
burners. These things may catch
fire and plastic Items could melt.
Never use your range for warming
or heating a room. You could be
burned or seriously Injured. Such
misuse could also cause damage to
the range.
Never wear loose clothing when
using your range. Such clothing
could catch fire.
Never use a towel or other bulky cloth
as a potholder. Such cloths could
catch fire on a hot element/burner.
Never let pot handles stick out
over the front of the range. Turn
handles In so that they cannot be
bumped Into. Keep the handles
away from other hot surface ele-
ments/burners.
Never leave c0oktop elements/
burners unwatched at high heat
settings. Bollovers cause smok-
Ing and greasy splllovers could
catch fire.
3 NESAFO9-2
IMPORTANT SAFETY INSTRUCTIONS
BASIC SAFETY PRECAUTIONS
Keep this book for later use.
Be sure your range Is Installed and grounded properly
by a qualified technician.
Always use dry potholders when removing pans from
the oven or cooktop. Moist or damp potholders car,
cause steam burns.
£_lways follow cleaning Instruct!ons In th!s beoL
Always keep the range and oven clean. Food and
grease are easy to Ignite. Clean the range, oven and
vents regularly.
Clean Only Parts Listed In Manual.
CAUTION: Do not store items of interest to
children in cabinets above a range or on the
backguard of a range. Children climbing on a
range to reach items could be seriously injured,
Always keep combustible wall coverings, curtains, or
drapes a safe distance away from your range and oven.
Always keep dish towels, dish cloths, potholders and
other linens a safe distance away from your range.
Never store such Items on your range.
Always keep the appliance area clear and free from
things that will burn (gasoline and other flammable
vapors and ,quids).
Never try to repair or replace any part of the range
unless Instructions are given In this book. All other
work should be done by a skilled technician.
Never heat unopened food containers. Pressure
buildup may make container burst and cause Injury.
Never leave jars or cans of fat or drippings on or near
therange. Neverlstgreasebullduponyourrange. You
can keep grease fires from starting If you clean up
grease and spills after each range use.
Never try to move a pan of hot fat, especially a deep fat
fryer. Walt until the fat has cooled.
Never touch surface units, heating elements, or Interior
surfaces of the oven. They may be hot even though they
appear dark In color.
Always keep wooden utensils, plastic utensils or canned
food a safe distance away from your range.
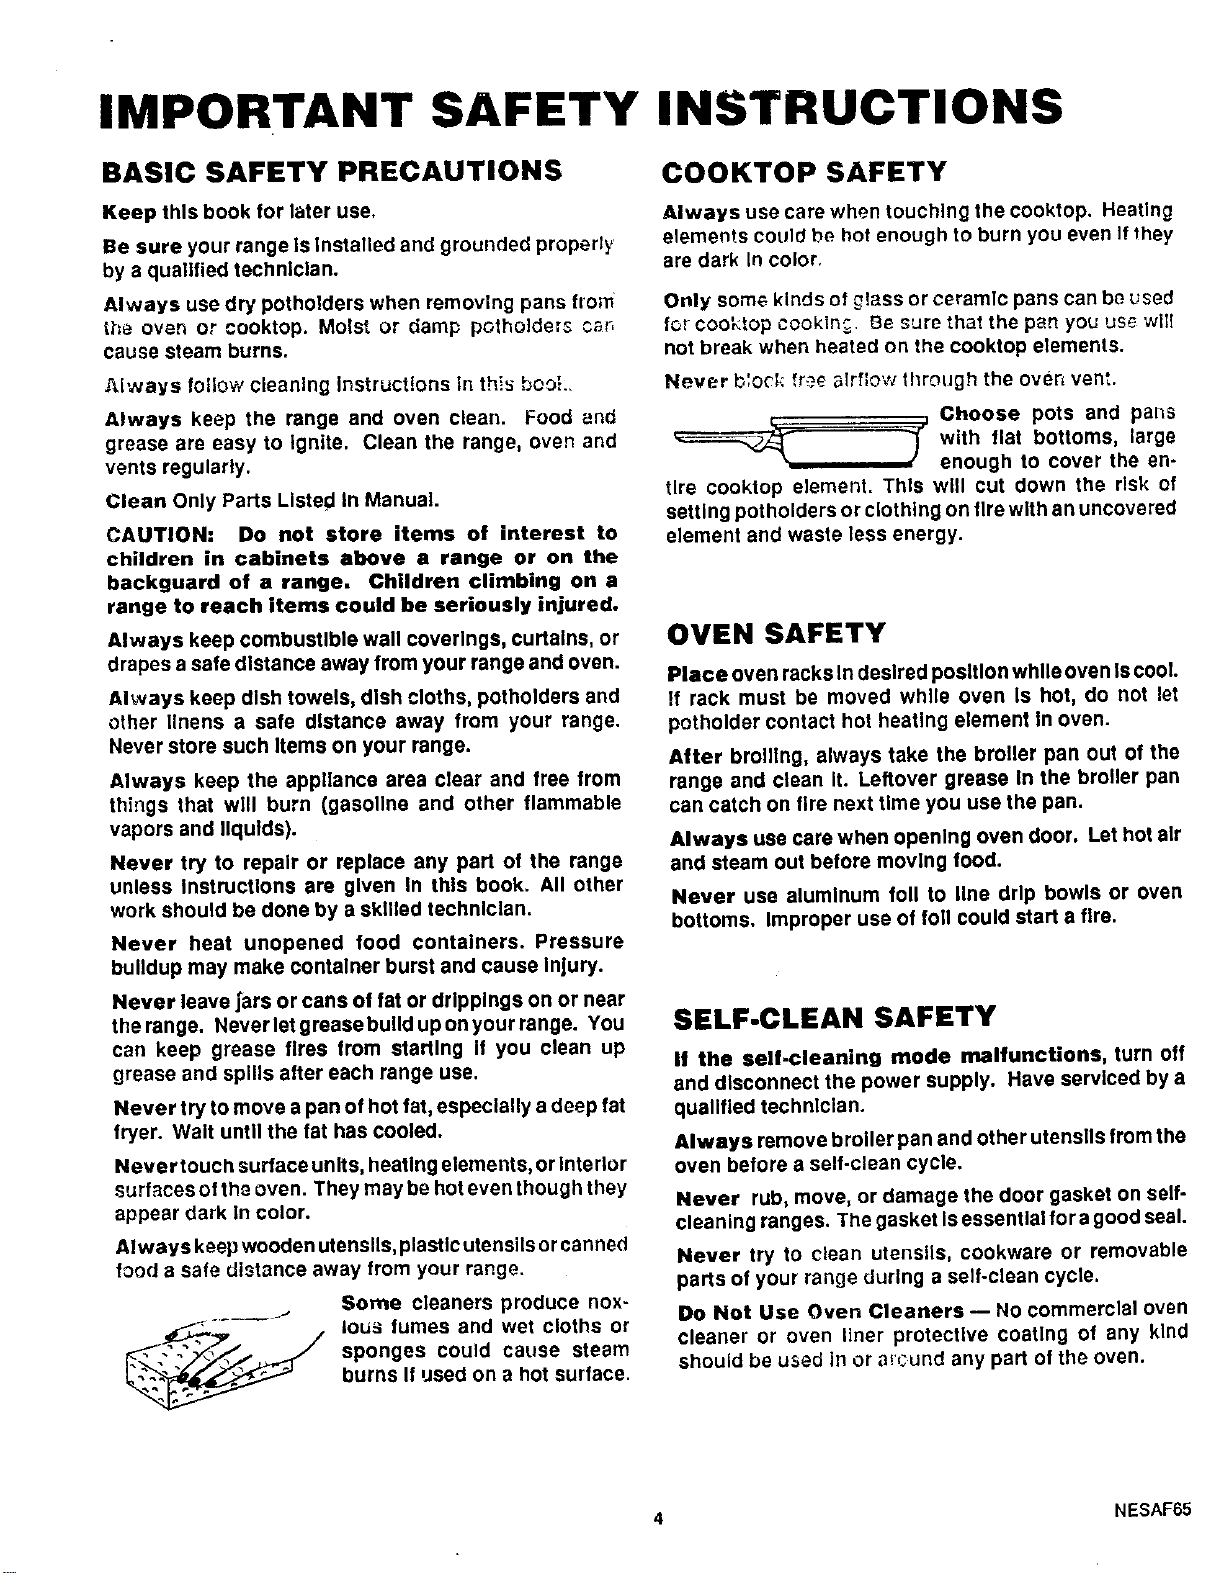
Some cleaners produce nox-
ious fumes and wet cloths or
sponges could cause steam
burns If used on a hot surface.
COOKTOP SAFETY
Always use care when touching the cooktop. Heating
elements could be hot enough to burn you even If they
are dark In color.
Only some kinds of glass or ceramic pans can be used
for cooktop cookln_ Be sure that the pan you use wlI{
not break when heated on the cooktop elements.
Never b'oc_: fr_e airflow tl_rough the oven vent.
Choose pots and pans
_with flat bottoms, large
enough to cover the en-
tire cooktop element. This will cut down the risk of
setting potholders or clothing on fire with an uncovered
element and waste less energy.
OVEN SAFETY
Place oven racks In desired position while oven Is cool.
!f rack must be moved while oven Is hot, do not let
potholder contact hot heating element In oven.
After broiling, always take the broiler pan out of the
range and clean It. Leftover grease In the broiler pan
can catch on fire next time you use the pan.
Always use care when opening oven door. Let hot air
and steam out before moving food.
Never use aluminum foil to line drip bowls or oven
bottoms. Improper use of foil could start a fire.
SELF-CLEAN SAFETY
If the self-cleaning mode malfunctions, turn off
and disconnect the power supply. Have serviced by a
qualified technician.
Always remove broiler pan and other utensils from the
oven before a self-clean cycle.
Never rub, move, or damage the door gasket on self-
cleaning ranges. The gasket Is essential for a good seal.
Never try to clean utensils, cookware or removable
parts of your range during a self-clean cycle.
Do Not Use Oven Cleaners -- No commercial oven
cleaner or oven liner protective coating of any kind
should be used in or around any part of the oven.
4 NESAF65
SAFETY INSTRUCTIONS (conUnued)
READ AND UNDERSTAND
THIS INFORMATION NOW!
Should you ever need it, you will
not have time for reading.
Be sure everyone in your home
knows what to do in case of fire.
Never use water on a grease fire -
It wlU only spread the flames.
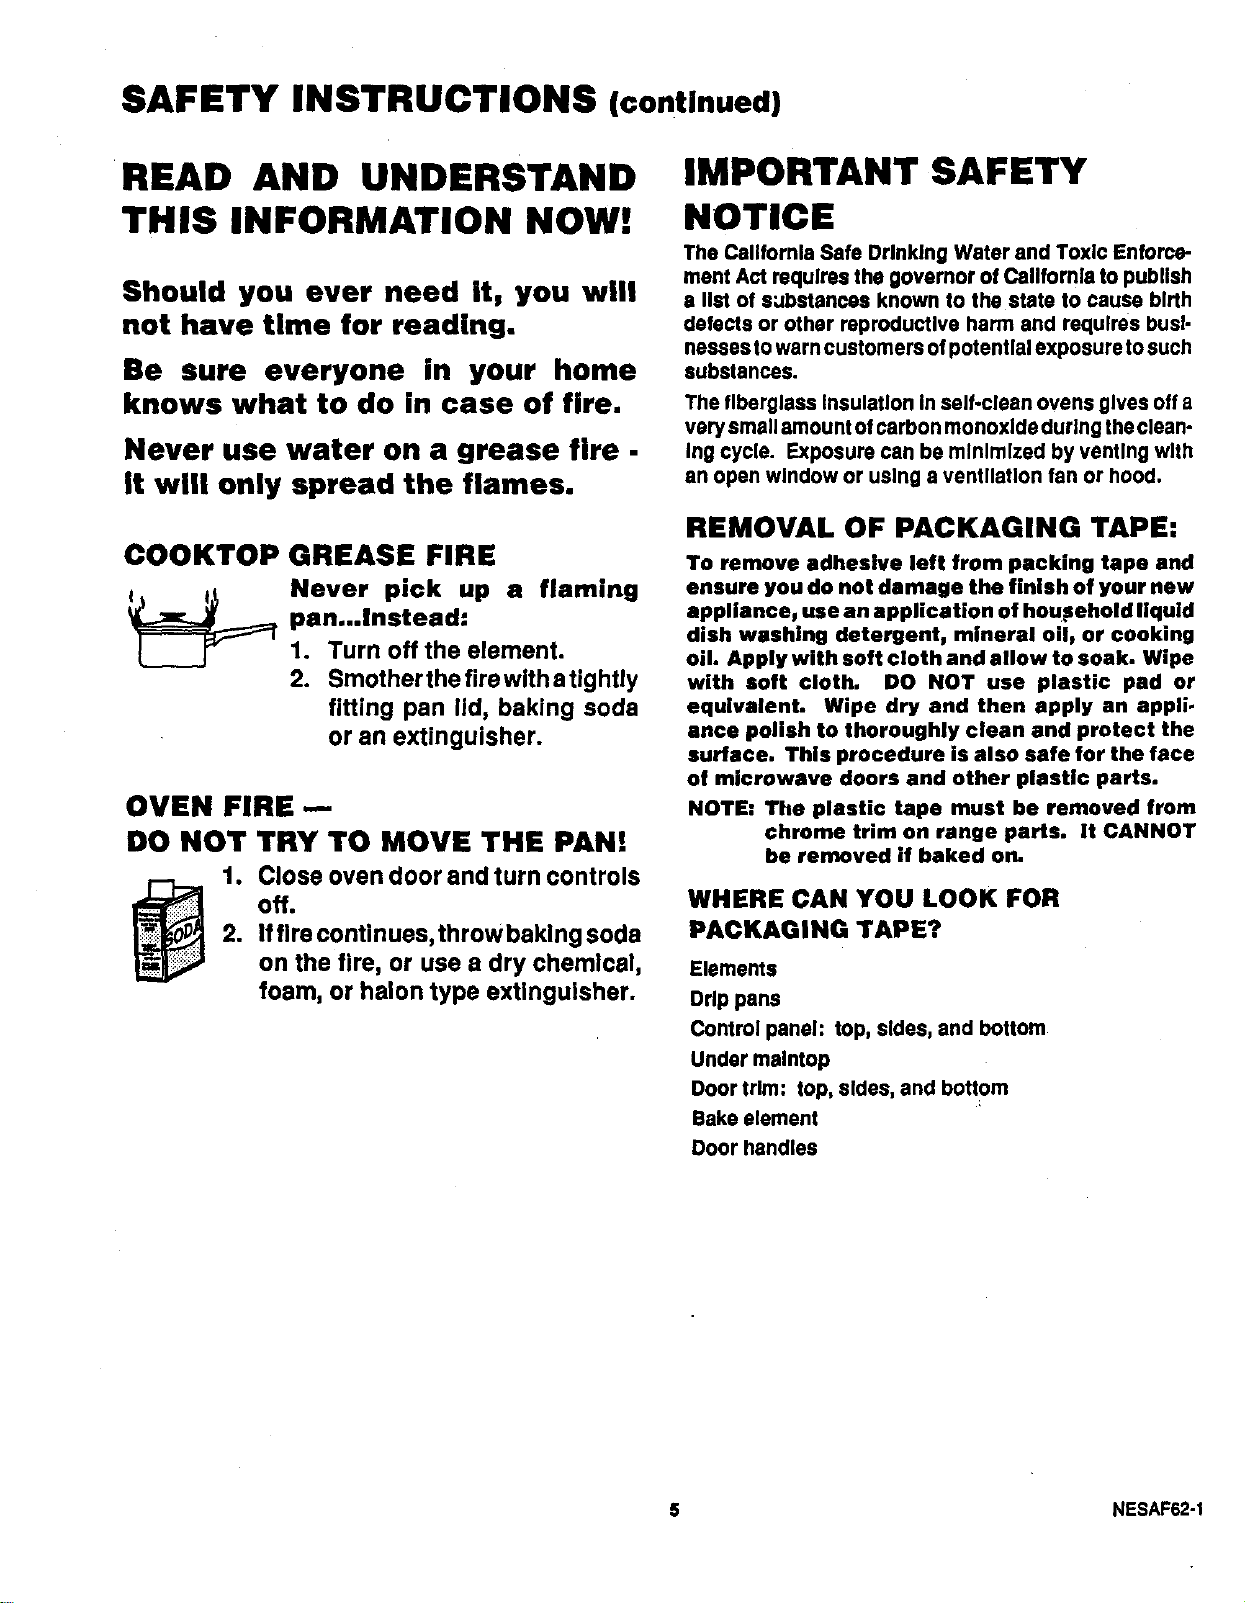
COOKTOP GREASE FIRE
__: ever pick up a flaming
pan...Instead:
1. Turn off the element.
2. Smother the fire with a tightly
fitting pan lid, baking soda
or an extinguisher.
OVEN FIRE--
DO NOT TRY TO MOVE THE PAN!
1. Close oven door and turn controls
off.
2. If fire continues, throwbaklng soda
on the fire, or use a dry chemical,
foam, or halon type extinguisher.
IMPORTANT SAFETY
NOTICE
The California Safe Drinking Water and Toxic Enforce-
ment Act requires the governor of California to publish
a list of substances known to the state to cause birth
defects or other reproductive harm and requires busi-
nesses to warn customers of potential exposure to such
substances.
The fiberglass Insulation In self-clean ovens gives off a
very small amount of carbon monoxide during the clean-
Ing cycle. Exposure can be minimized by venting with
an open window or using a ventilation fan or hood.
REMOVAL OF PACKAGING TAPE:
To remove adhesive left from packing tape and
ensure you do not damage the finish of your new
appliance, use an application of houFehold liquid
dish washing detergent, mineral oil, or cooking
oil. Apply with soft cloth and allow to soak. Wipe
with soft cloth. DO NOT use plastic pad or
equivalent. Wipe dry and then apply an appli.
ance polish to thoroughly clean and protect the
surface. This procedure is also safe for the face
of microwave doors and other plastic parts.
NOTE: The plastic tape must be removed from
chrome trim on range parts. It CANNOT
be removed if baked on.
WHERE CAN YOU LOOK FOR
PACKAGING TAPE?
Elements
Drip pans
Control panel: top, sides, and bottom
Under maintop
Door trim: top, sides, and bottom
Bake element
Door handles
5 NESAF62-1
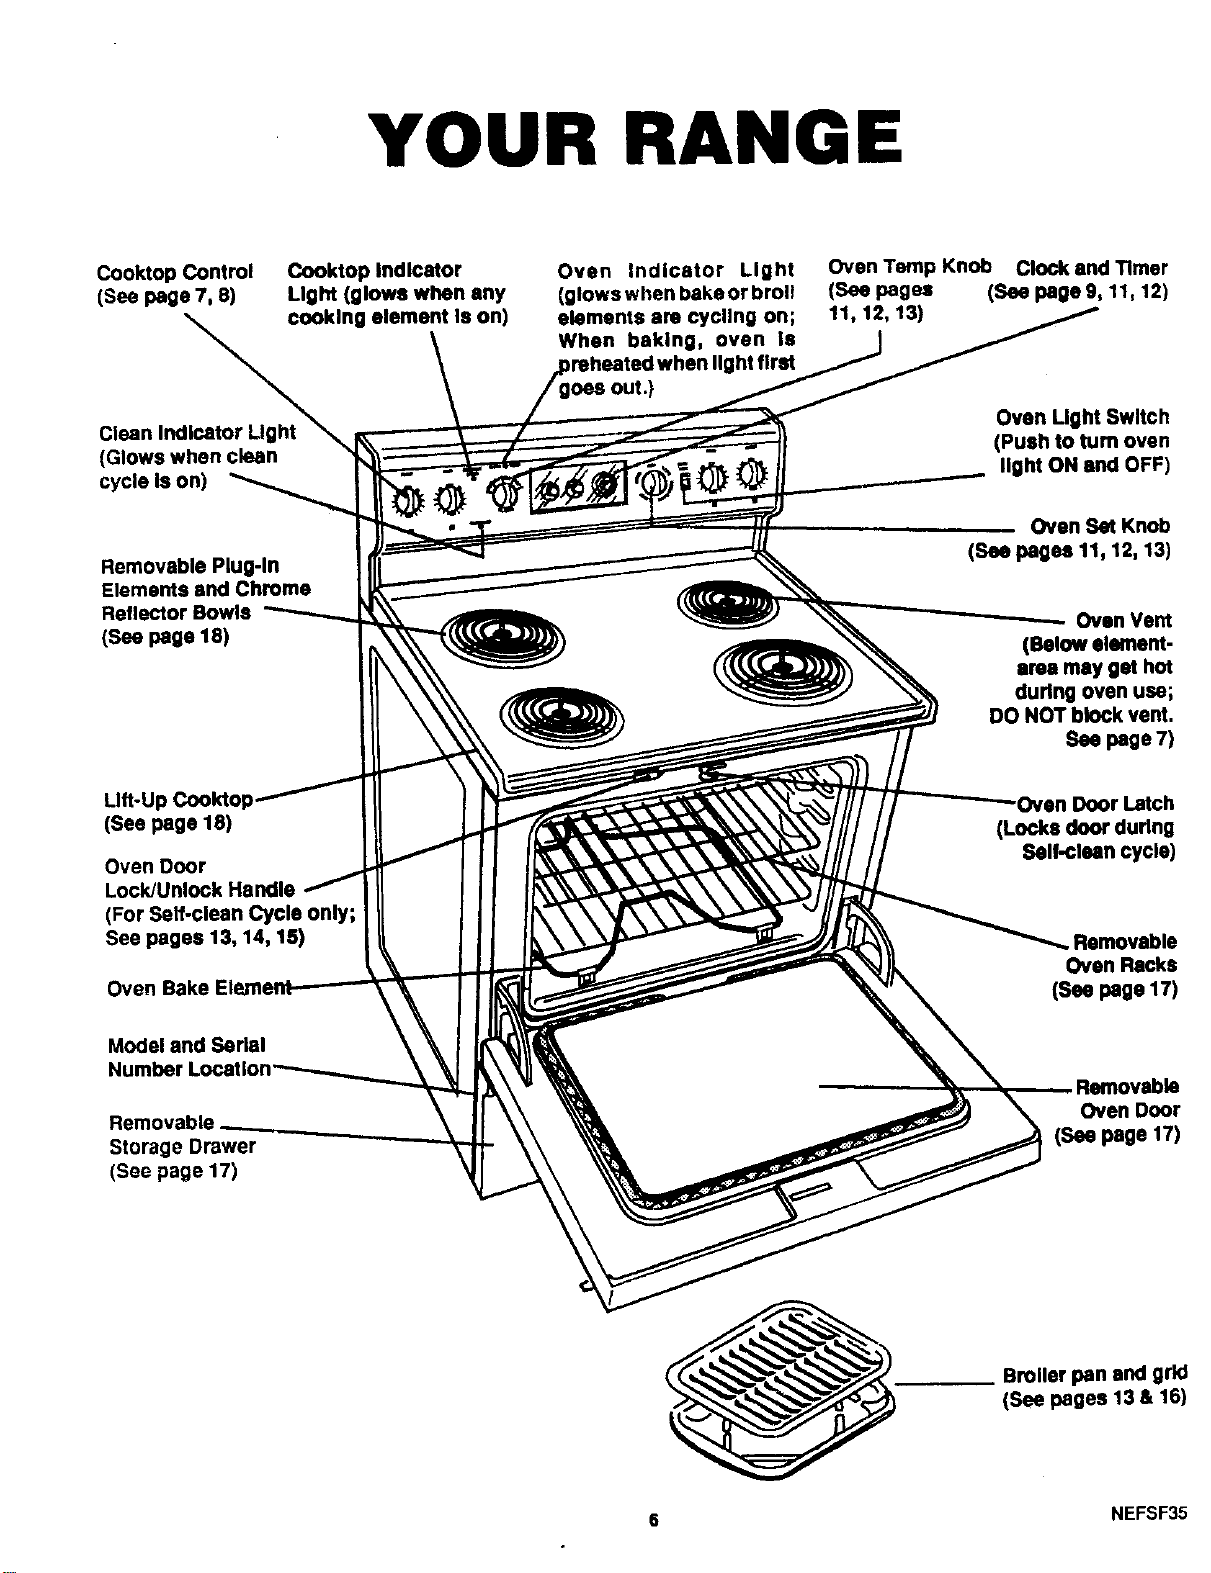
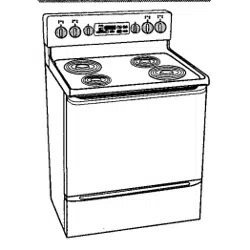
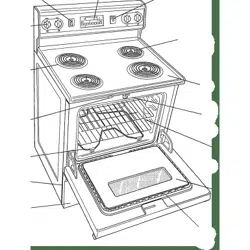
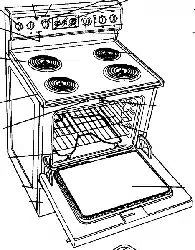
YOUR RANGE
Cooktop Control Cooktop Indlcstor
(See page 7, 8) Light (glows when any
cooking element Is on)
Clean Indicator LI
(Glows when clean
cycle Is on)
Removable Plug-In
Elements and Chrome
Reflector Bowls
(See page 18)
Lift-Up
(See page 18)
Oven Door
(For Self-clean Cycle only;
See pages 13, 14, 15)
Oven
Oven Indicator Light
(glows when bake or broil
elements are cycling on;
When baking, oven Is
Ightfirst
oee out.)
Oven Temp Knob Clock and Timer
(See pages (See page 9, 11, 12)
11, 12, 13)
Oven Light Switch
(Push to rum oven
light ON end OFF)
Oven Set Knob
(See pages 11, 12, 13)
Oven Vent
(Below element-
ares may get hot
during oven use;
DO NOT block vent.
See page 7)
Door Latch
(Locke door during
Self-clean cycle)
Oven Recks
(See page 17)
Model and Serial
Number Locst
Storage Drawer
(See page 17)
Oven Door
(Seepage 17)
Broiler pan and grid
(See pages 13 & 16)
6 NEFSF35

TO START THINGS COOKING
COOKTOP COOKING
Before you use the cooktop for the first time, take a few
moments to familiarize yourself with the elements and
the knob used to turn on each element.
COOKTOP ELEMENTS
The sign near each cooktop control knob shows which
element Is turned on by that knob.
'; OFF _ _; 0_ _ gO 01_ ._ /
O0 go OO O0
go O0 O0 OO
_ Le_ Right Right
Front Rear Rear Front
To operate cooktop controls:
1. Push to turn.
COOKTOP GUIDE TO BASIC SETTINGS
"HI"
Used for quick starts, such as
bringing water to • boll.
*'MED-HI"
Used for frying and rapid boiling.
O OFF
-B
"MED"
Used for slow boll and eaut61ng.
"MED'LO"
Used for cooking foods In small
amounts of water.
uLO-
Used for steaming foods or keep-
ing foods at serving temperature.
WED
0
A
",W'"
YED
2. Set on or between
marks for desired
heat.
|
The Indlcstor light will glow when any heating element
Is activated.
(Area may get hot during
oven use. DO NOT
block vent.)
7 NEMTC58-1
To Start Things Cooking (cont.)
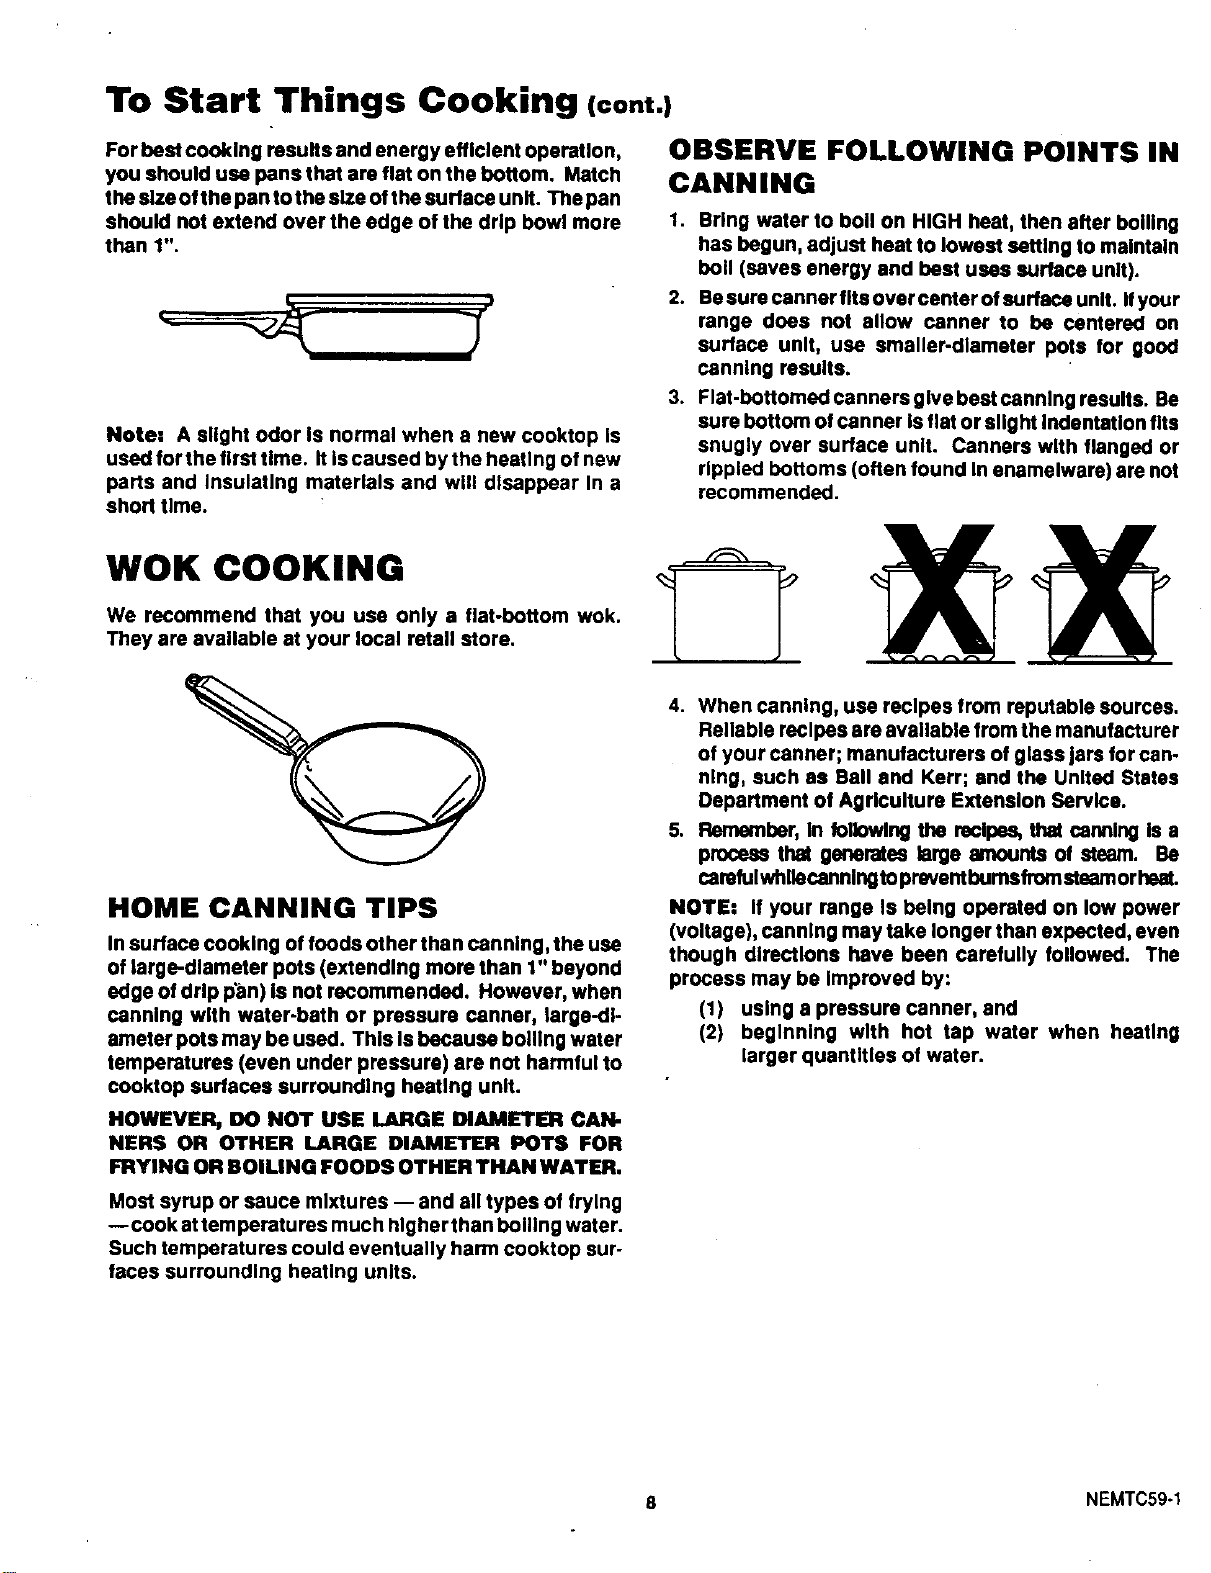
For best cooking results and energy efficient operation,
you should use pans that are flat on the bottom. Match
the size of the pan to the size of the surtace unit. The pan
should not extend over the edge of the drip bowl more
then 1".
Note-" A slight odor Is normal when a new cooktop Is
used for the first time. Itis caused by the heating of new
parts and Insulating materials and will disappear In a
short time.
WOK COOKING
We recommend that you use only a flat-bottom wok,
They are available at your local retail store.
HOME CANNING TIPS
In surface cooking of foods other than canning, the use
of large-dlamater pots (extending more than 1" beyond
edge of drip pan) is not recommended. However, when
canning with water-bath or pressure canner, large-di-
ameter pots may be used. This Is because boiling water
temperatures (even under pressure) are not harmful to
cooktop surfaces surrounding heating unit.
HOWEVER, DO NOT USE LARGE DIAMETER CAN-
NERS OR OTHER LARGE DIAMETER POTS FOR
FRYING OR BOILING FOODS OTHER THAN WATER.
OBSERVE FOLLOWING POINTS IN
CANNING
1. Bring water to boll on HIGH heat, then after boiling
has begun, adjust heat to lowest setting to maintain
boll (saves energy and best uses surface unit).
2. Besurecannerfltsovercenterofsurteceunlt. Ifyour
range does not allow canner to be cantered on
surface unit, use smaller-diameter pots for good
canning results.
3. Flat-bottomed canners give best canning results. Be
sure bottom of canner is flat or slight Indentation fits
snugly over surface unit. Canners with flanged or
rippled bottoms (often found In enamelware) are not
recommended.
4. When canning, use recipes from reputable sources.
Reliable reclpas are available from the manufacturer
of your canner; manufacturers of glass jars for can-
ning, such as Bell and Kerr; and the United States
Department of AgrlcuItura Extension Bervlce.
5. Remember, In following the recipes, thel canning Is a
process that generatee large amounts of steam. Be
camfulwhllacannlng topraventburnsfromstsamorhsat.
NOTE-" If your range Is belng operated on low power
(voltage), canning may take longer than expected, even
though dlractlons have been carefully followed. The
process may be improved by:
(1) using a pressure canner, and
(2) beginning with hot tap water when hsetlng
larger quantities of water.
Most syrup or sauce mixtures -- and all types of frying
--cook at temperatures much higher than boiling water.
Such temperatures could eventually harm cooktop sur-
faces surrounding heating units.
8 NEMTC59-1
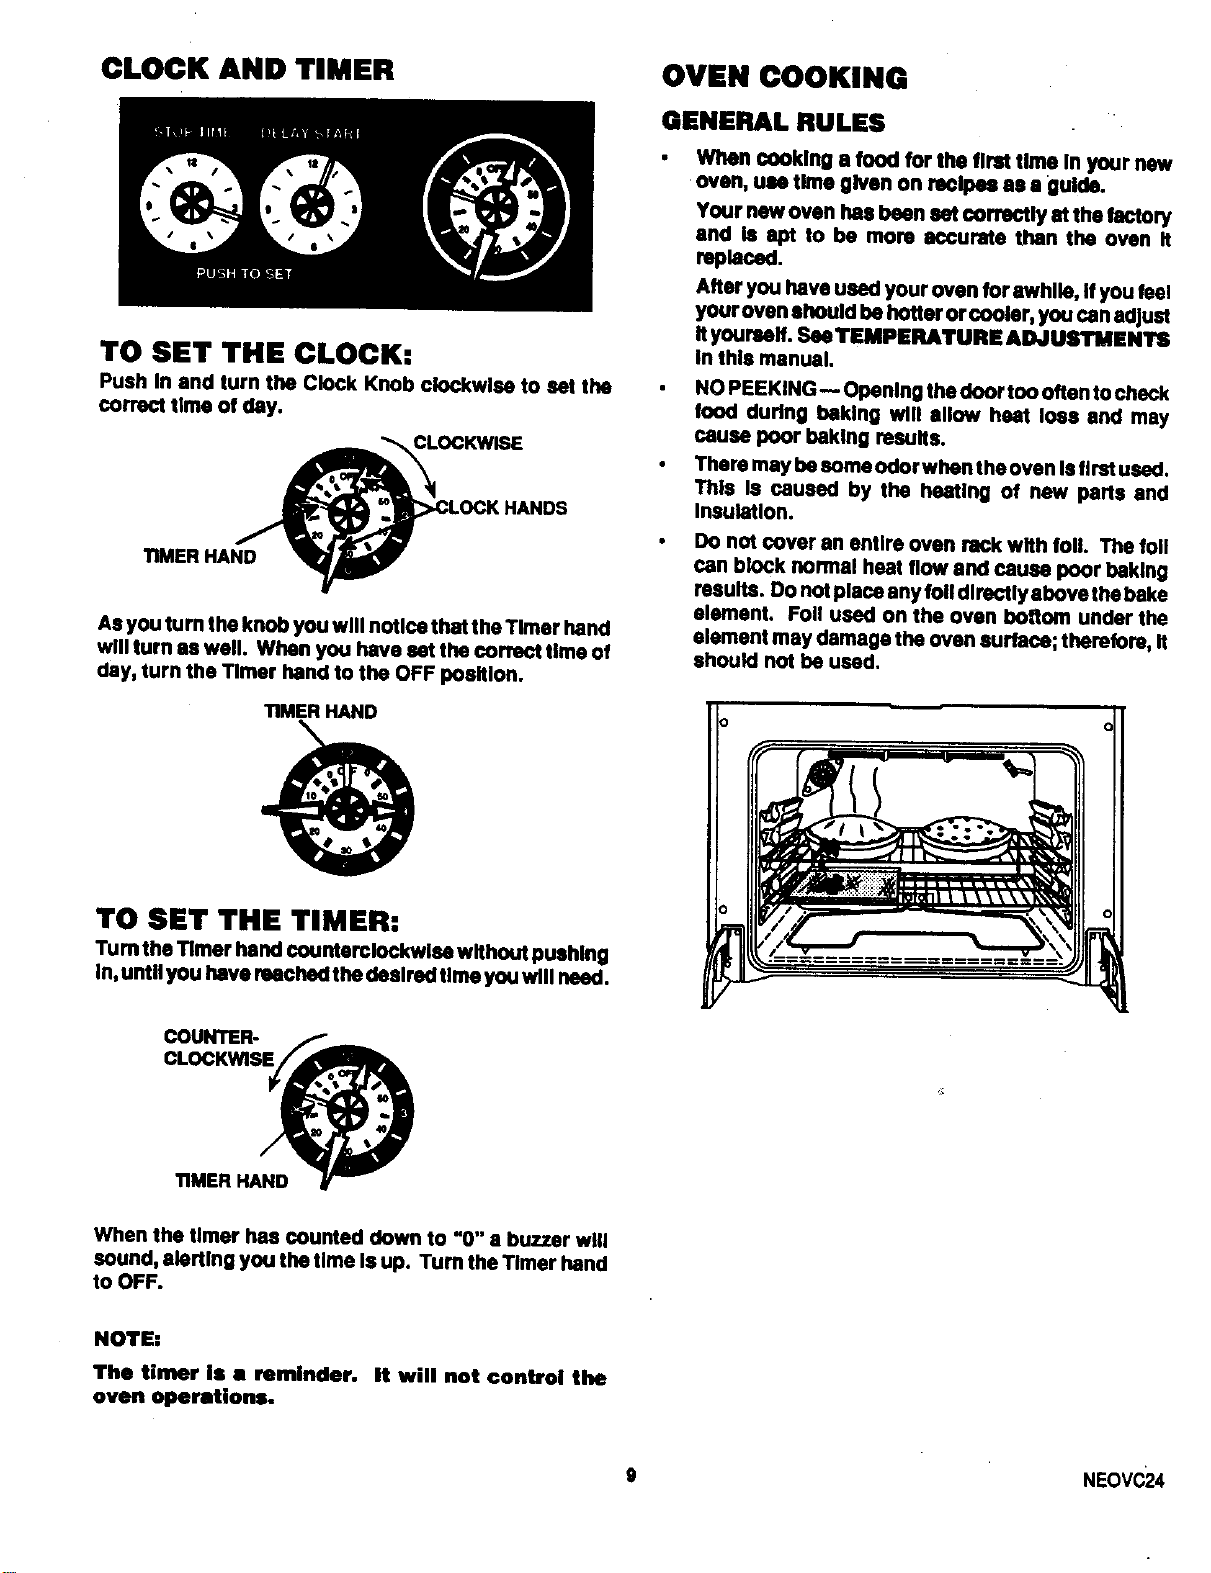
CLOCK AND TIMER OVEN COOKING
TO SET THE CLOCK:
Push In and turn the Clock Knob clockwise to set the
correct time of day.
_OCKWISE
LOCK HANDS
TIMER HAND
As you turn the knob you will notice that the Timer hand
will turn as well. When you have set the correct time of
daysturn the Timer hand to the OFF poslUon.
TIMER HAND
TO SET THE TIMER:
Turn the Timer hand counterclockwise without pushing
In, until you have reached the desired time you will need.
GENERAL RULES
When cooking a food for the first time In your new
oven, uN time given on reCllpU se s guide.
Your new oven has been set correctly at the factory
and Is apt to be more accurate than the oven It
replaced.
After you have used your oven for awhile, If you feel
your oven should he hotter or cooler, you can adjust
h yourself. See TEMPERATURE ADJUSTMENTS
In this manual.
NO PEEKING -- Opanlng the door too often to check
food during baking will allow heat loss end may
cause poor be,king results.
There may he some odor when the oven Isfiret used.
This Is caused by the heating of new paris and
Insuistlon.
Do not cover an entire oven rack with foil. The foil
can block normal heat flow and cause poor baking
results. Do not placa any foil directly above the bake
element. Foil used on the oven bottom under the
element may damage the oven surface; therefore, It
should not be used.
COUNTER- -_
CLOCKWlS_
"riMERHAND Y---
When the timer has counted down to "0" a buzzer will
sound, alerting you the time Is up. Turn the Timer hand
to OFF.
NOTE:
The tinter Is • reminder. It will not control the
oven operations.
g NEOVC24

OVEN COOKING (continued)
PREHEATING
When recipes require preheatlng, have food nearby
before you open the oven door. If the oven door Is
allowed to remain open for more than a brief time,
the preheat temperature will be lost.
Let the oven preheat thoroughly before cooking
baked products. Listen for preheat notlficetlon tone
(ifequipped) or watch forthe Indicator light to go off.
If your range does not have either of these features,
preheat for 10 minutes and put the food In the oven.
BAKEWARE 4-
NOTE:
YOUR OVEN HAS FOUR (4) RACK POSI-
TIONS. THE TOP LEVEL IS ONLY A
GUIDE; IT CANNOT BE USED AS A RACK
POSITION!
TOP LEVEL: GUIDE ONLY!
_,_RACK POSITIONS
Cookies should be'baked on flat cookie sheets
without sides to allow the air to clrcuiete properly. .rN.'_
NOTE: YOUR OVEN HAS FOUR(4)
RACK POSITIONS.
Place pens on the oven racks with 1" to I 1/2" of air
space on all sides of each pan. Avoid overcrowding
_/,_e___ / _ ,_.__ the oven.
Cakes, muffins, and quick breads should be baked
in shiny pans -- to reflect the heat -- because they
should have a light golden crust. Be sure the
underside of the pan is shiny, too. Darkened under-
sides will absorb the heat and may cause over-
browr_.[ngon the bottom of your food.
Yeast breads and pie crusts should be baked In
glass or dull (non-shiny) pans -- to absorb the heat
-- because they should have a brown, crisp crust.
Oven temperatures should be reduced 25 degrees
below recommended temperatures If exterior of
pans are dark non-stick, darkened by age or oven
proof glass.
BAKING
Always follow recipe carefully.
Measure ingredients properly.
Use proper pan and rack placement to obtain the
beat cooking results.
When baking several Items, stagger pans so that no
pan is directly above another.
Pans too close to each other, to oven walls or to the
oven bottom block the free movement of air. Im-
proper air movement causes uneven browning and
cooking.
10 NEOVC43-1
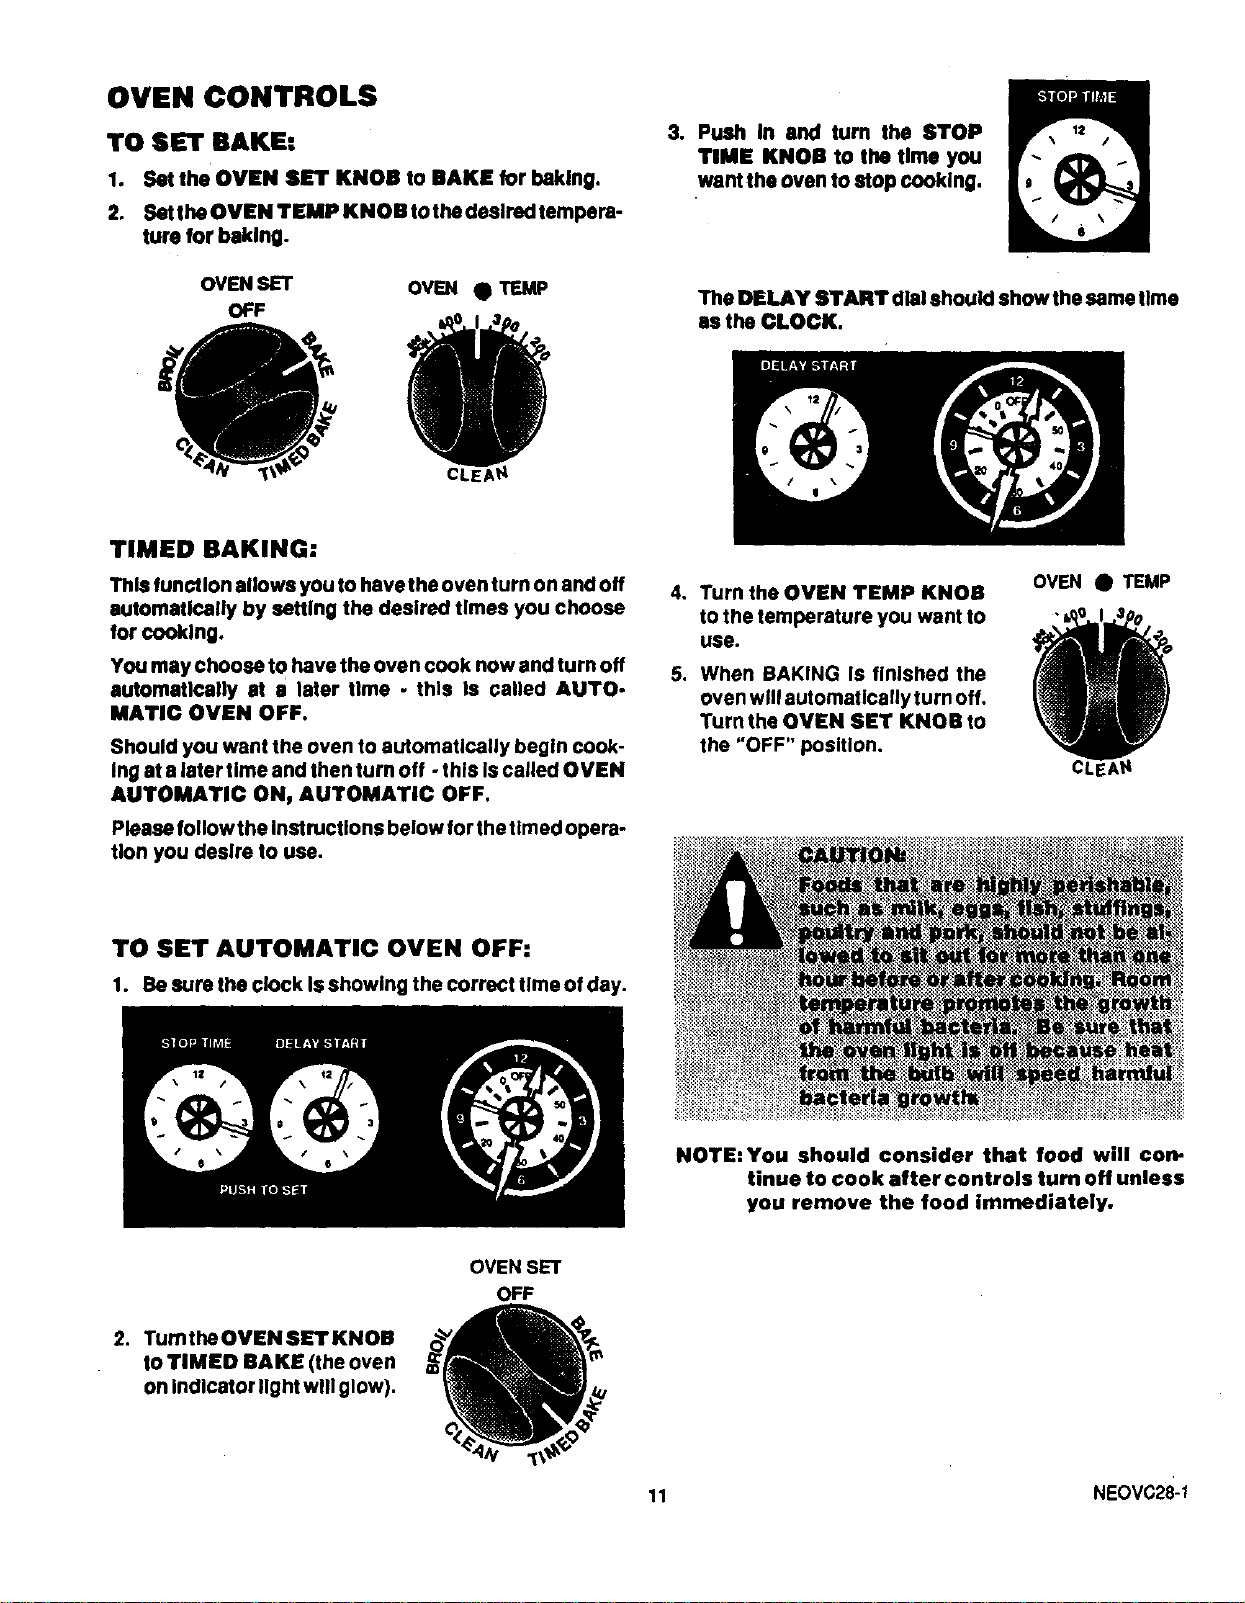
OVEN CONTROLS
TO SET BAKE:
1. Set the OVEN SET KNOB to BAKE for baking.
2. Set the OVEN TEMP KNOB to the dselred tempera-
ture for baking.
OVEN SET OVEN • TEMP
OFF
3. Push In and turn the STOP
TIME KNOll to the lime you
want lhe oven to stop cooking.
The DELAY START dial should show the same time
as the CLOCK.
TIMED BAKING:
This funclIon allows you to have the oven turn on and off
sutomatlcally by salting the desired times you choose
for cooking.
You may choose to have the oven cook now and turn off
automatically st a later time - this Is called AUTO-
MATIC OVEN OFF.
Should you want the oven to aulomatlcally begin cook-
Ing at a later time and then turn off - thls Is called OVEN
AUTOMATIC ON, AUTOMATIC OFF.
Please followthe Instructions below for the timed opera-
tion you desire to use.
4. Turn the OVEN TEMP KNOB
to the temperature you want to
use.
5. When BAKING Is finished the
oven will automatically turn off,
Turn the OVEN SET KNOB to
the "OFF" position.
OVEN • TEMP
TO SET AUTOMATIC OVEN OFF:
1. Besure the clock Isshowing thecorrect timeof day.
NOTE: You should consider that food will con-
tinue to cook after controls turn off unless
you remove the food immediately.
2. Turnthe OVEN SET KNOB
to TIMED BAKE (the oven
on Indicator light will glow).
OVEN SET
OFF
11
NEOVC28-1
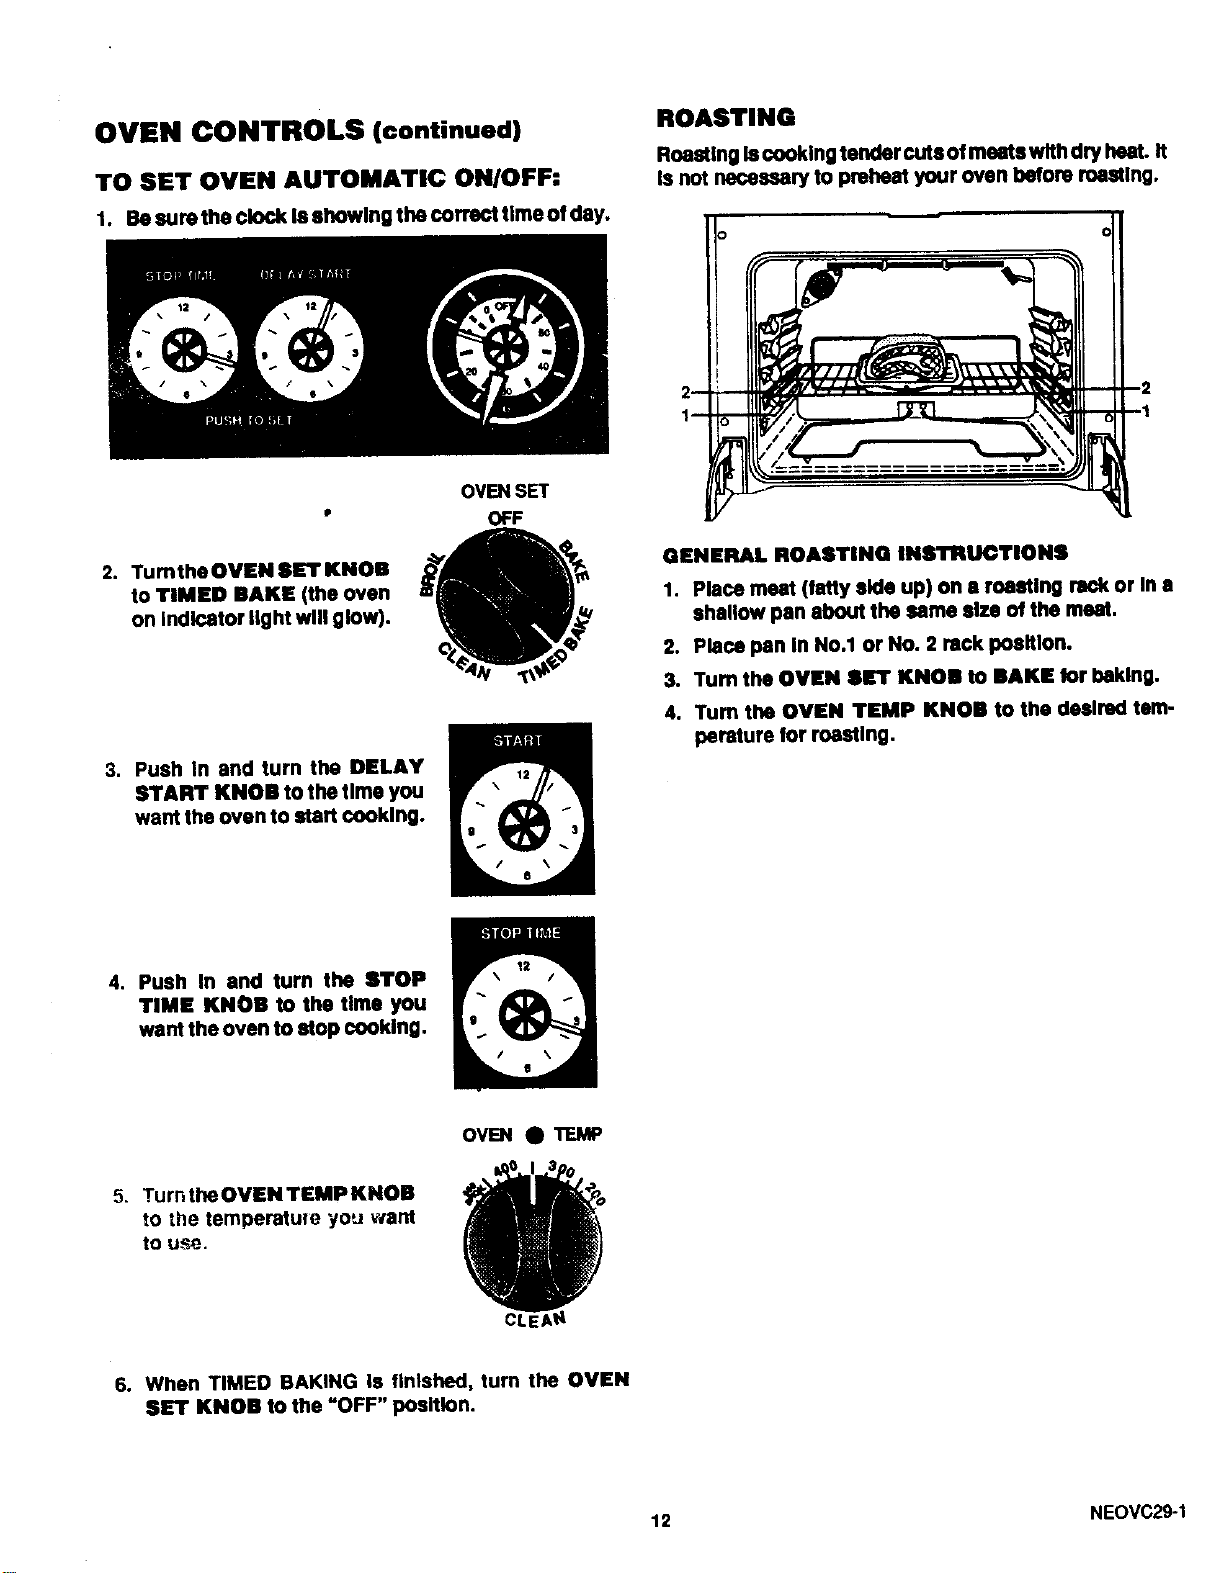
OVEN CONTROLS (continued)
TO SET OVEN AUTOMATIC ON/OFF:
1. Besure the clock Isshowing the oarrect t|me ofday.
2. Tumthe OVEN SET KNOB
to TIMED BAKE (the oven
on indicator light will glow).
OVENSET
OFF
3. Push in and turn the DELAY
START KNOB to the time you
want the oven to start cooking.
ROASTING
Roasting Iscooking tender cuts of meats with dry heat. It
Is not necessary to preheat your oven before masting.
O
GENERAL ROASTING INSTRUCTIONS
1. Place meat (fatty side up) on s roasting rack or In •
shallow pan about the same size of the meat.
2. Place pan In No.1 or No. 2 rack posItion.
3. Tum the OVEN SET KNOB to BAKE for baking.
4. Turn the OVEN TEMP KNOB to the desired tom-
perature for masting.
4. Push In and turn the STOP
TIME KNOB to the time you
want the oven to stop cooking.
5, Turn theOVENTEMPKNOB
to the temperatme you want
to U,_.
OVEN OTEMP
6. When TIMED BAKING Is finished, turn the OVEN
SET KNOB to the "OFF" position.
12 NEOVC29-1
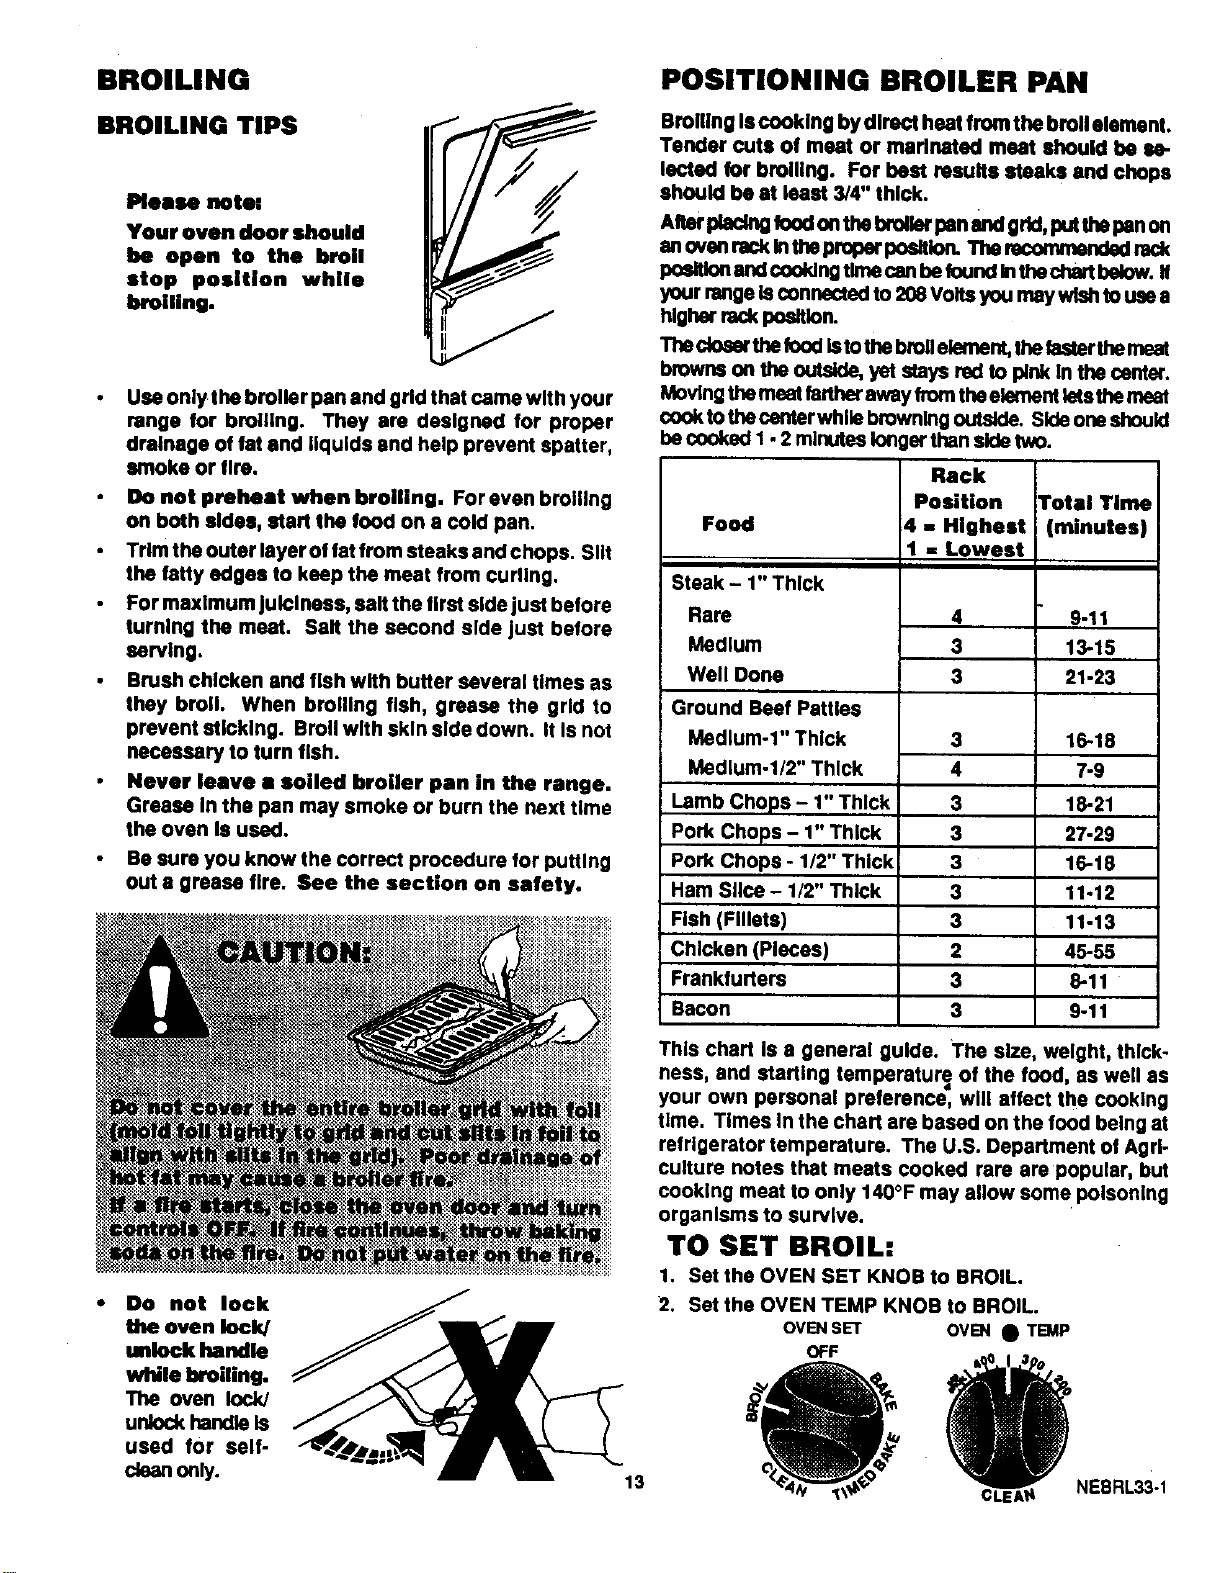
BROILING
BROILING TIPS I_
Please note:
Your oven door should
be open to the broil I_1_
stop position white
broiling.
Use only the broiler pan and grid that came with your
range for broiling. They are designed for proper
drainage of fat and liquids and help prevent spatter,
smoke or fire.
Do not preheat when broiling. For even broiling
on both sides, start the food on a cold pan.
Trim the outer layer of fat from steaks and chops. Slit
the fatty edges to keep the meat from curling.
For maximum juiciness, salt the first side just before
turning the meat. Salt the second side just before
serving.
Brush chicken and fish with butter several times as
they broil When broiling fish, grease the grid to
prevent sticking. Broil with skin side down. It Is not
necessary to turn fish.
Never leave a soiled broiler pan in the range,
Grease In the pan may smoke or burn the next time
the oven Is used.
Be sure you know the correct procedure for putting
out a grease fire. See the section on safety.
• Do not lock
the oven lock/
unlock handle
while broiling.
The oven lock/
unlock handle Is
used for self-
clean onty.
13
POSITIONING BROILER PAN
Broiling Iscooking by dlroct heat from the broil element.
Tender cuts of meat or marinated meat should be iN)-
leoted for broiling. For best results steaks and chops
should be at least 3/4" thick.
Alter placingkxxl on the brolterpan and grid,i_t thepanon
an oven rsck Inthe proper pesltlo_ The recommended rack
pesltlon and cooldng time cen be found Inthechert below. If
ycur range Isconnected to 208 Volts you may wish to use a
higher rackpesltlon.
The closerthe food letothe broilelement,the fasterthemeat
browns on the outside, yet stays red to p_nkIn the center.
Movingthe meat falther away from theelement letsthe meat
cook tothe center while browning outside. Side one should
be cooked I - 2 mlnutee longerthan side two.
Food
Steak - 1" Thick
Rare
Medium
Well Done
Ground Beef Patties
Medium-1" Thick
Medium-I/2" Thick
Lamb Chops - 1" Thick
Pork Chops - 1" Thick
Pork Chops - 1/2" Thick
Ham Slice - 1/2" Thick
Fish (Fillets)
Chicken (Pieces)
Frankfurters
Bacon
Rack
Position
4. Highest
1 - Lowest
Total Time
(minutes)
3
4
3
3
3
3
3
2
3
3
4 9-11
3 13-15
3 21-23
16-18
7-9
18-21
27-29
16-18
11-12
11-13
45-55
6-11
9-11
This chart Is a general guide. The size, weight, thick-
ness, and starting temperature of the food, as well as
your own personal preference; will affect the cooking
time. Times In the chart are based on the food being at
refrigerator temperature. The U.S. Department of Agri-
culture notes that meats cooked rare are popular, but
cooking meat to only 140°F may allow some polsontng
organisms to survive.
TO SET BROIL:
1. Set the OVEN SET KNOB to BROIL.
2. Set the OVEN TEMP KNOB to BROIL.
OVENSET OVEN• TEMP
OFF
__ NEBRL33-1
THE SELF.CLEAN CYCLE (3 HOURS - NORMAL CLEAN TIME)
BEFORE A CLEAN CYCLE
1. Remove the broiler pen end grid, oven racks, all
utensils end any foil that may he In the oven. Do not
try to clean utensils or any other objects In the oven
during a self-clean cycle. If oven racks ere left In
the range durlng • clean cycle, they willdarken,
lose their luster and become herd to slide. If
you choose to leave the racks In the oven, you
can polish the edges of the racks with steel
wool end •pply • small •mount of vegetable oil
to the rack edges after the self.clean cycle.
This will make the racks e•sier to slide.
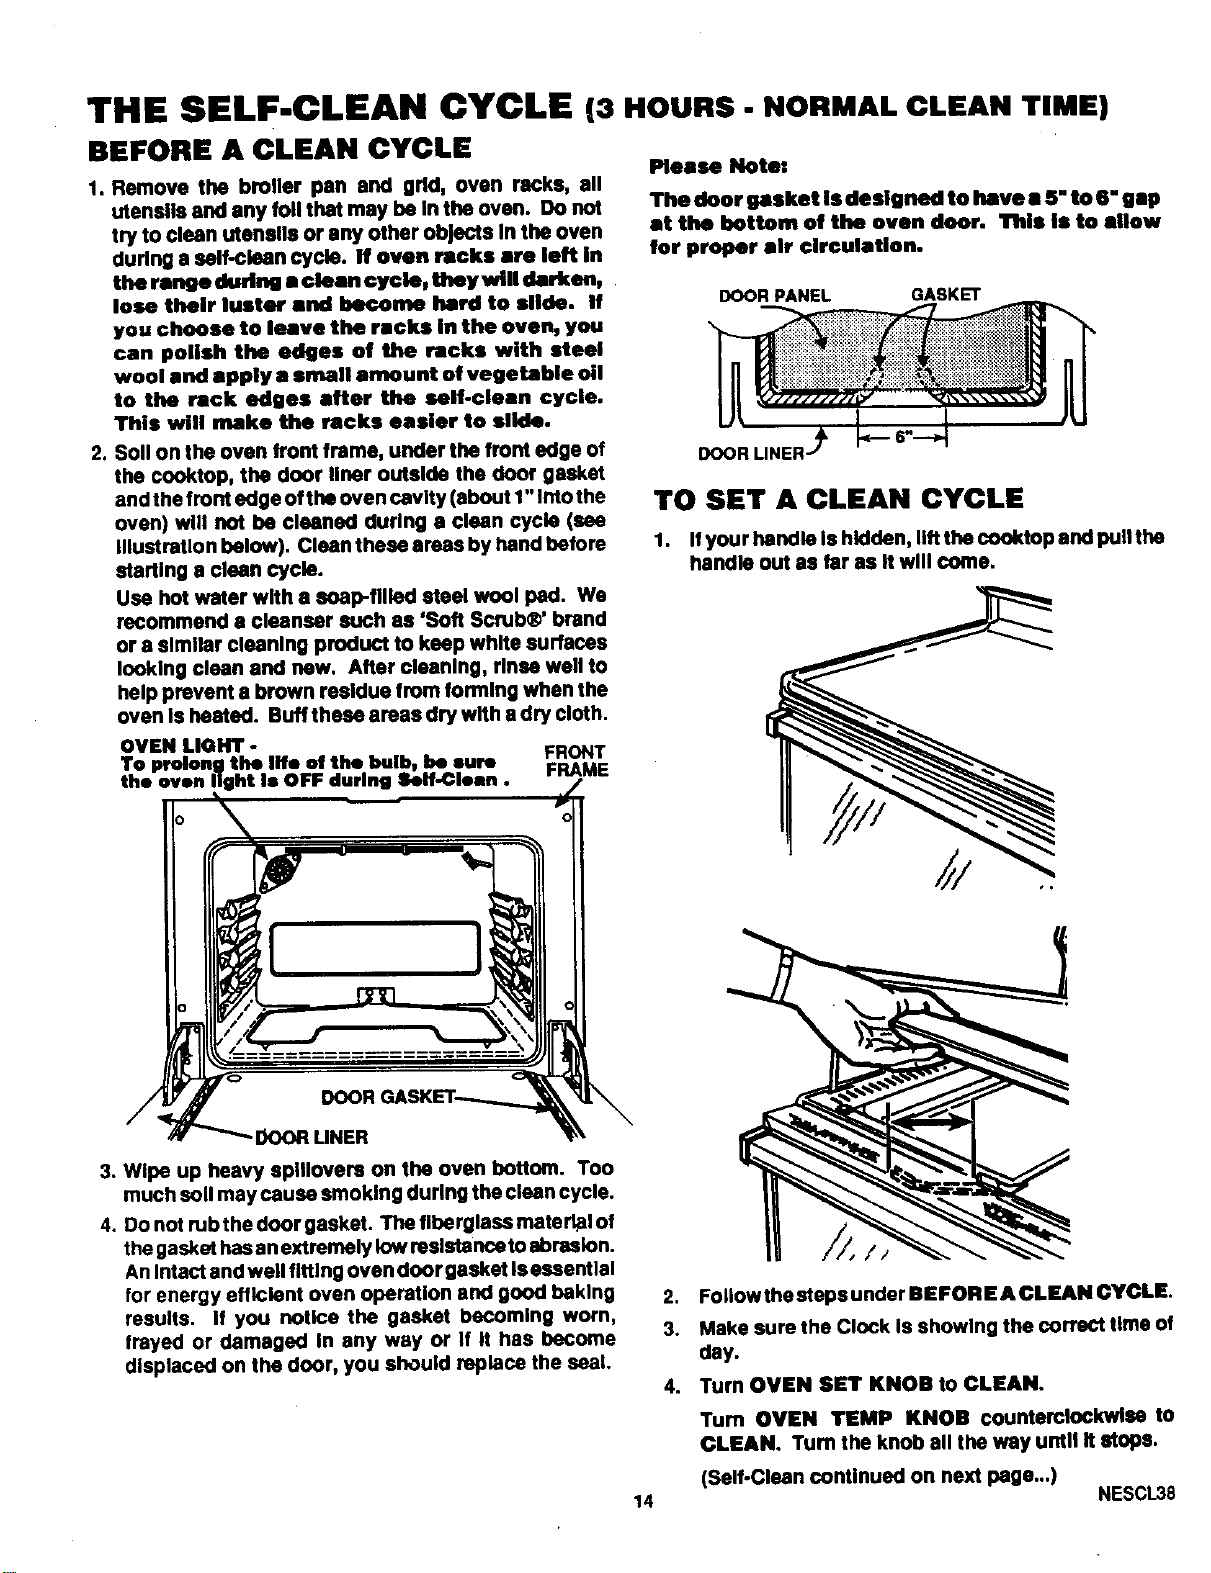
2. Soil on the oven front frame, under the front edge of
the cooktop, the door finer outside the door gasket
and the front edge of the oven cavity (about 1" into the
oven) will not be cleaned during • clean cycle (see
Illuetrstlon below). Clean these areas by hand before
starting a clean cycle.
Use hot water with a soap-filled steel wool pad. We
recommend • cleanser such as 'Soft Scrub®' brand
or • similar cleaning product to keep white surfaces
looking clean and new. After cleaning, rlnas well to
help prevent • brown realdue from forming when the
oven Is heated. Buff these areas dry with e dry cloth.
Please Note,
The door gasket is designed to have • 5" to 6" gap
at the bottom of the oven door. This is to allow
for proper air circulation.
DOOR PANEL GASKET
TO SET A CLEAN CYCLE
1. If your handle Is hidden, lift the cooktop and pull the
handle out as far as it will come.
OVEN LIGHT.
To prolong the lifo of the bulbw be sure
the oven light Is OFF during Self-Clean.
/,
FRONT
FRAME
O _ v -
3. Wipe up heavy splllovera on the oven bottom. Too
much soil may cause smoking during the clean cycle.
4. Donot mbthedoorgasket. Thefiherglassmatert_lof
the gasket has anextremely low resistance to abrasion.
An Intact and well fitting oven door gasket Iseasentlal
for energy efficient oven operation and good baking
results. If you notice the gasket becoming worn,
frayed or damaged In any way or If It has become
displaced on the door, you should replace the seat.
2. Follow the steps under BEFORE A CLEAN CYCLE.
3. Make sure the Clock is showing the correct time of
day.
4. Turn OVEN SET KNOB to CLEAN.
Tum OVEN TEMP KNOB counterclockwise to
CLEAN. Turn the knob all the way until it stops.
(Self-Clean continued on next page...)
14 NESCL38

SELF-CLEAN (continued)
TO SET A CLEAN CYCLE
5. Set DELAY START KNOB on the clock to the
present time of day.
6. Set the STOP TIME KNOB to the time of day when
you went the clean cycle to end.
7. Slide the door lock/unlock handle all the way to the
right to lock the door. You may nasd to preea on the
door sllgffily to get It to lock.
TO LOCK:_
Make sure the oven light Is off during the Clean cycle, to
prolong the life of the bulb.
TO INTERRUPT A CLEAN CYCLE:
1. Turn STOP TIME KNOB to the current Ume of day.
2. Allow sufficient time for cooling. The oven door
will unlock only after the tempereturo Is below
looking temperature.
Do not force the door lock handle. Slide door lock/
unlock handle to left to unlock door.
WHEN A CLEAN CYCLE IS FINISHED:
1. STOP TIME will be the same as the time of day.
2. Allow sufficient time for cooling. Do not force the
door lock handle. Slide door lock/unlock handle to
left to unlock door.
1"O SET DELAYED CLUN CYCLE:
NOTEz Clock must be set to correct Hmu d day.
1. Turn OVEN BET KNOB to CLEAN.
2. Set the DELAY START TIME KNOB to the time of
day when you went cleaning to begin.
3. Set the STOP TIME KNOB to the time of day when
you went the clean cycle to end.
4. Tum OVEN TEMP KNOB counterclockwise to
CLEAN. Turn the knob all the way until It Mops.
5. Slide the door lock/unlock handle all the way to the
right to lock the door.
After cleaning ends, welt about 30 minutes for oven to
cool. Turn OVEN SET KNOB and OVEN TEMP
KNOB to OFF. When oven has cooled, slide door lock/
unlock handle to the left.
Make sure the handle
Is in the unlocked
position and raise the
cooklop.
Move the handle
slowly to the left to
ensure It Is as far to
the left as It will go.
Push the handle back
into the latch cover
as far as It will go.
Lower the cooktop.
AFTER A CLEAN CYCLE
After e clean cycle, you may
notice some whIte ash in
the oven. Just wipe It up
with a damp cloth.
Ifwhlteopots remain, scrub
them with a soap-filled steel
wool pod. Be sure to rlnas
thoroughly with a whitevln-
egar and water mixture. These deposits are usually a
salt residue that cannot be removed by the clean cycle.
If the oven is not clean after one clean cycle, the cycle
may be repeated.
3. Turn OVEN SET KNOB to "OFF". Turn OVEN
TEMP KNOB cleckwise.
15 NESCL39
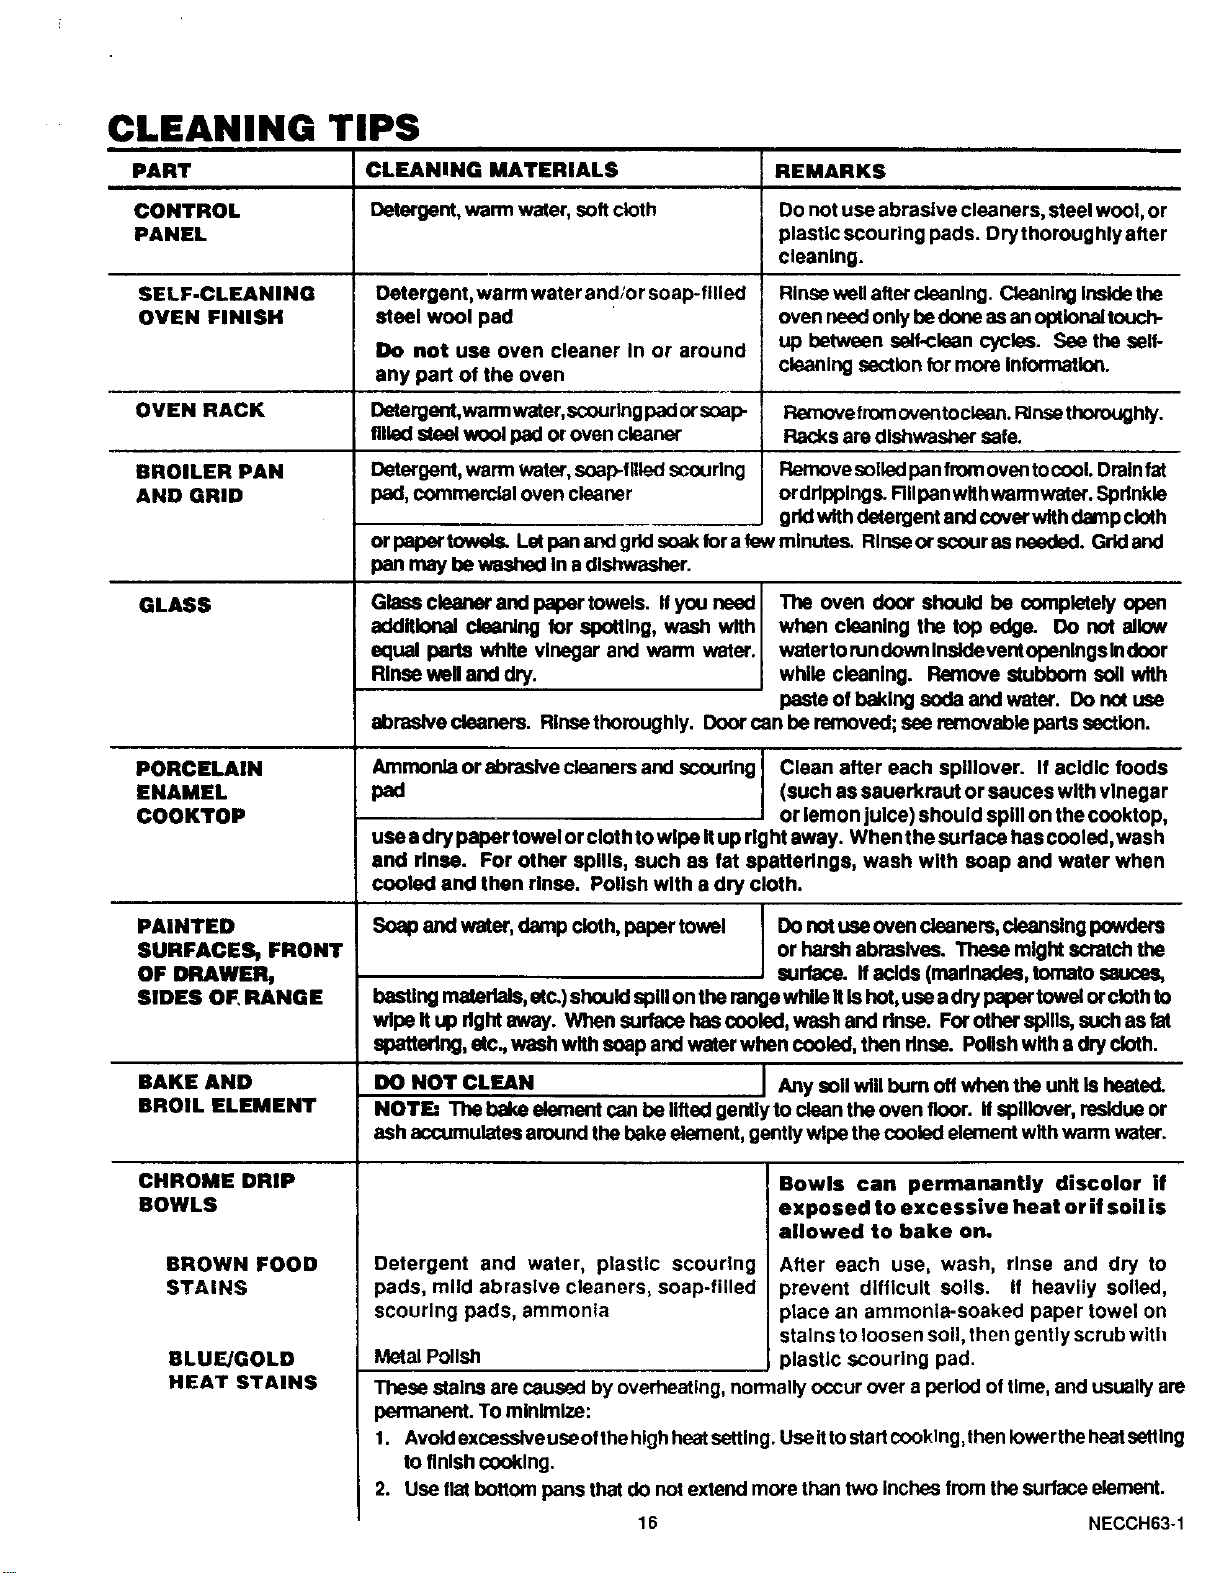
CLEANING TIPS
PART CLEANING MATERIALS REMARKS
CONTROL Detergent, warm water, soft cloth Do not use abrasive cleaners, steel wOOl,or
PANEL plastic scouring pads. Drythoroughly after
cleaning.
SELF-CLEANING Detergent, warm water and/o rsoap- filled Rinse wall aftercleaning. Cleaning Instdethe
OVEN FINISH steel wool pad oven nendonlybedone as anoptlonaltouch-
Do not use oven cleaner in or around up between self-clean cycles. See the sell-
any part of the oven cleaning sectionfor more Intormatlo_.
OVEN RACK Detergent,warmwater, scourlngpadorsoap- _efromoventoclean. Rlnsethoroughly.
filled steel wool pad or oven cleaner Racks are dishwasher safe.
BROILER PAN
AND GRID
GLASS
PORCELAIN
ENAMEL
COOKTOP
PAINTED
SURFACESt FRONT
OF DRAWER,
SIDES OF, RANGE
BAKE AND
BROIL ELEMENT
CHROME DRIP
BOWLS
BROWN FOOD
STAINS
BLUF.JGOLD
HEAT STAINS
Detergent, warm water, soap-filled scouring
pad, commemlal oven cleaner
Remove soiled pan from oventocool. Drainfat
ordrippings. RIIpan wlthwarmwater. Spdnlde
grid with detergent and cover with damp cloth
or papertoweis. Latpanand grldsoak forafewmlnutes. Rlnseor scour as needed. Grk:land
pan may be washed In a dishwasher.
Glass cleaner and paper towels. Ifyou need I
additional cleaning for spotting, wash with I
equal parts white vinegar and warm water.
Rinse wall and dry.
The oven door should be completely open
when cleaning the top edge. Do not allow
watertonJndown Inaldeventopenings Indoor
while cleaning. Remove stubborn soil with
paste of baking soda and water. Do not use
Ammonia or abraelve cleaners and scoudng Clean after each splllover. If acidic foods
pad (such as sauerkraut or sauces with vinegar
or lemon juice) should spill on the cooktop,
use adry paper towel or clothtowipe itup rightaway. When thesurface has cooled, wash
and rinse. For other spills, such as fat spattedngs, wash with soap and water when
cooled and then rinse. Polish with a dry cloth.
Sosp and water, damp cloth, papar towal Do notuee oven cleaners, ciesnalngpowders
or harsh abrasives. These might scratch the
surface, ff acids (madnades, tomato sauces,
basting materials,etc.)should spillon the rangewhile Itishot,use a dry papertowel orclothto
wipe It up dght away. When surface has cooled, wash and dnse. For other spills,such as fat
spattertng, stc, wash wIth soap and water when cooled, then rinse. Polish with a dry cloth.
DO NOT CLEAN J Any soil will burn off when the unIt is heated.
NOTE: The bake element can be liftedgently to clean the oven floor, ifsplllover, residue or
ash accumulates around the bakeelement, gentlywipe the cooled element wIth warm water.
Bowls can permanantly discolor if
exposed to excessive heat or if soil is
allowed to bake on.
Detergent and water, plastic scouring After each use, wash, rinse and dry to
pads, mild abrasive cleaners, soap-filled prevent difficult soils, if heavily soiled,
scouring pads, ammonia place an ammonia-soaked paper towel on
stains to loosen soil, then gently scrub with
Metal Polish plastic scouring pad.
These stains are caused by overheating, normally occur over a period of time, and usually are
pem_3n_. To minimize:
1. Avoldexcesslveuseofthehlghheatsettlng. Useittostartcooklng,thenlowartheheatsetting
to finish cooking.
2. Use flat bottom pans that do not extend more than two inches from the surface element.
16 NECCH63-1
abrasive cleaners. Rinsethoroughly. Door can be removed; see removable parts section.
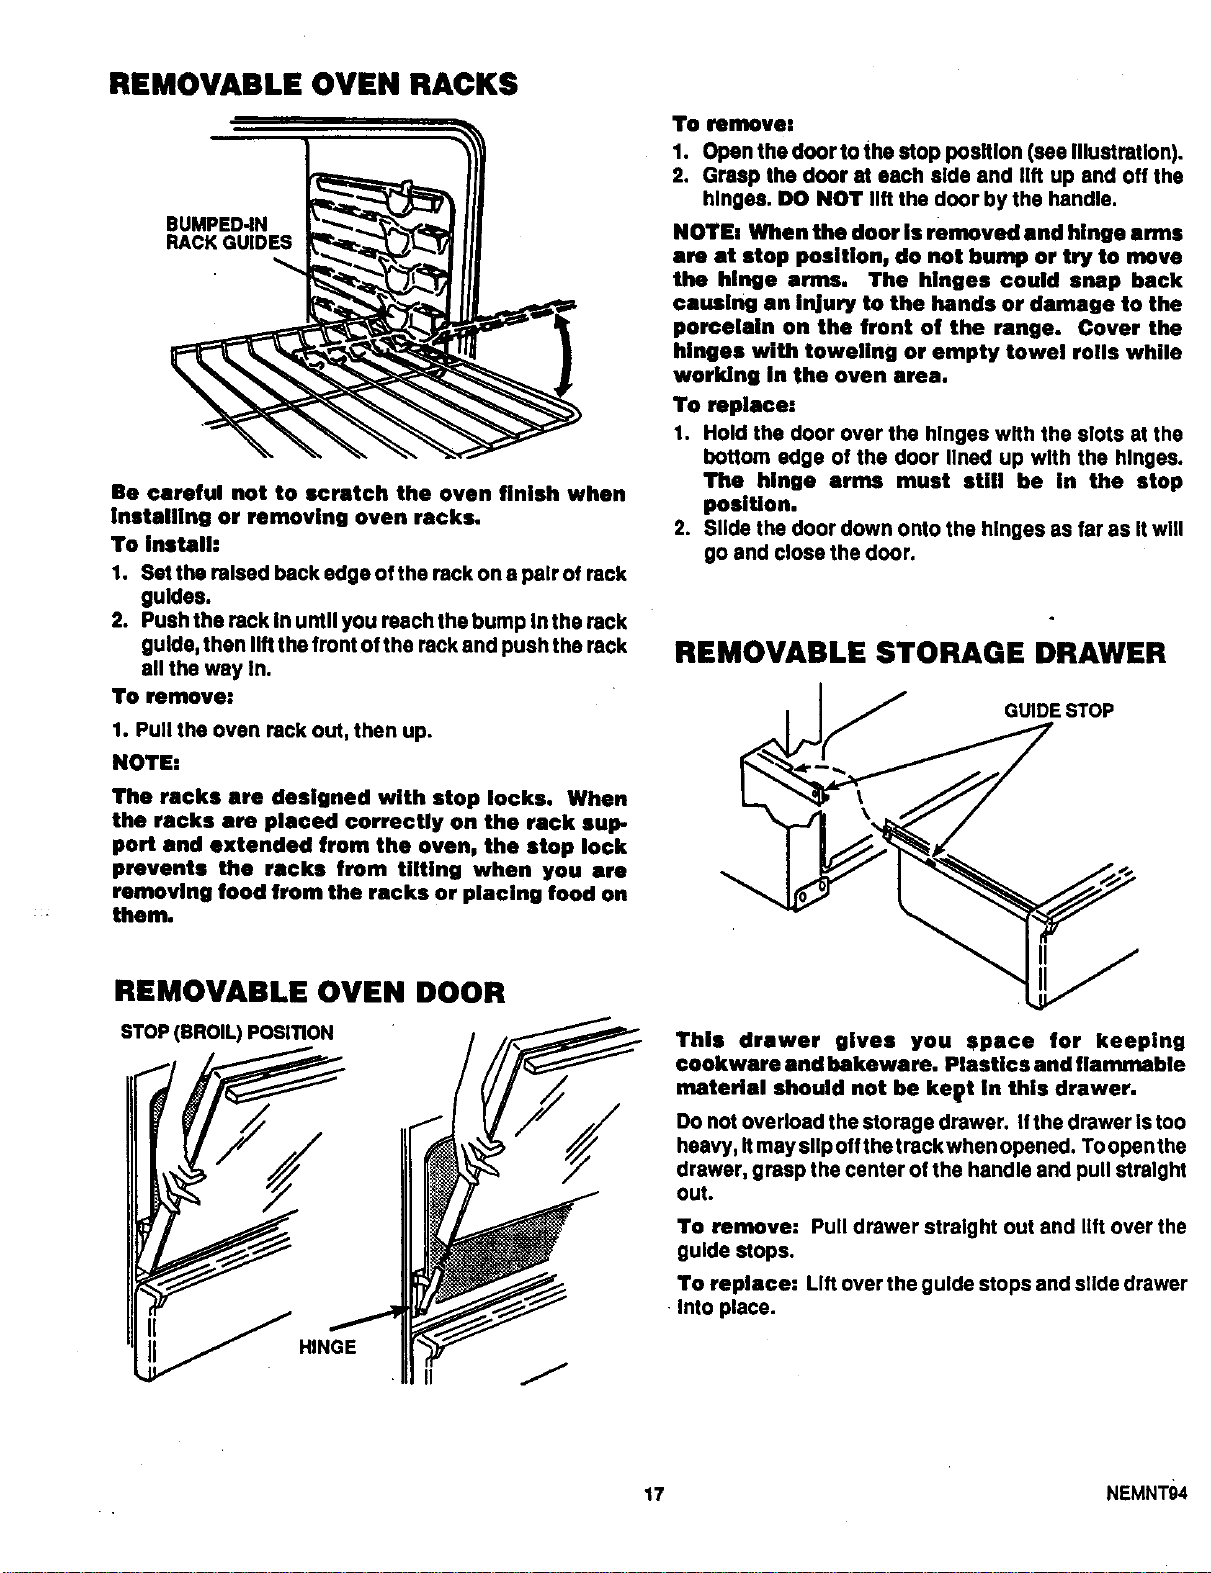
REMOVABLE OVEN RACKS
BUMPED-IN
RACK GUIDES
Be careful not to scratch the oven finish when
Installing or removing oven racks.
1"o install:
1. SSt the raised back edge of the rack on a pair of rack
guides.
2. Push the rack in until you reach the bump in the rack
guide, then lift the front of the rack and push the rack
all the way in.
Toremove:
1. Pull the oven rack out, then up.
NOTE:
The racks are designed with stop locks. When
the racks ere placed correctly on the rack sup-
port and extended from the oven, the stop lock
prevents the racks from tilting when you ere
removing food from the racks or placing food on
them.
REMOVABLE OVEN DOOR
STOP(BROIL) POSITION
/
HINGE
II
To remove:
1. Open the door to the stop position (see Illustretlon).
2. Grasp the door st each side and lift up and off the
hinges. DO NOT lift the door by the handle.
NOTE: When the door is removed and hinge arms
ere at stop position, do not bump or try to move
the hinge arms. The hinges could snap back
causing an injury to the hands or damage to the
porcelain on the front of the range. Cover the
hinges with toweling or empty towel rolls while
working In the oven area.
To replace:
1. Hold the door over the hinges with the slots at the
bottom edge of the door lined up with the hinges.
The hinge arms must still he in the stop
position.
2. Slide the door down onto the hinges as far as It wlU
go and close the door.
REMOVABLE STORAGE DRAWER
GUIDESTOP
This drawer gives you Space for keeping
cookware end hekeware. Plastics and flammable
materiel should not be kelpt in this drawer.
Do not overload the storage drawer. If the drawer is too
heavy, it may slip off the track when opened. To open the
drawer, grasp the center of the handle and pull straight
out.
To remove: Pull drawer straight out and lift over the
guide stops.
To replace: Lift over the guide stops and slide drawer
Into place.
17 NEMNT94
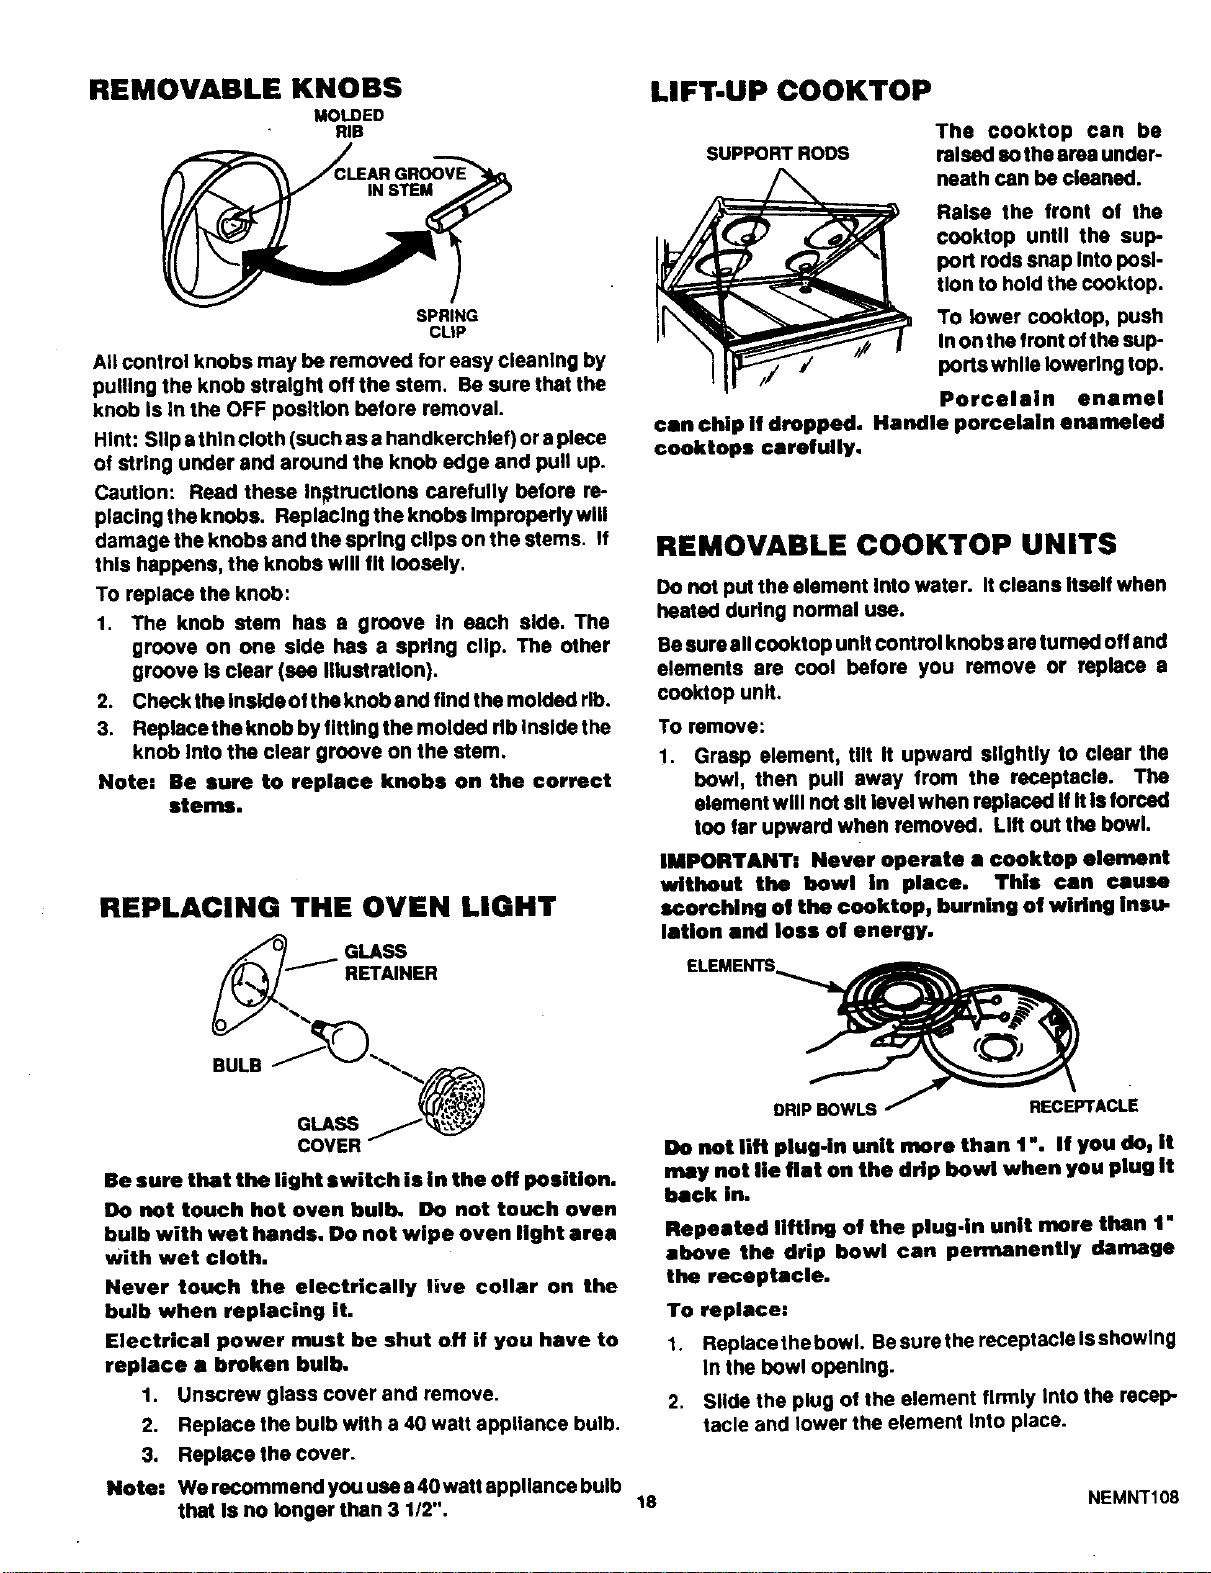
REMOVABLE KNOBS
MOLDED
RIB
SPRING
CLiP
All control knobs may be removed for easy cleaning by
pulling the knob straight off the stem. Be sure that the
knob Is In the OFF position before removal.
Hint: Slip a thin cloth (such as a handkerchief) or a plsce
of string under and around the knob edge and pull up.
Caution: Read these In_ructlons carefully before re-
plsclng the knobs. Rsplaclng the knobs Improperly will
damage the knobs and the spring clips on the stems. If
this happens, the knobs will fit loosely.
To replace the knob:
1. The knob stem has a groove In each side. The
groove on one side has a spring clip. The other
groove Is clear (see Illustration).
2. Check the Insldeof the knob and find the molded rib.
3. Replacethe knob by tlttlng the molded rib Inside the
knob Into the clear groove on the stem.
Note: Be sure to replace knobs on the correct
sternso.
REPLACING THE OVEN LIGHT
GLASS
RETAINER
BULB
GLASS
COYER
Be sure that the light switch is in the off position.
Do not touch hot oven bulb. Do not touch oven
bulb with wet hands, Do not wipe oven light area
with wet cloth.
Never touch the electrically live collar on the
bulb when replacing it.
Electrical power must be shut off if you have to
replace a broken bulb.
1. Unscrew glass cover and remove.
2. Replace the bulb with a 40 watt appliance bulb.
3. Replace the cover.
Note: We recommend you use a 40 watt appliance bulb
that Is no longer than 3 1/2".
LIFT-UP COOKTOP
SUPPORT RODS
The cooktop can be
relsed sothearea under-
neath can be cleaned.
Raise the front of the
cooktop until the sup-
port rods snap Into posi-
tion to hold the cooktop.
TO lower cooktop, push
In on the front of the sup.
portswhlle lowering top.
Porcelain enamel
can chip if dropped. Handle poreelain enameled
cooktops carefully,
REMOVABLE COOKTOP UNITS
Do not put the element into water. It cleans Itself when
heated during normal use.
Be sure all cooktop unit control knobs are tumealoff and
elements are cool before you remove or replace s
cooktop unit.
To remove:
,
Grasp element, tilt It upward slightly to clear the
bowl, then pull away from the receptacle. The
element will not sit level when replaced If ItIs forced
too far upward when removed. Lift out the bowl.
IMPORTANT: Never operate a cooktop elemnt
without the bowl in place. This can cause
scorching of tire cnoktcp, burning of wiring insu-
lation and loss of energy.
DO not lift plug.in unit more than 1 ". If you do, it
may not lie flat on the drip bowl when you plug It
hack in.
Repeated lifting of the plug-in unit more than t"
above the drip bowl can permanently damage
the receptacle.
To replace:
1. Repiacethebowl. Besurethereceptacleisshowlng
In the bowl opening.
2. Slide the plug of the element firmly Into the recep-
tacle and lower the element Into place.
18
NEMNT108
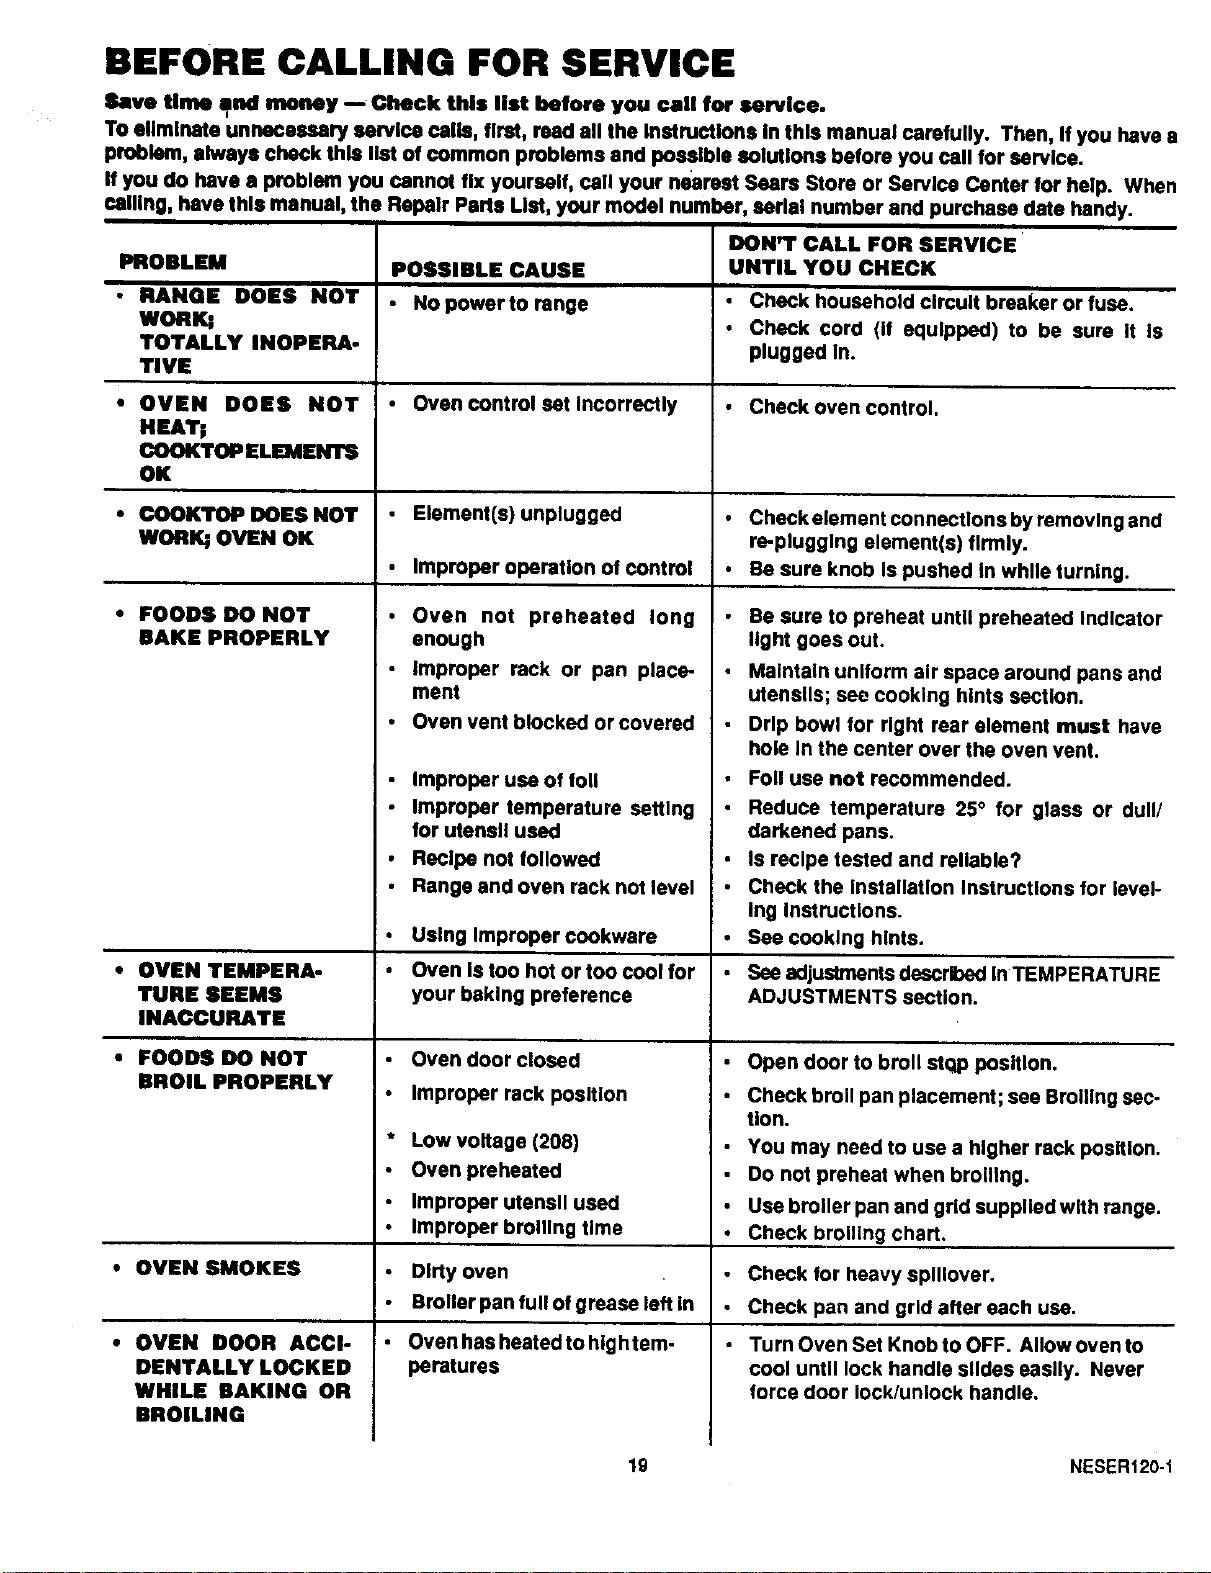
BEFORE CALLING FOR SERVICE
Save time a,nd money -- Check this list before you call for service.
To eliminate unnecessary service cells, first, read all the Instructions In thLs manual carefully. Then, If you have a
problem, always check thls list of common problems and possible solutions before you cell for service.
If you do have a problem you cannot fix yourself, cell your nearest Sears Store or Service Center for help. When
Calling, have this manual, the Repair Parts LISt, your model number, serial number and purchase date handy.
PROBLEM
• RANGE DOES NOT
WORK;
TOTALLY INOPERA-
TIVE
• OVEN DOES NOT
HEATI
COOl(TOP ELEMENTS
OK
• COOKTOP DOES NOT
WORK; OVEN OK
• FOODS DO NOT
BAKE PROPERLY
• OVEN TEMPERA-
TURE SEEMS
INACCURATE
• FOODS DO NOT
BROIL PROPERLY
• OVEN SMOKES
• OVEN DOOR ACCI- •
DENTALLY LOCKED
WHILE RAKING OR
BROILING
DON'T CALL FOR SERVICE
POSSIBLE CAUSE
• Nopowerto range
UNTIL YOU CHECK
Check household circuit breaker or fuse.
Check cord (if equipped) to be sure it is
plugged In.
• Oven control set Incorrectly Check oven control.
Check element connections by removing and
re-plugging element(s) firmly.
Be sure knob Is pushed In while turning.
Element(s) unplugged
Improper operation of control
Oven not preheated long
enough
Improper rack or pan place-
ment
Oven vent blocked or covered
Improper use of foil
Improper temperature setting
for utensil used
Recipe not followed
Range and oven rack not level •
Using Improper cookware
Oven Is too hot or too cool for •
your baking preference
Oven door closed
Improper rack position
Low voltage (208)
Oven preheated
Improper utensil used •
Improper broiling time
Dirty oven
Broiler pan full of grease left In •
Oven has heated to hlghtem-
peratures
Be sure to preheat until preheated Indicator
light goes out.
Maintain uniform air space around pans and
utensils; see cooking hints section,
Drip bowl for right rear element must have
hole In the center over the oven vent.
Foil use not recommended.
Reduce temperature 25° for glass or dull/
darkened pans.
Is recipe tested and reliable?
Check the Installation Instructions for level-
Ing Instructions.
See cooking hints.
See adjustments described In TEMPERATURE
ADJUSTMENTS section.
Open door to broil stop position.
Check broil pan placement; see Broiling sec-
tion.
You may need to use a higher rack position.
Do not preheat when broiling.
Use broiler pan and grid supplied with range.
Check broiling chart.
Check for heavy splllover.
Check pan and grid after each use.
Turn Oven Set Knob to OFF. Allow oven to
cool until lock handle slides easily. Never
force door lock/unlock handle.
lg NESER120-1

BEFORE CALLING FOR SERVICE (continued)
PROBLEM
• OVEN WILL NOT SELF-
CLEAN OR POOR SELF-
CLEANING RESULTS
• OVEN DOOR WILL
NOT UNLOCK
• OVEN LIGHT DOES
NOT WORK
• OVEN EMITS ODOR
POSSIBLE CAUSE
Controls set Incorrectly
Clean cycle Interrupted too
soon
Oven too dirty
Clean cycle not complete
Door accidentally locked
while baking or broiling
Light switch In OFF position
Light bulb burned out
Oven Insulation may emit
odor during first few usages
Failure to wipe out excessive
sou during self-cleaning
DON'T CALL FOR SERVICE
UNTIL YOU CHECK
See self-clean Instructions.
Heavily soiled ovens require a 3 1/2 hour
clean cycle.
Heavy spillovers should be removed be-
fore setting clean cycle. Repeat clean
cycle.
Oven must cool below lock temperature.
Turn oven control to OFF. Walt until oven
cools and door will unlock. Do not force
the door lock.
Check switch setting; see operating In-
structions.
Check or replace light bulb; see remov-
able parts section of this manual.
Put oven through a self-clean cycle to
speed up process of odor "wearing off."
Wipe excessive soil before begin nlng self-
clean cycle.
THERMOSTAT ADJUSTMENTS
The temperature In your new oven has been set cor- 3.
rectly at the factory, so be sure to follow the recipe
temperatures and times the first few times you bake in 4.
your new oven.
We do not recommend the use of Inexpensive Ihermom*
etera, such as those found In the grocery store, to
readjust the temperatura setting of your new oven.
These thermometers can vary by 20° - 40°F. Your oven
has been preset to maximize cooking efficiency.
If you think the oven should be hotter or cooler, you can
adjust It yourself. To decide how much to change the
temperature, set the oven temperature 25°F higher or
lower than the temperature In your recipe, then bake.
The results of this "test" should give you an Idea of how
much the temperature should be changed.
To adjust knob:
1. Turn OVEN TEMP KNOBto OFF and removethe knob
by pulling straight off.
2, Look at the back of the knob. The arrow pointing to
the center of the bottom screw Indicates the original
factory setting.
5o
Use a screwdriver to loosen the two screws about 2
turns each.
Hold the knob handle (A on Illustration) while turning
the disk (B on Illustration) In the desired direction to
Increase or decreasethe temperature. (See Illustration
below for"Self-Clean Thermostat.") Asyou turn, you
should be able to hear clicks and feel notches or
teeth. Each click or notch is 15°F. You can turn up
to 2 clicks or notches In either direction.
When you reach the desired adjustment, retlghten
both screws.
"A .... B"
KNOB DISK
TOMAKEOVEN
COOLER
TURNDISK
TOMAKEOVEN
HOTTER
TURN DISK
20 NESER122-1

KENMORE ELECTRIC RANGE WARRANTY
p-
Dear Customer:
Our constant efforts are
directed toward making
sure your new Kenmore
Range will arrive at your
home In perfect condlUon
and w111g|va you proper
performance. As part of
these efforts, we feel It Is
our responsibility to pro-
vide you with this warranty
for your range.
J
J
FULL ONE YEAR WARRANTY ON THE FUNCTIONING OF ALL
PARTS EXCEPT GLASS PARTS
If, within one year from the date of Instellstlon, any part, other than a glass
10aM,falls to function properly due to a defect In material or workmanship,
Sears will repair or replace It, free of charge.
FULL 30-DAY WARRANTY ON GLASs PARTS AND FINISH OF PORCE-
LAIN ENAMEL, PAINTED OR BRIGHT METAL FINISHED PARTS
If, within 30 days from the date of Installation, any glass part orthe finish
on any porcelain enamel, painted or bright metal pert IS defective In
material or workmanship, Sears will replace the part, free of charge.
FULL 90-DAY WARRANTY ON MECHANICAL ADJUSTMENTS
For 90 days from the date of Instsllatlon, Sears will provide, free of charge,
any mechanical adjustments necessary for proper oparetlon of the range,
except for normal maintenance.
If the range Is subjected to other than private family use, the above
warranty coverage Is effective for only 90 days.
WARRANTY SERVICE IS AVAILABLE BY CONTACTING THE
NEAREST SEARS SERVICE CENTER/DEPARTMENT IN THE
UNITED STATES
This warranty applies only while this product Is In use In the United States.
This warranty gives you specific legal rights, and you may also have other
rights which vary from state to state. SEARS, ROEBUCK and CO.
Dept. 720PSO
3333 Beverly Road
Holirrian Estates, IL 60179
WE SERVICE WHAT WE SELL
_We Service What We Sell" is our assurance to you that you can depend on Sears for servlca because Sears
eervtce Is nationwide.
Your Keomore Range hasadded value whenyou conslderthat Sears hasa service unit near you staffed by
Searstrained technlclens.., professlonal techniciansspeclflcellytrelned on Sears appllances, havlng the
parts,tools and equipment to ensure that we meet our pledgeto you -- "We Servlce What We Selll"
TO FURTHER ADD TO THE VALUE OF YOUR RANGE, BUY A SEARS MAINTENANCE AGREEMENT.
KenmoreRangesare designed,manufacturedand
testedforyears ofdependable operation. Vet,any
modern appliance may require cervlce from time
totime. The SearsWarranty plusthe Sears Maln-
tenancoAgreement providesprotection from un-
expected repair bills and assures you of enjoying
maximum range efficiency.
Here's a comparative warranty and Maintenance
Agreement i_harl showing you the benefits of a
Sears Range Maintenance Agreement.
yursofOwnershlpCoverage 1slYest 2ndYelr 3rdYur
Repiacemerdof 0eleCtive
1 Pert,otherthenPorceliln W MA MA
orGlass
g0 DAYS
2 Mechanical Adjustment W MA MA
30 DAYS
3 Por©elllnlindGlassParts W MA MA
Annual Preventive Mainten-
4 .o.Cheok,tyo.rr,q.,= MA MA MA
W - WmTeJ_4y MA. Malntenar_e Agreemer4
CONTACT YOUR SEARS SALESPERSON OR LOCAL SEARS SERVICE
CENTER TODAY AND PURCHASE A SEARS MAINTENANCE AGREEMENT.
I
KenlTiore ®America's Best Selling Appliance Brand
Sold by SEARS, ROEBUCK AND CO., Hoff_n Estates_ IL 60179 "
I
--- Printed In LaFayette, Georgia --