Loading ...
Loading ...
Loading ...
17
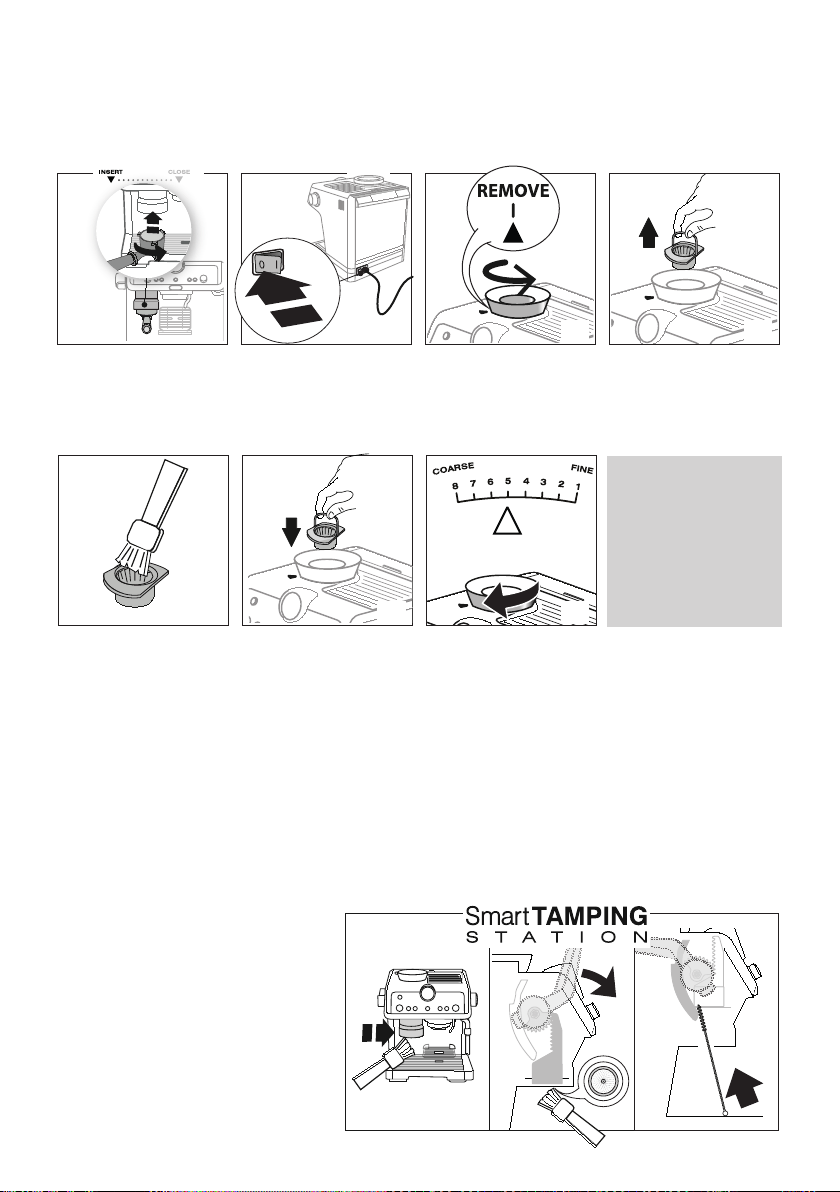
8.3 Cleaning the burr
When cleaning the beans container, clean the container housing and upper burr with a damp cloth. The burr can be removed and replaced
by an authorised customer services centre.
You may also need to remove the burr if it becomes blocked with foreign matter. If this occurs, remove the beans container and clean
as follows:
1. Attach the portalter and
operate the mill without
beans to free the coee
guide;
2. Turn the appliance o;
3. Turn the grinding selector
anticlockwise as far as it
will go to the “REMOVE”
position;
4. Extract the upper burr,
gripping it by the handle;
5. Clean the burr with a
brush (not included)
and remove the coee
residues using a vacuum
cleaner;
6. Put the upper burr back
in place;
7. Turn the selector to select
the desired grinding level.
Make sure the burr is inser-
ted correctly by pulling it by
the handle. If it is correctly
inserted, it will not move.
8.4 Replacing the burrs
When the quantity of coee becomes even less, contact a customer services centre to have the burrs replaced, then adjust the mill
again as follows entering the setting menu (“6. Menù settings”) and selecting the rst range of the “Extra grinding adjustment”.
Then turn the ground coee quantity dial (B2) to minimum position and set the dose like a rst use (see “3.2 The perfect dose”).
8.5 Cleaning the “Smart tamping station”
1. Clean the attachment area with a brush;
2. Pull the
lever
(A20) as far as it will go and
clean the presser cylinder with a brush. Then
release the lever.
3. Use the tube brush (C7) to clean the coee
funnel.
1 2 3
1
5
2
6
3
7
4
Loading ...
Loading ...
Loading ...