Loading ...
Loading ...
Loading ...
Low air humidity
u
Open the drawer.
u
Slide the compartment cover forwards.
w
With the drawer closed: Gap between the cover and the
compartment.
u
Switch off HydroBreeze.
w
The air moisture in the Safe decreases.
High air moisture
u
Open the drawer.
u
Slide the cover back.
w
With the drawer closed: The cover seals the compartment.
u
Activate the HydroBreeze.
w
The air moisture in the Safe increases.
If there is too much moisture in the compartment:
u
Choose the setting “low air moisture”.
-or-
u
Remove any excess moisture with a cloth.
Note
You can apply the “low air moisture” setting to the Fruit & Vege-
table-Safe and the Meat & Dairy-Safe.
u
Set the “low air moisture” option.
7.9 HydroBreeze
HydroBreeze emits a mist over the refrigerated goods to
provide moisture every time the door is opened.
The HydroBreeze and its water tank are located in the adjust-
able bottle shelf.
Ensure that the following conditions are met:
-
The water tank is clean (see 8.3.3 Clean the components) .
-
The water tank is properly engaged.
-
Moisture is set to “high moisture” (see 7.8 Adjusting the
moisture levels) .
-
HydroBreeze is on (see HydroBreeze) .
7.9.1 Fill the water tank
WARNING
Unclean water!
Contaminants.
u
Only fill with drinking water.
u
The HydroBreeze is off: empty water tank.
u
The HydroBreeze is no longer in use: empty water tank.
NOTICE
Sugar-content liquids!
Damage to HydroBreeze.
u
Only fill with drinking water.
Note
Only use filtered, decarbonised water for the best quality
drinking water and to make the HydroBreeze, work smoothly.
This water quality can be achieved using a table water filter of
the kind available in trade retail outlets.
u
Only ever fill the water tank with filtered, decarbonised
drinking water.
The water tank is built into the adjustable bottle shelf
(see 1.2 Overview of the appliance and features) .
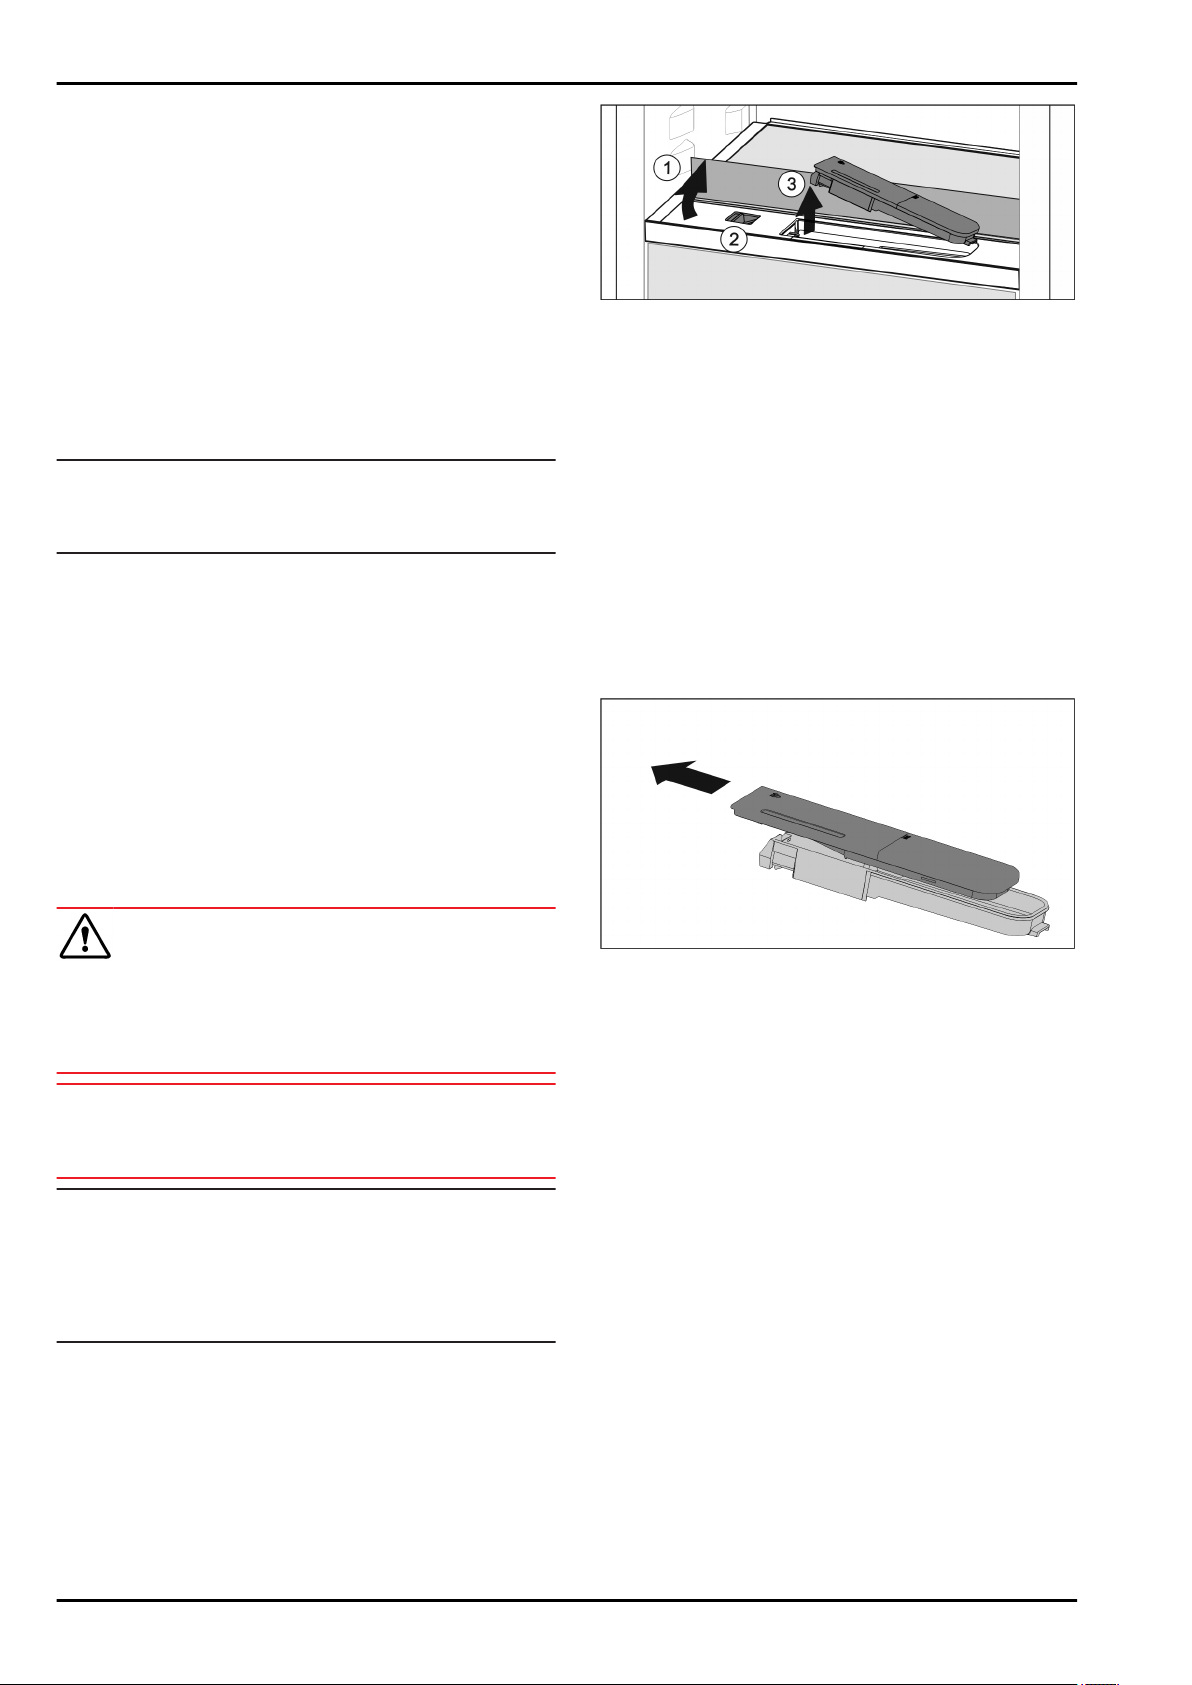
Fig. 44
u
Press on the back-left corner of the front glass plate.
w
The glass panel folds up at the front.
u
Lift the glass panel and fold towards the rear until it clicks
into place
Fig. 44 (1)
.
w
Glass panel stands upright.
u
Slide the slider
Fig. 44 (2)
to the left.
w
The water tank jumps out of its recess.
u
Remove the water tank
Fig. 44 (3)
.
u
Cleaning the water tank (see 8.3.3 Clean the components) .
Square opening:
u
Fill with drinking water up to the marker.
u
Insert the water tank into the recess, bottom first.
u
Slowly lower the front part and push the tank in.
w
The water tank is clicked into place.
7.9.2 Dismantling the water tank
You can take the water tank apart for cleaning.
Fig. 45
u
Dismantling the water tank.
7.10 IceMaker
The IceMaker will produce ice cubes for household use only.
Ensure that the following conditions are met:
-
IceMaker is cleaned (see 8 Maintenance) .
-
IceMaker drawer is fully inserted.
7.10.1 Producing ice cubes
The volume depends on the freezing temperature. The colder
the temperature, the more ice cubes the system can produce in
a certain time period.
After the IceMaker is turned on for the first time, it can take up
to 24 hours for the first ice cubes to be made.
u
Activate the IceMaker function (see 6.2 Control concept) .
u
To make a high number of ice cubes: Activate the MaxIce
function (see 6.2 Control concept) .
u
To make a high number of ice cubes: Move the divider in the
IceMaker drawer or remove it completely.
u
Distribute the ice cubes evenly in the drawer to increase the
capacity.
u
Closing the drawer: IceMaker starts making ice cubes again
automatically.
Features
* Depending on model and options 19
Loading ...
Loading ...
Loading ...