Loading ...
Loading ...
Loading ...
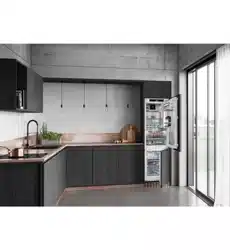
7.5.3 Inserting the bottle shelf
Fig. 29
u
Slide in the bottle shelf until it engages and push down.
w
The lugs at the back of the bottle shelf are connected auto-
matically.
w
LED comes on.
7.6 Drawers
Drawers can be removed for cleaning.
The shelves below can be used for storage until the drawers
are replaced.
The way to remove/insert the drawers varies depending on the
pull-out system. Your appliance can include various pull-out
systems.
Note
The energy consumption increases and the cooling power
goes down if ventilation is not sufficient.
u
Leave the bottom drawer in the appliance!
u
Always leave the fan air vents clear on the back wall!
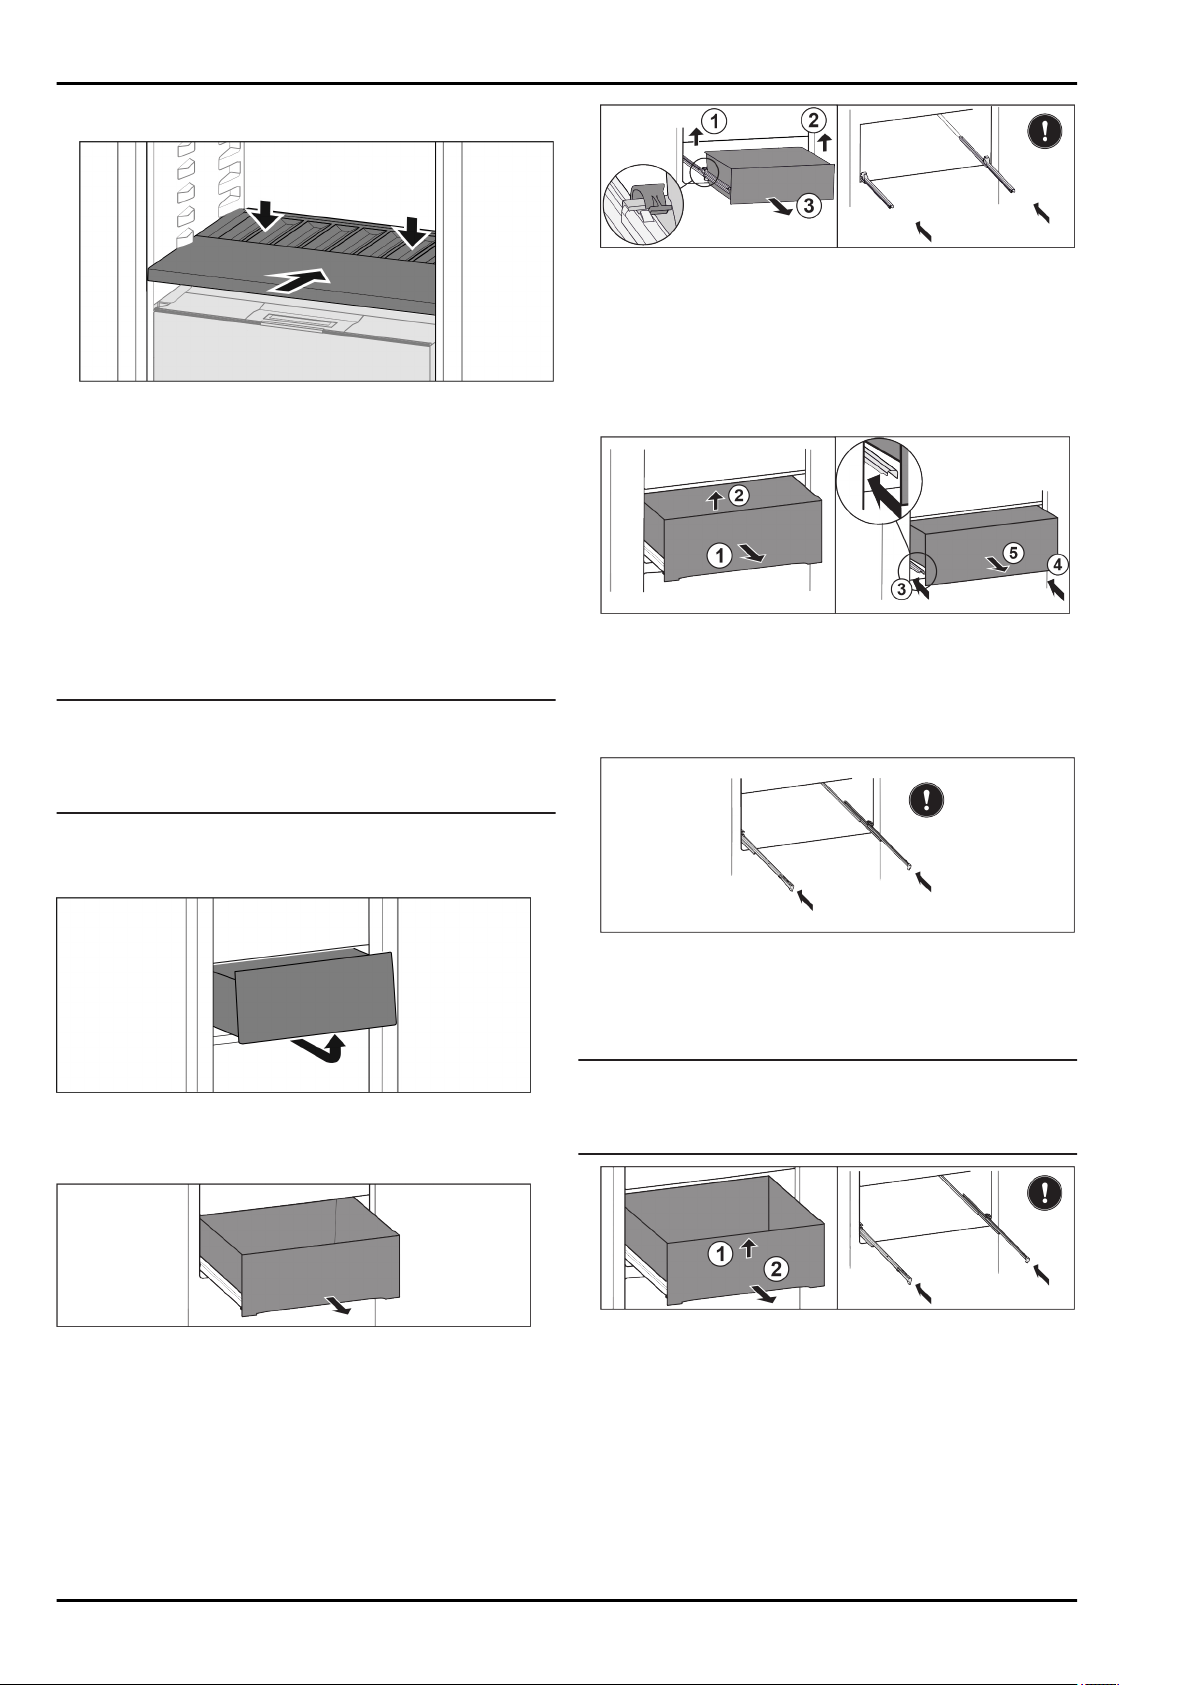
7.6.1 Removing the drawer
Drawer without a pull-out system
Fig. 30
u
Remove the drawer as shown in the illustration.
Drawer on telescopic rails
Fig. 31
Ensure that the following conditions are met:
q
Drawer is completely pulled out (see Fig. 90) .
Fully extendible:*
Fig. 32
*
u
Lift the left clamp and simultaneously pull the drawer on the
left forwards
Fig. 32 (1)
.*
u
Lift the right clamp and simultaneously pull the drawer on the
right forwards
Fig. 32 (2)
.*
u
Take out the drawer to the front
Fig. 32 (3)
.*
u
Slide the rails in.*
Partial pull-out fridge compartment:*
Fig. 33
*
u
Pull out the drawer half-way
Fig. 33 (1)
.*
u
Lift at the front
Fig. 33 (2)
.*
u
Insert left rail
Fig. 33 (3)
.*
u
Insert right rail
Fig. 33 (4)
.*
u
Take out the drawer to the front
Fig. 33 (5)
.*
Fig. 34
*
If the rails are not yet fully inserted after removing the
drawer:*
u
Push the rails in completely.*
Partial pull-out freezer compartment
Note
If the magnet on the top drawer in the freezer compartment is
damaged or removed, the door sensors will malfunction.
u
Do not damage or remove the magnet.
Fig. 35
*
If the drawer is in the top freezer:
u
Lift up the drawer at the front
Fig. 35 (1)
.
u
Take out to the front
Fig. 35 (2)
.
u
Slide the rails in.
Features
* Depending on model and options 17
Loading ...
Loading ...
Loading ...