Loading ...
Loading ...
Loading ...
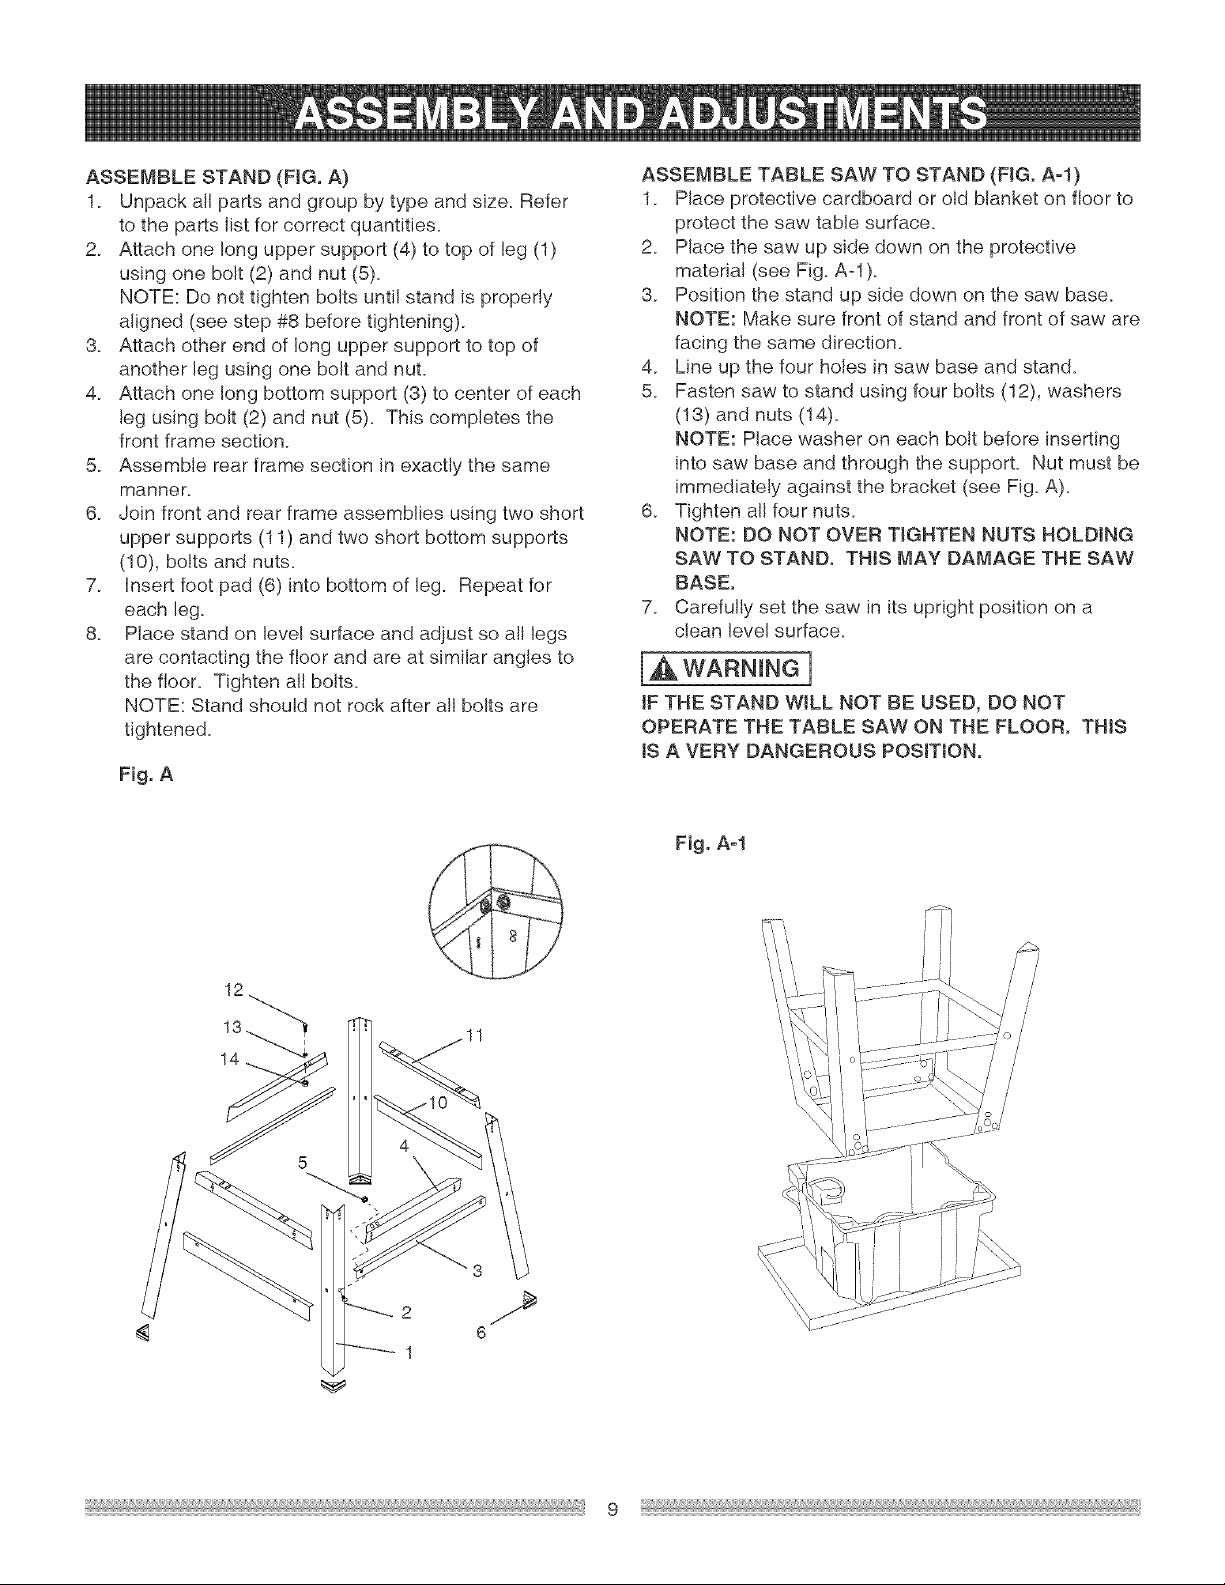
ASSEMBLESTAND(FIG.A}
1. Unpackallpartsandgroupbytypeandsize.Refer
tothepartslistforcorrectquantities.
2. Attachonelonguppersupport(4)totopofleg(1)
usingonebolt(2)andnut(5).
NOTE:Donottightenboltsuntilstandisproperly
aligned(seestep#8beforetightening).
3. Attachotherendof longuppersupporttotopof
anotherlegusingoneboltandnut.
4. Attachonelongbottomsupport(3)tocenterofeach
legusingbolt(2)andnut(5). Thiscompletesthe
frontframesection.
5. Assemblerearframesectionin exactlythesame
manner.
6. Joinfrontandrearframeassembliesusingtwoshort
uppersupports(11)andtwoshortbottomsupports
(10),boltsandnuts.
7. Insertfootpad(6)intobottomofleg. Repeatfor
eachleg.
8. Placestandonlevelsurfaceandadjustsoal!legs
arecontactingthefloorandareatsimilaranglesto
thefloor.Tightenallbolts.
NOTE:Standshouldnotrockafteral!boltsare
tightened.
Fig.A
ASSEMBLETABLESAWTOSTAND(FIG.A-I)
1. Placeprotectivecardboardoroldblanketonfloorto
protectthesawtablesurface.
2. Placethesawupsidedownontheprotective
material(seeFig.A-I).
3. Positionthestandupsidedownonthesawbase.
NOTE:Makesurefrontofstandandfrontofsaware
facingthesamedirection.
4. Lineupthefourholesinsawbaseandstand.
5. Fastensawtostandusingfourbolts(12),washers
(13)andnuts(14).
NOTE:Placewasheroneachboltbeforeinserting
intosawbaseandthroughthesupport.Nutmustbe
immediatelyagainstthebracket(seeFig.A).
6. Tightenallfournuts.
NOTE:DONOTOVERTIGHTENNUTSHOLDING
SAWTOSTAND.THISMAYDAMAGETHESAW
BASE.
7. Carefullysetthesawinitsuprightpositionona
cleanlevelsurface.
[A WARNING1
tF THE STAND WILL NOT BE USED, DO NOT
OPERATE THE TABLE SAW ON THE FLOOR. THIS
tS A VERY DANGEROUS POSITION.
Fig. A-1
1
3
6
Loading ...
Loading ...
Loading ...