Loading ...
Loading ...
Loading ...
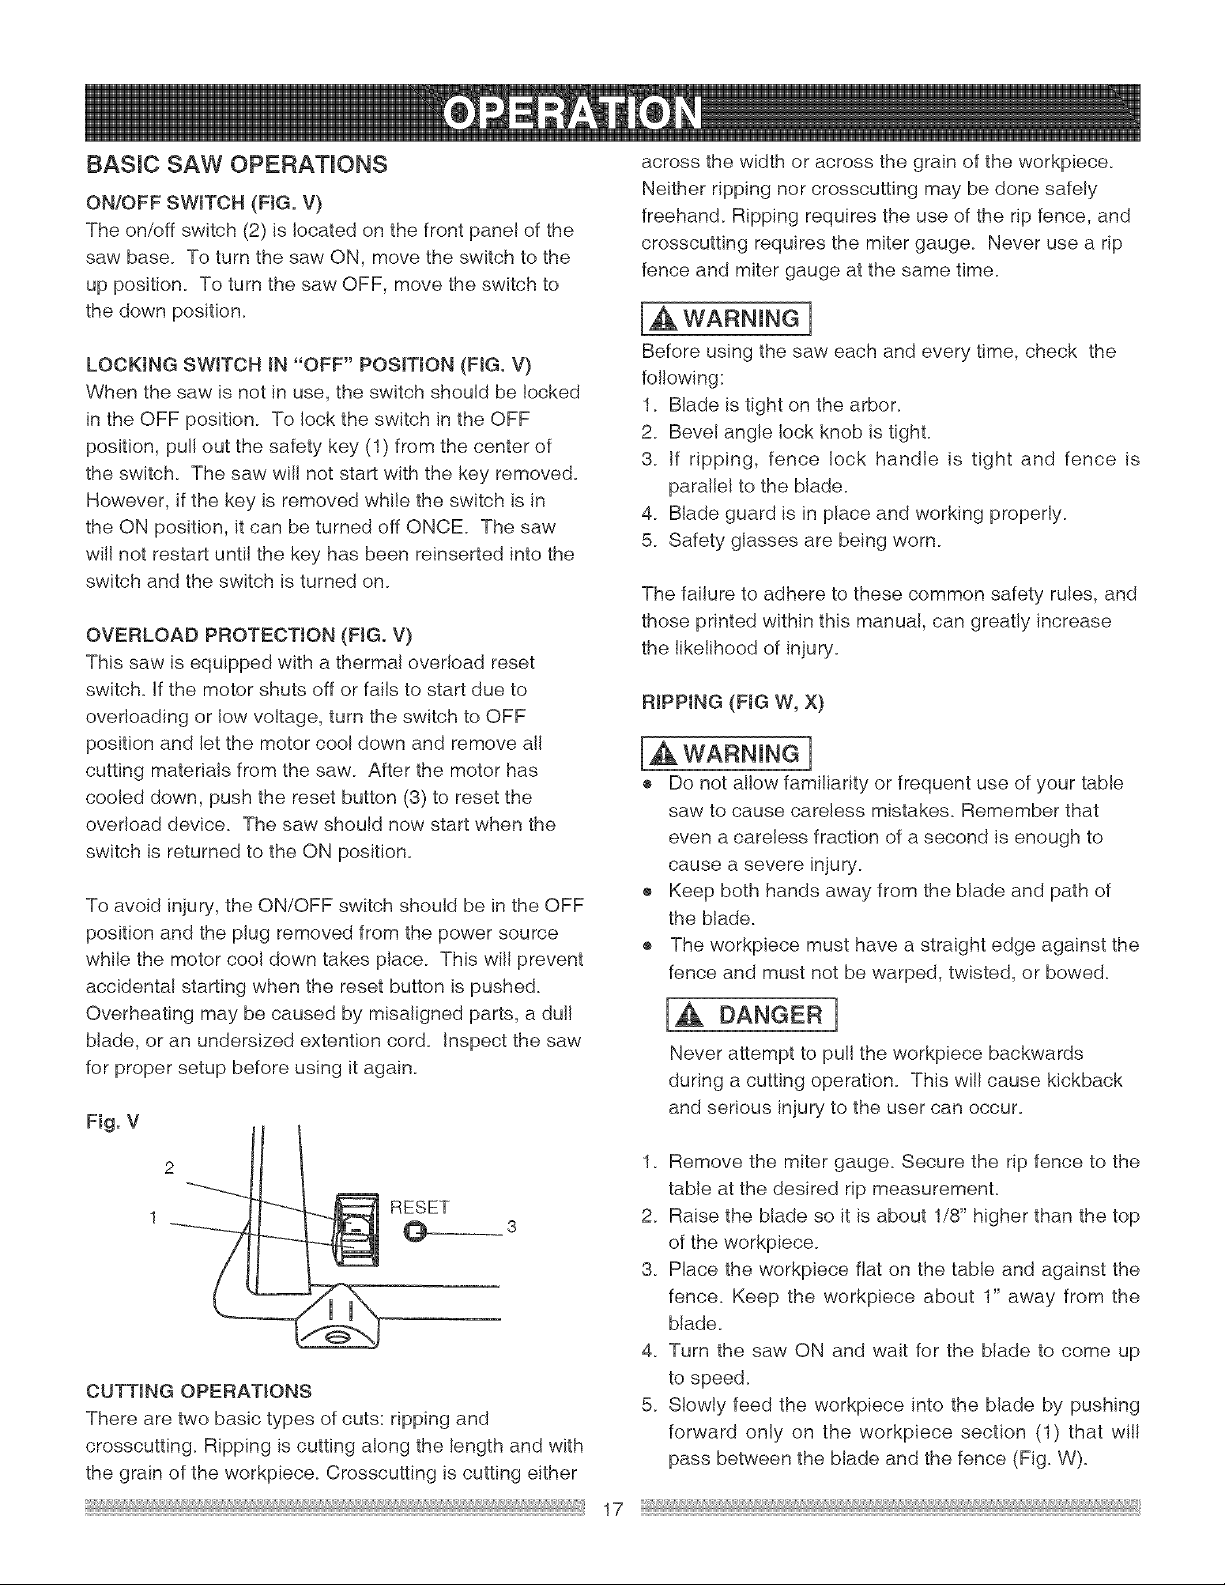
8ASmC SAW OPERATmONS
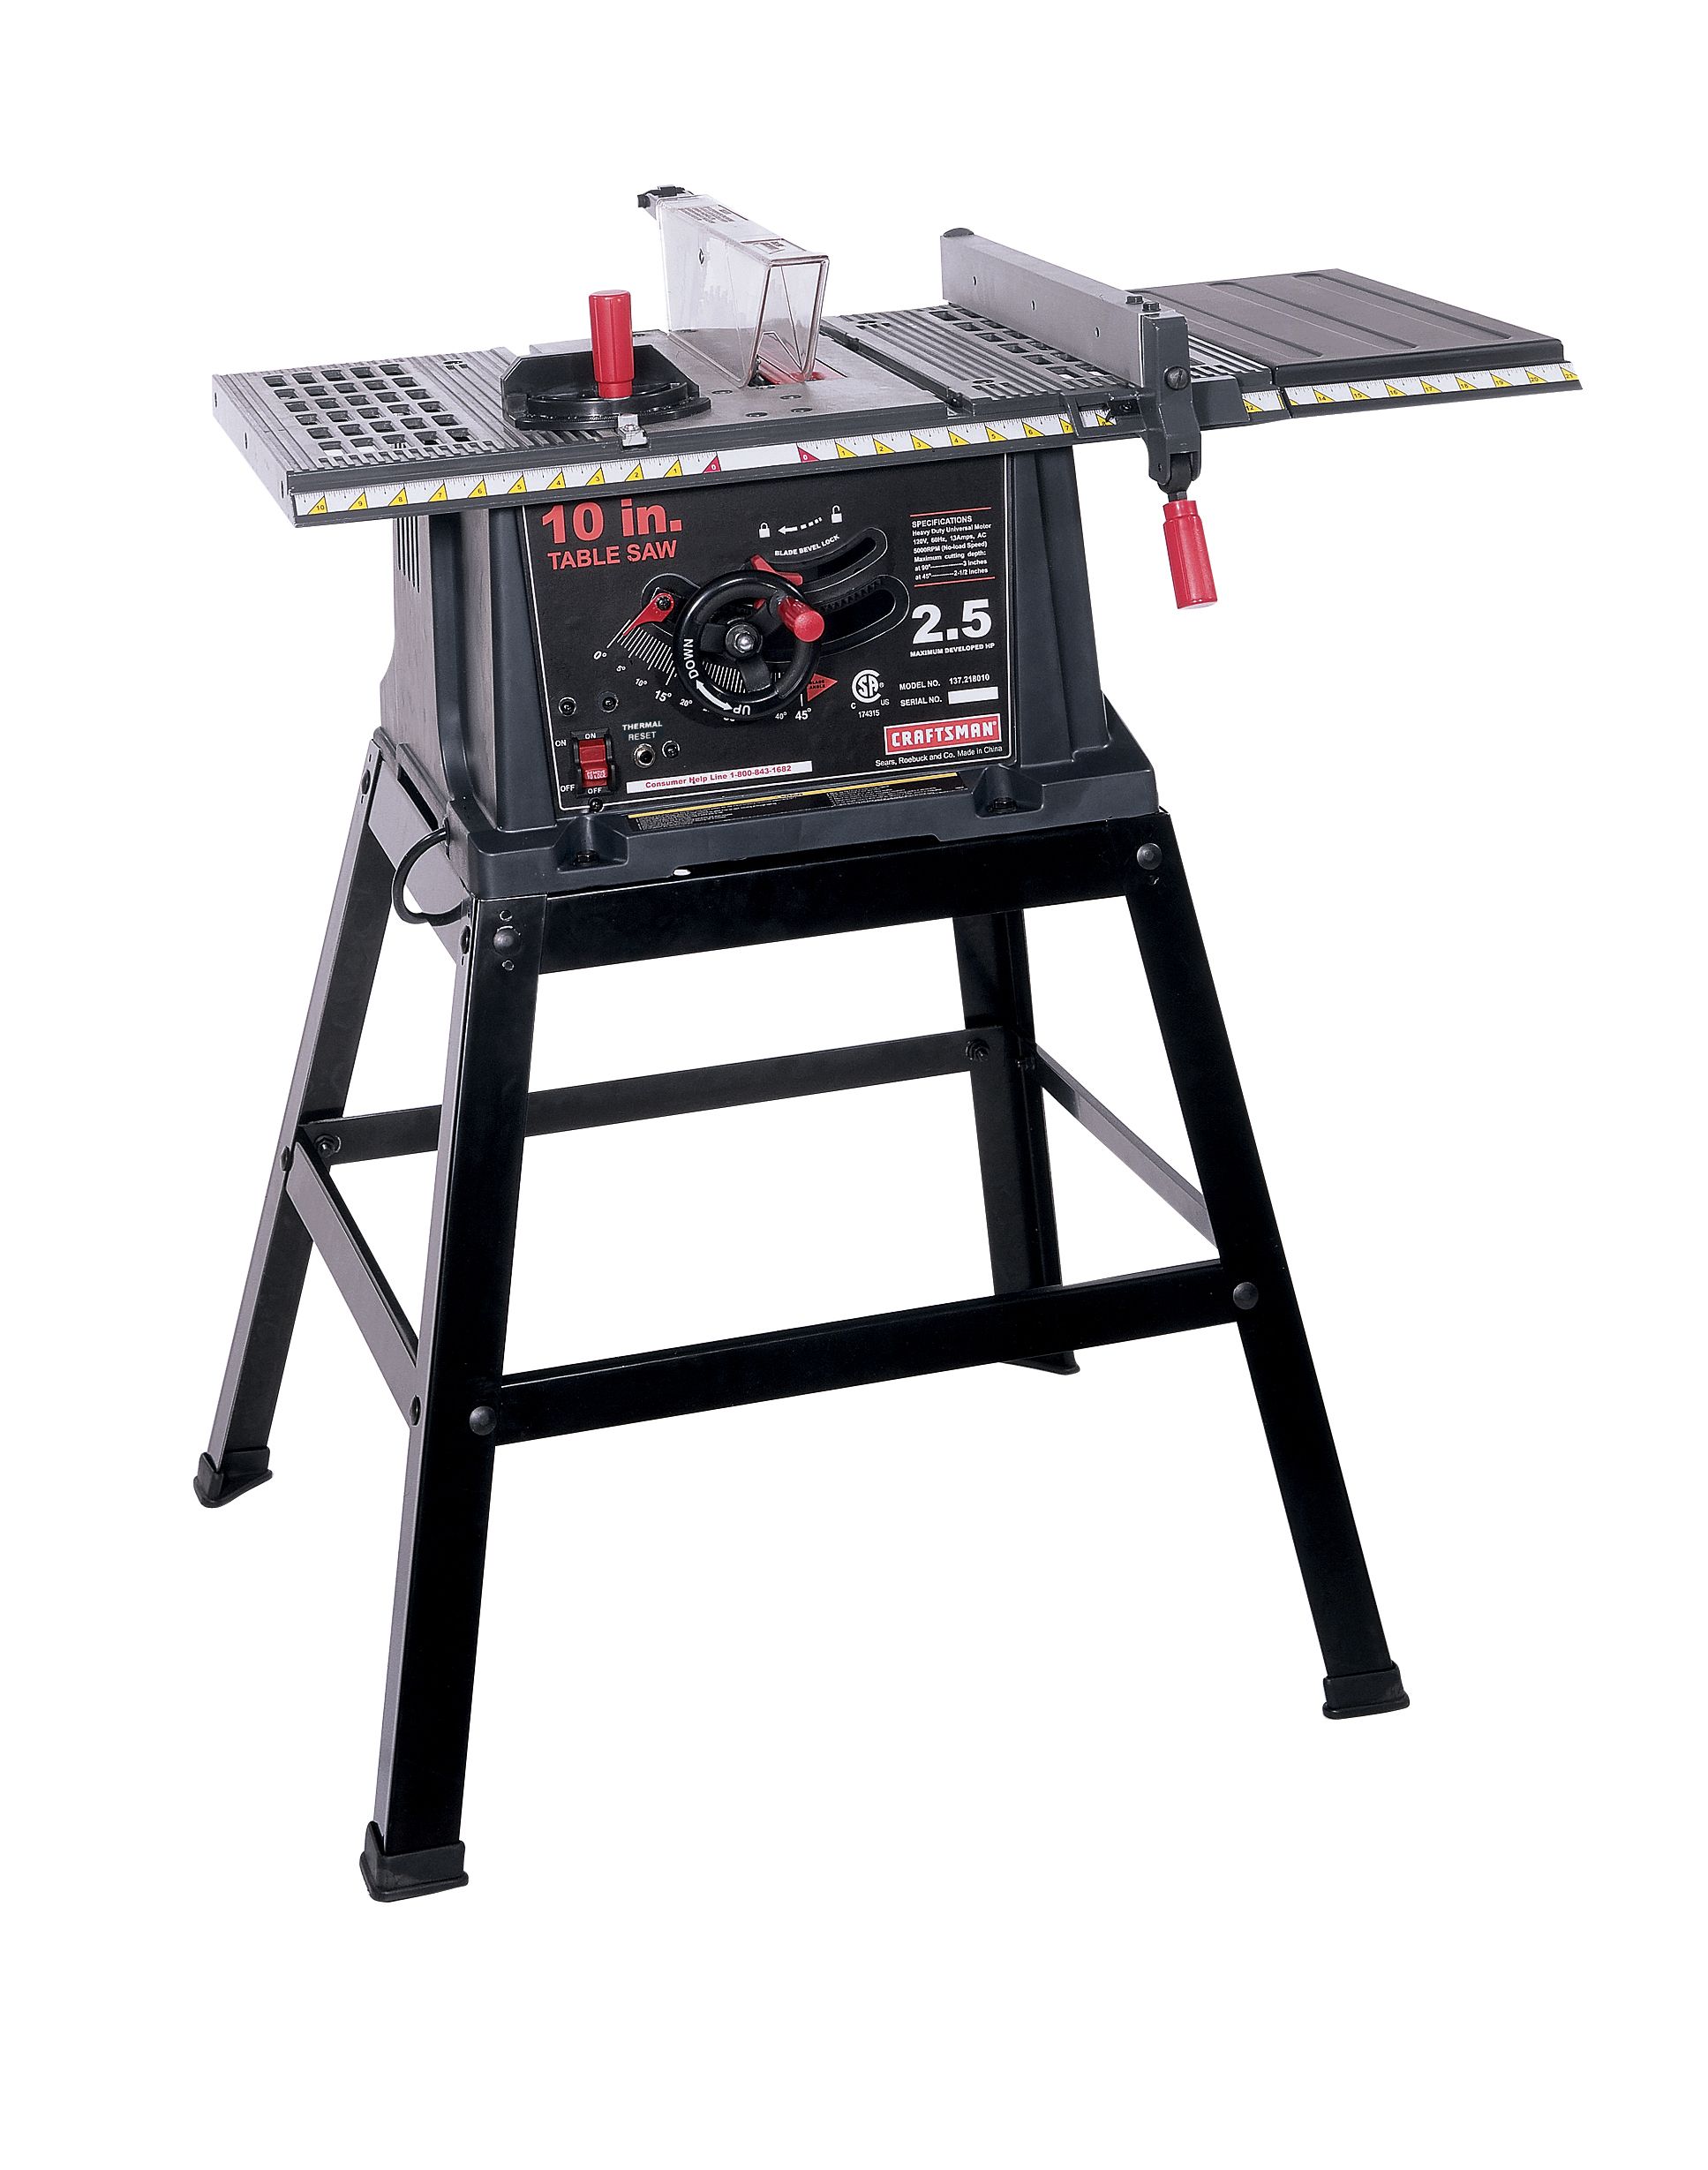
ON/OFF SWITCH (FIG. V)
The on/off switch (2) is located on the front panel of the
saw base. To turn the saw ON, move the switch to the
up position. To turn the saw OFF, move the switch to
the down position.
LOCKING SWITCH tN "OFF" PosmoN (FIG. V)
When the saw is not in use, the switch should be locked
in the OFF position. To lock the switch in the OFF
position, pull out the safety key (1) from the center of
the switch. The saw will not start with the key removed.
However, if the key is removed while the switch is in
the ON position, it can be turned off ONCE. The saw
wil! not restart until the key has been reinserted into the
switch and the switch is turned on.
OVERLOAD PROTECTION (FIG. V)
This saw is equipped with a thermal overload reset
switch, if the motor shuts off or fails to start due to
overloading or low voltage, turn the switch to OFF
position and let the motor coo! down and remove aft
cutting materials from the saw. After the motor has
cooled down, push the reset button (3) to reset the
overload device. The saw should now start when the
switch is returned to the ON position.
To avoid injury, the ON/OFF switch should be in the OFF
position and the pJug removed from the power source
while the motor cool down takes place. This will prevent
accidental starting when the reset button is pushed.
Overheating may be caused by misaligned parts, a dul!
blade, or an undersized extention cord. inspect the saw
for proper setup before using it again.
Fig. V
2
RESET
0
CUTTING OPERATIONS
There are two basic types of cuts: ripping and
crosscutting. Ripping is cutting along the length and with
the grain of the workpiece. Crosscutting is cutting either
across the width or across the grain of the workpiece.
Neither ripping nor crosscutting may be done safely
freehan& Ripping requires the use of the rip fence, and
crosscutting requires the miter gauge. Never use a rip
fence and miter gauge at the same time.
[A WARNING]
Before using the saw each and every time, check the
following:
1. Blade is tight on the arbor.
2. Bevelangle lockknob is tight.
3. If ripping, fence lock handle is tight and fence is
parallel to the blade.
4. Blade guard is in place and working properly.
5. Safety glasses are being worn.
The failure to adhere to these common safety rules, and
those printed within this manual, can greatly increase
the likelihood of injury.
RIPPING (FIG W, X)
WARNING ]
® Do not ai!ow familiarity or frequent use of your table
saw to cause careless mistakes. Remember that
even a careless fraction of a second is enough to
cause a severe injury.
® Keep both hands away from the blade and path of
the blade.
o The workpiece must have a straight edge against the
fence and must not be warped, twisted, or bowed.
IA DANGERI
Never attempt to pull the workpiece backwards
during a cutting operation. This wil! cause kickback
and serious injury to the user can occur.
1. Remove the miter gauge. Secure the rip fence to the
table at the desired rip measurement.
2. Raise the blade so it is about 1/8" higher than the top
of the workpiece.
3. Place the workpiece flat on the table and against the
fence. Keep the workpiece about 1" away from the
blade.
4. Turn the saw ON and wait for the blade to come up
to speed.
5. Slowly feed the workpiece into the blade by pushing
forward only on the workpiece section (1) that will
pass between the blade and the fence (Fig. W).
17
Loading ...
Loading ...
Loading ...